


Shop Made Tools: Router Table Fence

Shop Made Tools: Router Table Fence
In the first post in this series I described how to build a router table into the RIDGID R4512 Table Saw. This post is about how I built a fence for this setup but the fence can be used with any router table. After the last post I used the table for awhile but it was very apparent that a fence was needed. Dust collection was also a need so that was integrated as well.
Building a basic fence
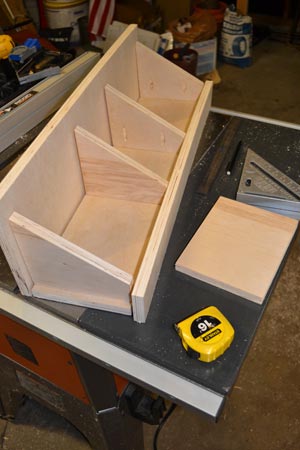
The basic fence can be made out of 3/4 plywood or MDF. I used some birch ply I had leftover from another project. It has a tall front face, storage cubbies, and dust collection.
Step 1: Cut all the pieces.
- Bottom: 27″ x 6-1/2″
- Back: 27″ x 2-3/4″ (as tall as the TS fence)
- Front: 27″ x 7-1/2″
- Struts: 2 pieces that measure 6-1/2″ x 7-3/4″
- Stack strut pieces and cut diagonally on miter saw 1-3/4″ in from one corner and 1-3/4″ in from the opposite corner.
- Dust port: 6″ x 7-1/4″. 6″ edges may have to be beveled depending on how much glue and caulk you don’t want to use.
Step 2: Assemble the pieces. I used pocket holes.
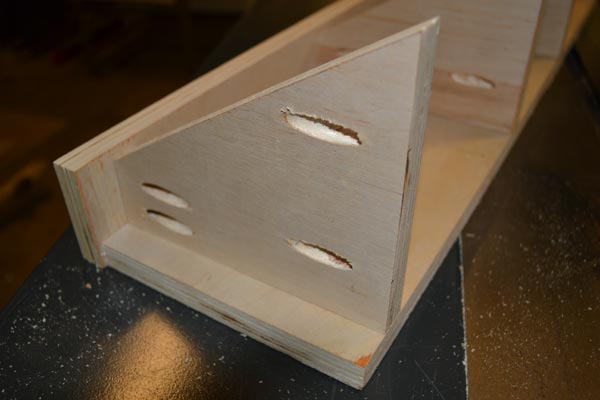
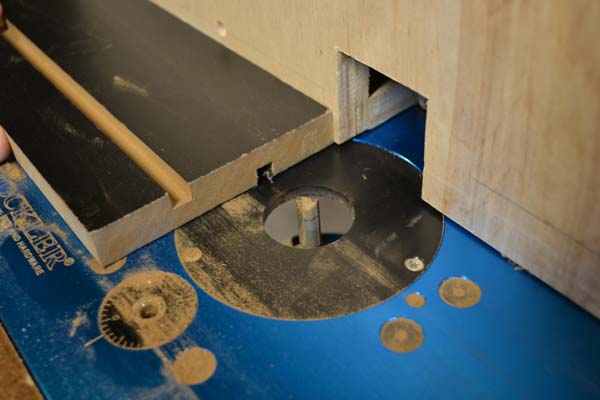
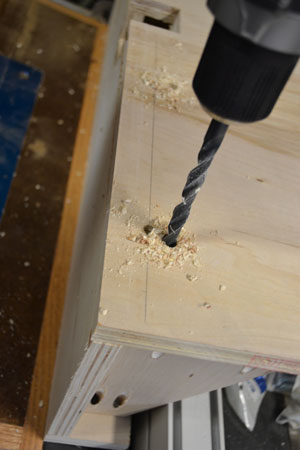
Step 3: Drill and seal dust port. 2-1/4″ hole saw fits my RIDGID vac hose perfectly. After the glue dried I caulked the top and bottom seams you see in this image to close up the gaps. I didn’t bevel this piece but could have for better mating to the back of the front face.
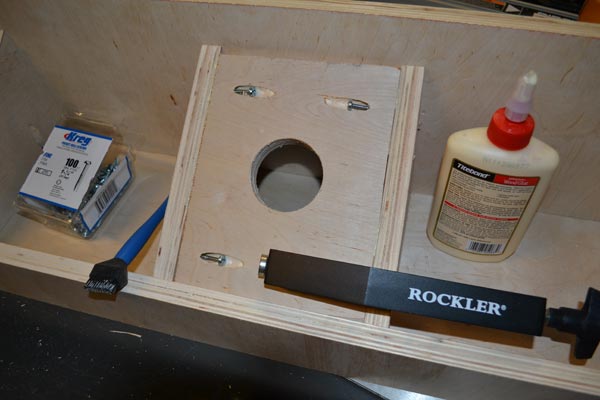
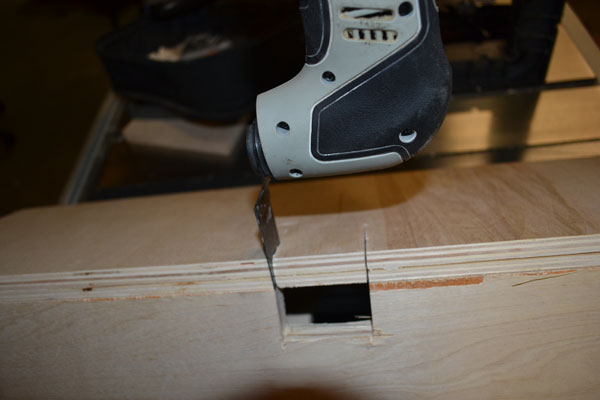
Step 4: Cut the bit recess. I made mine 2″x2″ on both front and bottom faces. Multi-tool is perfect for this
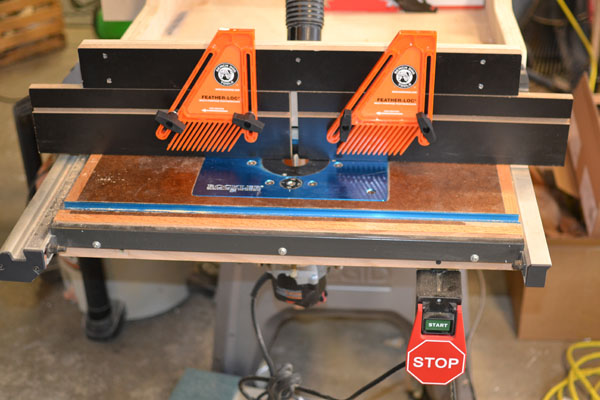
Step 5: Secure the fence. I use Universal Fence Clamps from Rockler but almost any small clamps will work.

Improving the basic fence
Up until this point I made the fence entirely out of scrap. A few T-bolt hardware additions and a little more scrap make the fence better though. It has adjustable and reversible fence faces that allow for zero clearance routing. Read on to see how.
Step 6: Cut MDF and route channel with 3/8″ straight bit. I centered the channel 1-1/2″ in from the edge. Each 17″ long piece has two channels.
- 2 pieces at 17″ x 4-3/4″
- 1 piece at 27″ x 2-3/4″ (channel is optional, I didn’t but you could)
Step 7: Cut T-slot. 3/8″ depth was perfect.
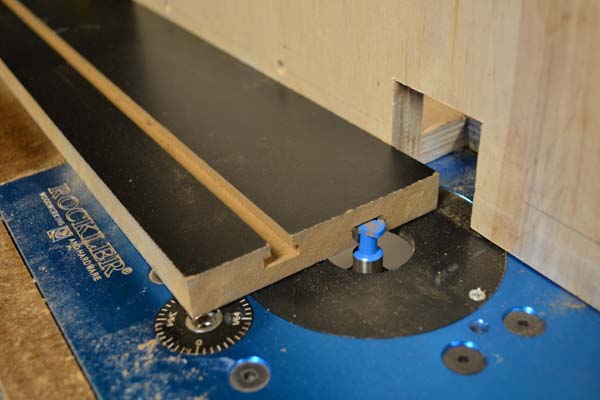
Step 8: Drill for T-bolts
Step 9: Attach MDF faces
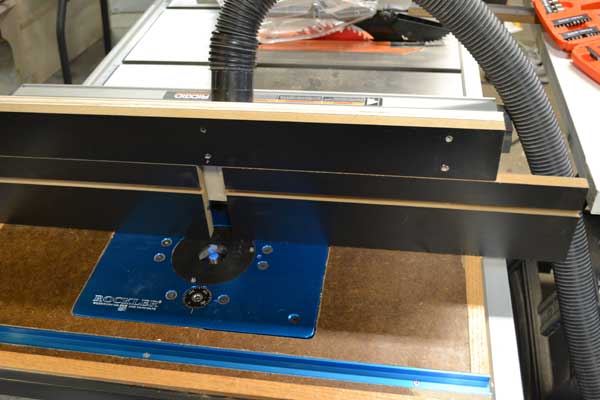
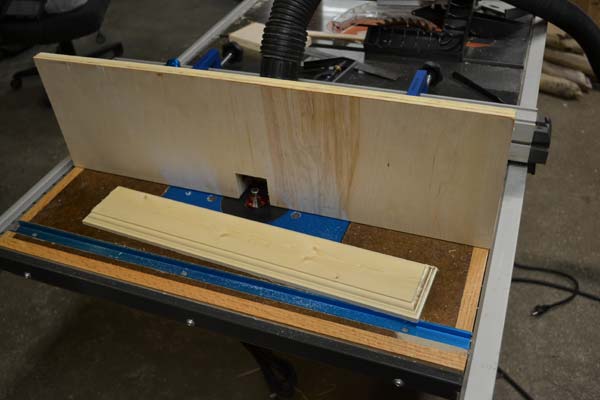
Using the router table and fence
Overall I really like using this tool. I’ve used it to make a bunch of trim and millwork pieces lately that I had trouble finding in the big box store without an expensive special order. The biggest items being 14 feet of oak stair nosing for a balcony landing and then MDF skirtboards. I’ve also been making my own base trim now out of MDF to match the skirt profile. Mounting a couple feather boards in the t-slots was a tremendous help in holding down the soon to be trim boards. This is especially important when running long stock. I also added the Safety Power Tool Switch from Rockler to make it a lot easier to switch on and off.
One thing that has become apparent though with routing MDF is that I need dust collection below the table as well. Look for that in an upcoming post in the Shop Made Tools series. If you make this project, post your pictures on our Facebook page.
Related Posts
About the author
Jeff Williams
Contributing Editor Jeff Williams is a carpenter for a commercial General Contractor specializing in concrete, steel, and wood buildings. Jeff comes from a long line of contractors. His parents started a commercial General Contracting firm many years ago and it has afforded him life-long, hands-on learning opportunities from rough and fine carpentry all the way to structural steel and concrete. Jeff has a Construction Management degree and loves the thrill of coordinating and successfully managing large jobs from start to finish. Inspired by the difficulties sometimes encountered to complete punch lists his motto is, "Work hard until the job is done."
Disclosure
Product reviews on this site contain our opinion of a product or service. We will always strive for objectivity and transparency in our reviews. Our goal is to provide readers with honest, objective information based on our own experiences. We never have and never will accept payment in exchange for a positive review. Many of the products that we review are provided to us for free by a manufacturer or retailer. In some cases, we also have advertising or affiliate relationships with manufacturers and retailers of products and services we review. For additional information please visit our additional disclosure policies.