


Weather Guard Van Configurator

Weather Guard Van Configurator
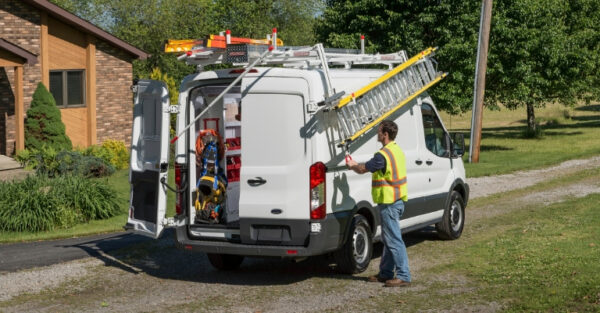
As a contractor, there aren’t many things more important to -us than our tools. Because of this, the way we store, transport, and care for those tools should be a high priority. We have all seen that van or truck that pulls up to a job site and opens the doors with tools or materials falling out. In addition to a safety issue, you know that this contractor will constantly be shuffling through that mess. He will spend valuable time digging to the bottom of the pile of things in the back of the van, looking for that one item he needs at that moment. He is doomed to repeat that process over and over again.

Now imagine a neatly organized, well laid out, rugged storage system designed specifically for your van and tailored for the specific work you do. Tools organized where they belong, materials exactly where you placed them, and open floor space to boot! This scenario enables an increase in work efficiency and allows for more effective utilization of your vehicle. Where going to show you how to customize your van using the Weather Guard Van Configurator.
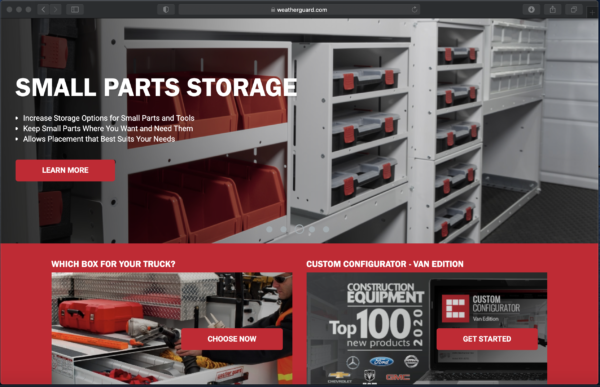
The Weather Guard van storage equipment makes this all possible. You can customize their system with the Custom Van Configurator, on the Weather Guard website, to find the exact tool you need. Designing a custom van interior configuration has never been easier. Let’s take a look at what’s available.
Customize Your Work Vehicle – 7 Steps
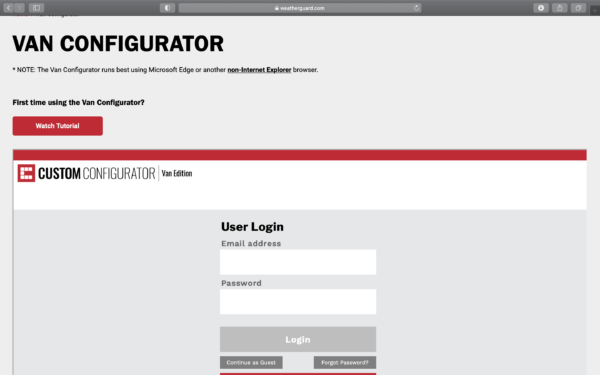
Head on over to the Weather Guard website www.weatherguard.com, and click on the custom configurator tab to get started. The process is super easy to create a login. Once you have done that, the rest is fun and easy.
The Configurator
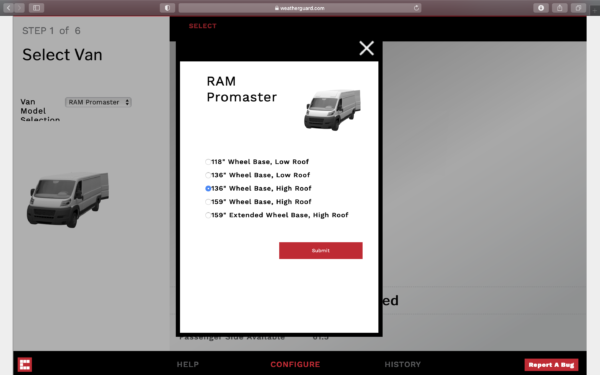
- Step 1 is to select your specific van make and model and configuring the custom storage solution that suits your needs. With six (6) major manufacturers represented, some with multiple models, you are sure to find your specific vehicle and, in turn, a configuration for you. For this review, we’ll be looking at the Ram Pro-Master, specifically a 2019 1/2 ton (1500) 136″ wheelbase, high roof.
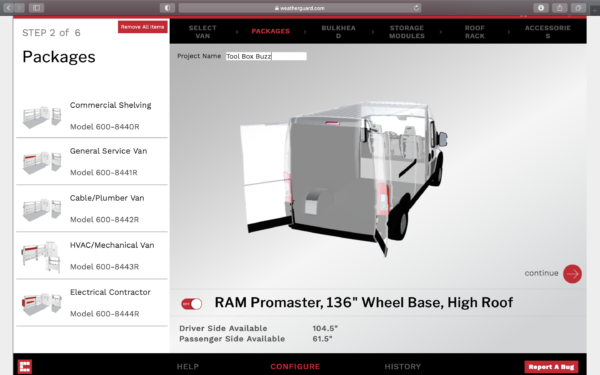
- Step 2 immediately impresses the user with a list of pre-configured packages designed for multiple trades, from commercial shelving or general service van, to more specific configurations for cable/plumber, HVAC/mechanical or electrical contractors. Simply selecting one of these configurations put together by the pros at Weather Guard would suit many contractors’ needs. The ability to add on to one of these configurations is the icing on the cake.
Make it your own
Let’s say you search through the preselected configurations on the website, and you don’t see quite what you are looking for. Or maybe you’re a specialty contractor with specific requirements for storage. Weather Guard has you covered as well with the custom configurator and the ability to select the pieces and parts you want in your van.
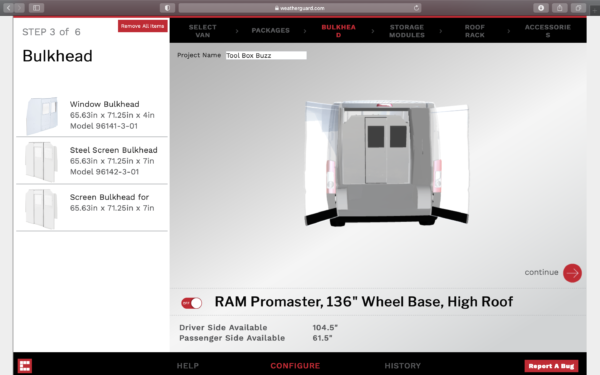
- Step 3 gets you on track to a fully custom installation beginning with one of three bulkhead styles to create a safe, secure storage area. From here, your custom storage solution starts with selecting from a seemingly endless selection of shelving sizes and configurations. These include open shelving, available 13.5″, 16″, and 24″ deep, closed, lockable storage cabinets with solid steel doors. The system even provides drawer units with full extension drawer slides and slide locks to keep the drawers closed during transit.
Detailed Storage Designs
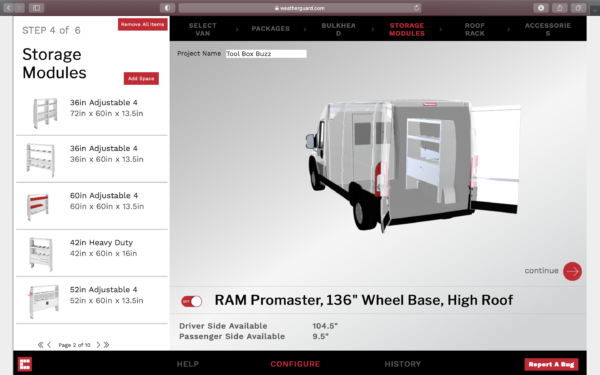
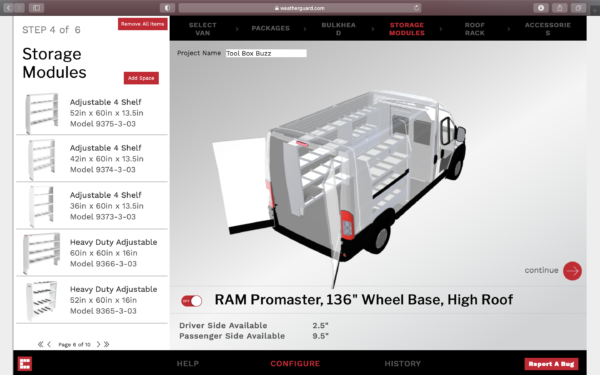
I can not emphasize enough is the quality and detailed information available on the online van configurator. Weather Guard has created an exceptional product offering. While customizing a storage solution for your application, the program automatically keeps track of what components you’ve selected and what amount of space you have left for additional items on both sides of the van based on your original make and model specification. For example, once I select my van from the list, the application shows me what is available for space on both the driver’s side and on the passenger side between the side and rear doors. This brings us to the next step.
- Step 4 will open your mind to the endless options Weather Guard has put together for the end-user. While selecting components, the configurator will show you a 3D representation of the van’s components and show the space remaining for additional shelving or other accessories. This allows the user to drag and drop shelving units and accessories and see what your van will look like before ordering any actual parts.
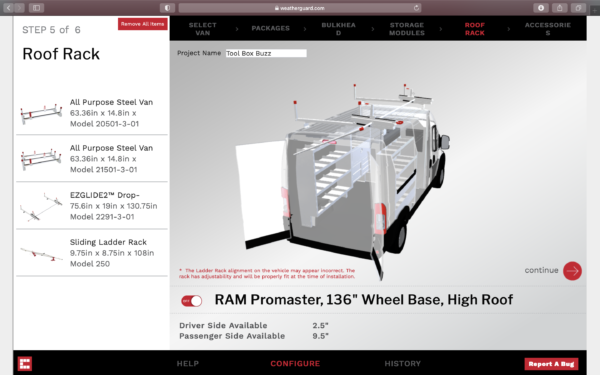
- Step 5 brings you outside the van for ladder rack storage. There are multiple options, from basic crossbars to the Easyglide2 drop-down ladder rack system.
- Step 6 The accessories. Now that you have selected your primary storage and shelving units picked, it’s time to get down to the specifics. From a rubber floor liner to caulk or spray can storage, choosing all the right accessories will truly make this work van yours. Conduit storage units, locking shelf doors, extension cord hooks, and bucket organizers are just the tip of the iceberg. Small parts bins and locking drawers with full extension drawer slides can undoubtedly help with productivity, keeping you from searching around for the things you need to get the job done. Now you have completed your virtual design.
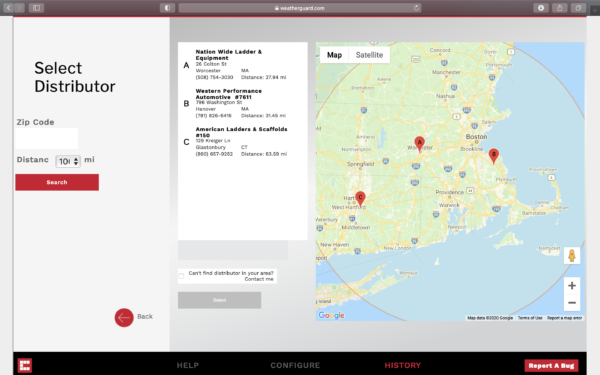
- Step 7 Fill in your zip code, allowing the configurator to give you a list of local distributors to purchase and install your new custom storage solution. The application lists the distributors by distance from your zip code from 10 to 100 miles, ranked by the closest first. These distributors will help make your 3D online configuration a reality.
Weather Guard Custom Van Pricing
Pricing is not listed within the configurator, so contacting your local distributor is a must to finalize your purchase. Your van’s installation time will vary depending upon the configuration and amount of components. I can not see why most of these installations wouldn’t be completed in one day.
The commitment to create your custom work van could be as little as 30 – 60 minutes, depending upon your computer knowledge and if you select one of Weather Guard’s pre-configured systems. I spent a total of roughly 2 1/2 hours working through the program, scanning all the configurations and options before assembling what would become my final assembly.
Overall User Experience
Overall, the configurator was easy to work through, and the online tutorial will spell out the process perfectly. The website ran the program seamlessly, and the 3D representation of the van and the Weather Guard pieces and parts mocked up within gives the user a real-time feel for the finished configuration. The user can manipulate the 3D view around any axis and visualize the van interior from any angle. This certainly gives the user one confidence in their selections.
For our review, Weather Guard systems allowed us to purchase directly for our 2019 Ram Pro-Master. That way, we can experience the installation process on our own, and allowing us the first-hand experience of the assembly and installation of the products.
Be sure to check out the second installment of this review, where we’ll dive into the installation and use of the Weather Guard storage system we selected. We intentionally put this to use in a work van for an extended time to get a real-life experience to accurately depict what to expect from the Weather Guard system.
About the author
Matthew Blood
Matthew Blood is a master tile installer, certified through the Ceramic Tile Education Foundation, and proudly wears his certification #1279. After high school, Matt attended a technical college where he graduated with an Associates's degree in Architectural engineering, and begin working as a draftsman in various construction-related industries. Woodworking was a passion, and after about 8 years or so, Matt moved on from the office life and started contracting as a remodeler and woodworker. Soon, tile became the passion, and he hasn’t looked back since! Today, Matt is focusing on custom residential tile installations, is an active participant in the National Tile Contractors Association as the Rhode Island state ambassador, as well as a regional evaluator for the Ceramic Tile Education Foundation’s Ceramic tile Installer (CTI) program.
Disclosure
Product reviews on this site contain our opinion of a product or service. We will always strive for objectivity and transparency in our reviews. Our goal is to provide readers with honest, objective information based on our own experiences. We never have and never will accept payment in exchange for a positive review. Many of the products that we review are provided to us for free by a manufacturer or retailer. In some cases, we also have advertising or affiliate relationships with manufacturers and retailers of products and services we review. For additional information please visit our additional disclosure policies.