


Weather Guard Van Storage System Installation

 Weather Guard Van Storage System – Installation and Use
In my last article about the Weather Guard tool storage solutions, I brought you through the steps of selecting components to customize your particular van storage system with the online van configurator from Weather Guard. You can review that article viewed here.
Today I will walk you through the assembly, installation, and use of the system.
Weather Guard – Durable Components
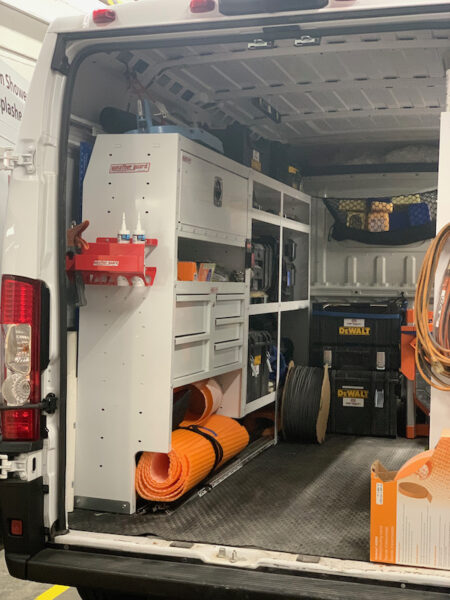
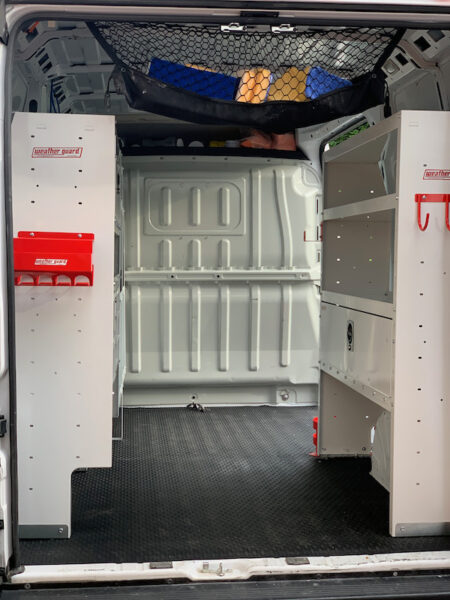
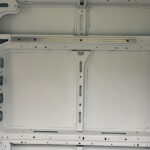
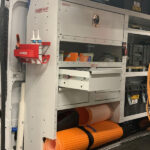
When unboxing the flat-packed shelving systems and components, the first thing I noticed was the quality and durability of the finish and the materials themselves. The 18 gauge steel components are rigid and structural, yet not overly heavy enough to create a weight concern for anyone running a 1/2 ton van. The side panels are folded 90 degrees along both the front and back edges for strength. WeatherGuard predrills these panels with holes, offering many adjustments for the shelving installation.
 Shelves
The shelves are all hemmed and slotted to receive the supplied dividers. Also, WeatherGuard punched the shelf pieces for easy installation of the optional locking cabinets. Using the supplied captive nuts at each corner, the user can quickly assemble the shelves using only a ratchet and socket. WeatherGuard even makes its toolbox with captive nuts for easy installation.
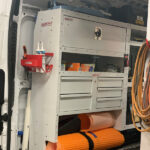
Drawers
I selected the toolbox drawers with all-steel construction, mounted with full extension drawer slides, and a slide lock under the integrated handle. The slide lock ensures that the drawers will remain closed while in transit until you want them open.
Powder Coated Materials
All of these major components are finished with Weather Guard’s Brite White ARMOR TUF powder coat, giving this system a great look in addition to impressive durability. WeatherGuard paints the smaller steel accessory components in a bright red powder coat, keeping with their branded color scheme.
 Accessories
I did not select any of the plastic bin storage units or parts cases for this installation. I can only expect that these components are of the same quality as what I received – the quality synonymous with the Weather Guard name.
This review will touch on flooring protection, shelf liners, and security accessories for the Weather Guard van storage system.
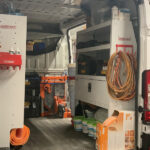
Weather Guard Van Storage System Assembly
More often than not, I assume users will have their systems installed by one of the authorized distributors in their local area. If you are considering having the factory approved installation performed for you, my observations and comments may not be as relevant. What I hope you pick up are some insights into how the system works. My installation experience can be important if you decide to make some adjustments to a dealer-installed system. You may want to change the location of an installed component or change the shelf’s height. These adjustments are common when a user starts fitting up the new system and deciding what goes where.
Read Instructions for Install Tips – Please!
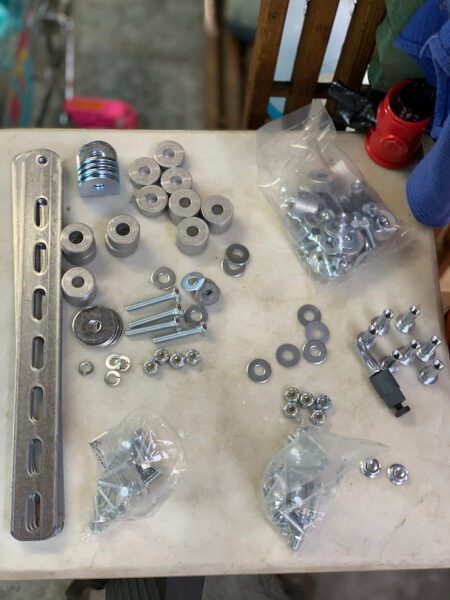
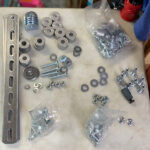
Before you tear into the bags of hardware, grab a socket wrench, and start slamming pieces together, please read and pay attention to the Weather Guard instructions. There, I said it. No one wants to admit they need the instructions for anything, right? Trust me on this one. Reading the instructions will save you the time of taking your finely assembled shelving unit apart to put it together correctly. I know this from experience.
I could sit here and tell you I read the instructions cover to cover before I began, but I’m a typical guy with a knowledge of tools and construction. In my case, I read as far as I thought I needed to understand what was going on. Then I started assembling the system. I ended up taking sections of my completed work apart multiple times.
The Weather Guard folks point out all the quirks and tricks in the instruction manual that allow the user to assemble the units in one shot correctly. So take the time to read the manual, my friend. You will thank yourself later.
Pre Install Tip – Plan and LayOut The Bottom Shelf Carefully
I noticed that Weather Guard details the all-important bottom shelf location for each type of van in their instruction manuals. I recommend you pay close attention to this particular procedure. The most crucial step is the location of the bottom-most shelf/component. The height requirement can often vary due to clearance over the wheel wells. My initial thought was to mount the bottom shelf as low as possible to get the most vertical storage possible.
While this proved right on the driver’s side shelf unit, which is mounted directly behind the bulkhead, the rear-mounted units require a different approach. Also, due to the taper integrated into the top of the side panels, one shelf lacks the full depth of the others. This shelf must be installed at the very top of the unit.
 Assembling The Shelves
Once the mounting locations are decided, the shelf assembly is a breeze. You will need to slip the shelf between the side panel’s front and back leg at the desired hole location and attach it with the supplied mounting bolt. The captive nuts on the shelves are a straightforward and thoughtful addition. For me, this demonstrates the effort and thought that had been put into engineering this system. The Weather Guard system completely eliminates the three-handed task of fumbling with tools and hardware while holding the shelf to attach everything. I cannot overstate what a time and frustration-saver this engineering solution provides. Well done, Weather Guard, well done.
Attaching The Back Panels and Storage Unit
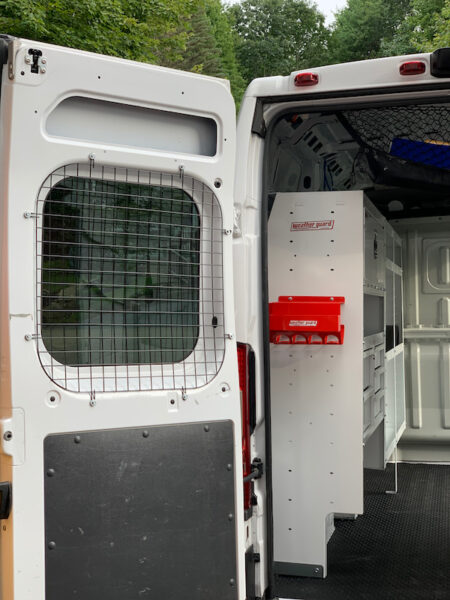
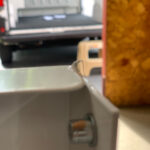
Attaching the back panels and locking doors to a shelving unit will create a storage cabinet. This assembly process is more time consuming due to the sheer number of nuts and bolts involved. But the finished assembly is a well-fitting, secure, and enclosed cabinet. WeatherGuard outfits the door with a quarter-turn locking D-handle assembly. Also, they provide a braided steel cable tieback to keep the door at a 90-degree angle when open. I find this is a nice feature to prevent the door from slamming down. Additionally, it provides a convenient place to set down small objects while searching through the cabinet, looking for other items.
Shelf Brackets
Within the hardware kit, you will find brackets for mounting the assembled shelving units into the van. It is worth noting that you will need to install the base mounting brackets regardless of whether or not you purchase the installation kit or not. I attached these to the assembled shelving units, flush with the side panels’ bottom edge before setting them in the van. The upper mounting brackets are more of a universal, adjustable type bracket. The installation kit allows me to omit these standard brackets. In my opinion, the standard top brackets limit the flexibility and use of the top shelf.
Weather Guard Van Storage System Installation
The most time-consuming part of the Weather Guard van storage system installation process was the planning and prepping. It was essential to pre-plan and think through the installation steps. (Of course, thoroughly reading the manual might have cut down on the planning time.) As previously mentioned, this step will most likely be handled by your local distributor, but I’ll walk you through my experiences.
There wasn’t anything too tricky about the install, and the specialty tools required were actually included with the hardware kit. With a measuring tape, drill, bits, sockets, and wrenches, a professional can do this with knowledge of the tools in a day or two. The installation time, of course, will depend on the amount of gear you purchase for your van.

Second Set of Hands To Get Started
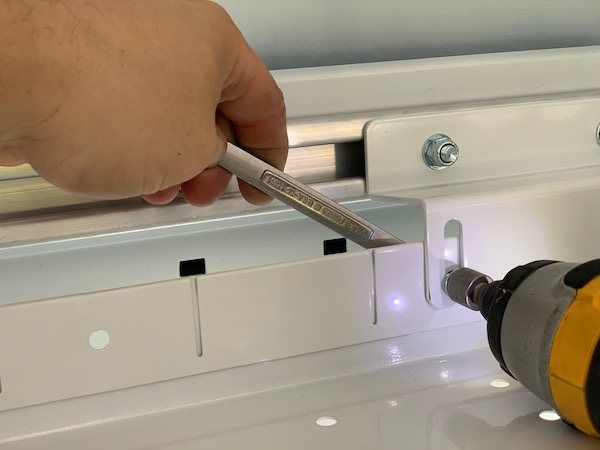
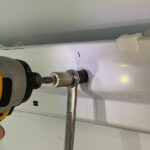
The initial installation stage was much easier with two people. Measurements must be taken from a given point that can be coordinated on both the inside of the van and the undercarriage. This is critical to ensure no interference with brake lines or fuel lines. Careful measuring and coordinating the locations pay off when drilling holes through the van’s floor.
In this case, I had help, and we determined a good benchmark would be the rear bumper and the centerline of the van. Having a helper saved me a tremendous amount of time and avoided mistakes.
In my installation, I had to shift the driver’s side unit slightly to avoid wiring underneath the vehicle.
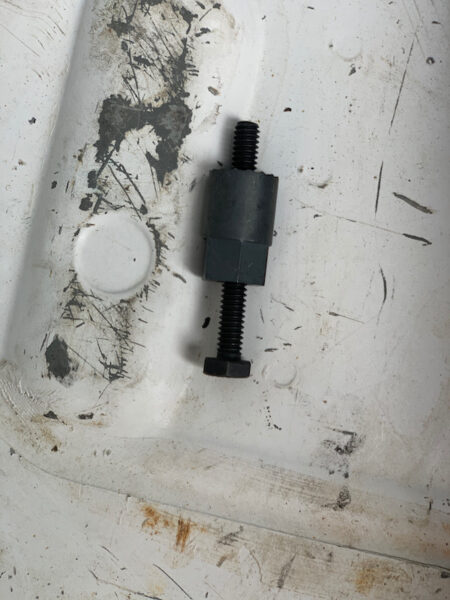
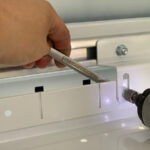
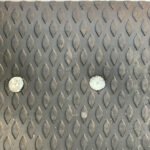
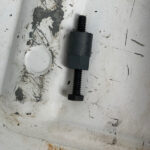
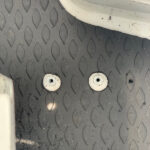
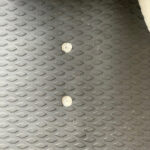
Once I drilled the mounting holes, I installed squish nuts supplied in the kit with the necessary tools to install and seal them onto the floor permanently.
Get The Installation Kit Designed For YOUR Vehicle
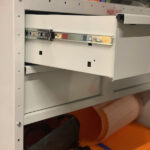
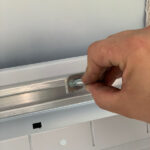
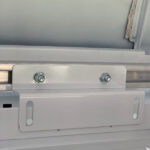
Earlier, I mentioned that installation kits are specifically designed for your vehicle. The custom installation kit takes the storage system from “generic” to the next level of specificity. For example, Weather Guard replaces standard angle brackets with a custom mounting rail fastened to the vehicle structure at the van’s roofline.
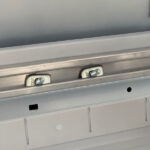
In my installation, I used several existing factory holes in addition to drilling a few new ones. Weather Guard provides the installation kit with squish nuts that are permanently installed into the mounting locations. I found this installation to be a simple task with a bolt and washer for each nut.
Many van storage systems use a generic one size fits most design approaches. This is not the case with the Weather Guard van storage system. Each component is designed to work seamlessly with the factory structural supports of your vehicle. This eliminates wasted space while maintaining strength and security.
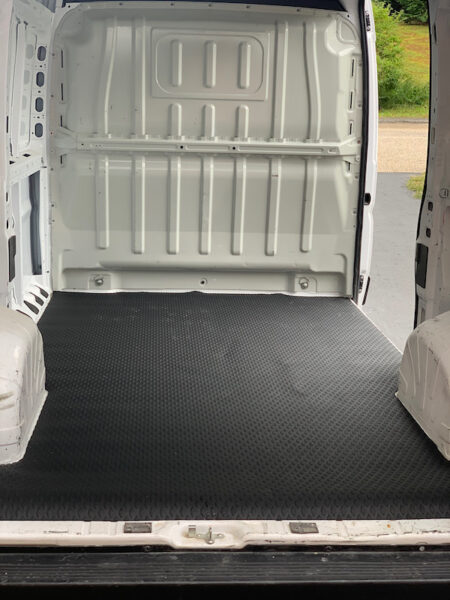
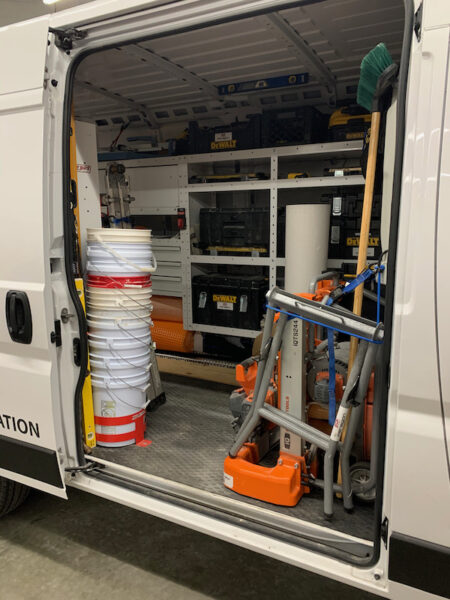
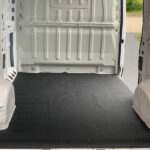
Weather Guard Thermoplastic Rubber Floor Mat
I chose to include the WeatherGuard model 89021 thermoplastic rubber floor mat. I like this rubber floor mat and consider it a great addition to my van. The mat keeps things in place on the floor where I put them and prevents loads from skidding along the van floor. Also, I find the mat reduces the rattling noise of any items on the floor. The mat protects the floor from scratches from objects I load in and out daily.
The floor mat expands and contracts in differing temperatures. I advise you to carefully follow the installation instructions to find the recommended hole sizes and understand the shelving mounting hardware’s clearances. You need to adhere to the instructions to eliminate possible thermal expansion issues.
Mounting The Shelves With Shim Bushings
Installed the shelving units in the van is very easy. I selected the appropriate shim bushing from the hardware kit to level shelving on the van’s floor. Weather Guard supplies differing shim thicknesses to install the shelving level. Whether the hole lands on or between the raised profiles, I found the shims can accommodate most vehicle floor systems.
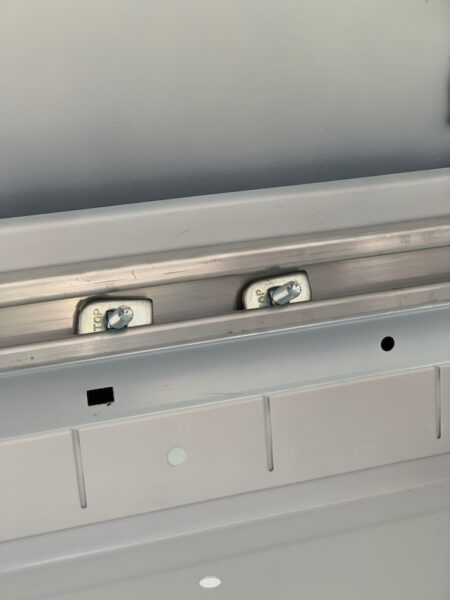
Once I mounted the base brackets to the floor, I was able to mount the supplied angle brackets to the upper mounting rail. The predrilled holes along the back edge are another great example of the thought Weather Guard put in this product.
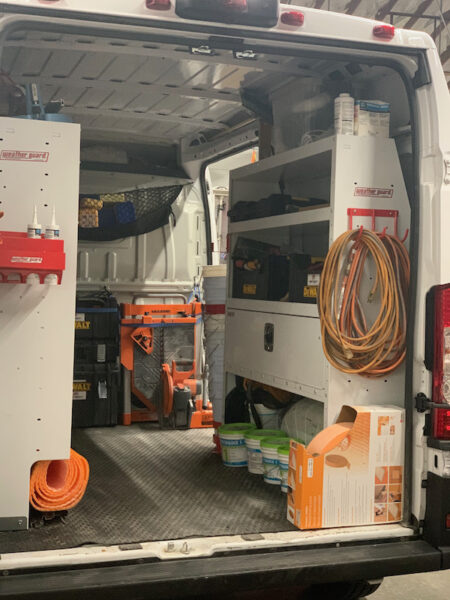
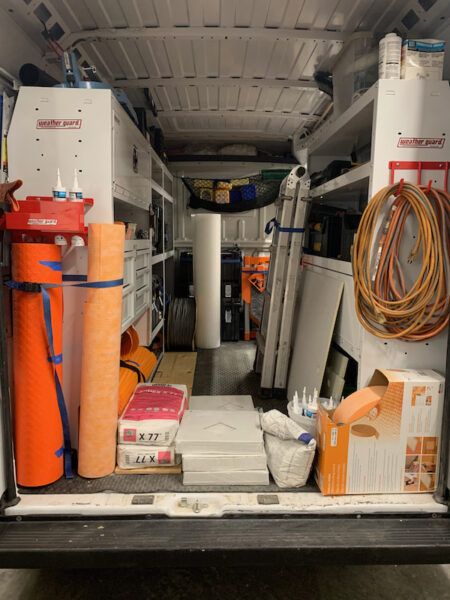
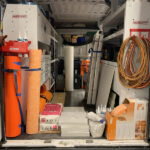
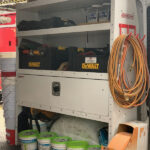
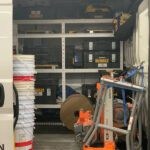
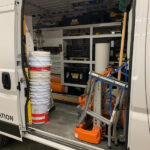
Weather Guard Van Storage System Accessories
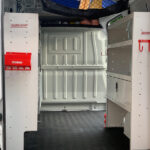
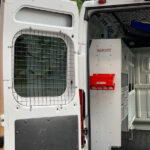
Weather Guard offers a full line of trade-specific accessories. I ordered a caulk tube holder, ladder bracket, 3 hook bracket for electrical cords, a 5-gallon bucket holder, and security screens for the rear windows. The accessories bolt directly to the shelving units with supplied hardware.
I mounted the bucket holder to the floor the same way as the shelving units. I installed the security screens by mounting them directly to the rear door frames with the supplied self-drilling screws. As the final installation step, I added in my shelf liners and dividers and loaded my storage system up with my tools, boxes, and other items.
Weather Guard Van Storage System – 3-Month Look Back
At this point, I have used the Weather Guard van storage system for three months. I am incredibly pleased with the system and the shelving components and accessories have performed with no issues. To date, I have not had to adjust the drawers or doors, and none of the mounting hardware has needed retightening. Even under heavy use, the powder coating looks as good as the day I installed it.
The shelving dividers work well to keep tools and boxes in place. The depth of the shelves has kept items from sliding off the shelves. With the 16″ depth units on the driver’s side and 13″ on the passenger side, I have encountered no issues fitting materials or large tools on the floor between the shelving units.
Room For Improvement?
I have very little to suggest as improvements to the Weather Guard van storage system. I can only offer a modification to the shelf mat systems. The mat does not stay in place without enough shelf dividers to hold it in place. It slides on the powder-coated shelf and could take a light toolbox or other stored materials with it. Strategically placed dividers can pinch the mat onto the shelf. I have added double-sided tape to keep the mat laying flat in the absence of the dividers.
Overall Impression
Overall, I am extremely happy with the quality and usefulness of this system. The shelving easily holds my toolboxes as well as larger loose tools. The drawer system keeps smaller tools handy, and the enclosed cabinets house smaller products and other tools keeping them secure during travel.


About the author
Matthew Blood
Matthew Blood is a master tile installer, certified through the Ceramic Tile Education Foundation, and proudly wears his certification #1279. After high school, Matt attended a technical college where he graduated with an Associates's degree in Architectural engineering, and begin working as a draftsman in various construction-related industries. Woodworking was a passion, and after about 8 years or so, Matt moved on from the office life and started contracting as a remodeler and woodworker. Soon, tile became the passion, and he hasn’t looked back since! Today, Matt is focusing on custom residential tile installations, is an active participant in the National Tile Contractors Association as the Rhode Island state ambassador, as well as a regional evaluator for the Ceramic Tile Education Foundation’s Ceramic tile Installer (CTI) program.
Disclosure
Product reviews on this site contain our opinion of a product or service. We will always strive for objectivity and transparency in our reviews. Our goal is to provide readers with honest, objective information based on our own experiences. We never have and never will accept payment in exchange for a positive review. Many of the products that we review are provided to us for free by a manufacturer or retailer. In some cases, we also have advertising or affiliate relationships with manufacturers and retailers of products and services we review. For additional information please visit our additional disclosure policies.