


Milwaukee PACKOUT Lessons Learned

My Thoughts On the Milwaukee Packout Modular Storage System
Hey guys – I realize Milwaukee PACKOUT isn’t new. The internet is filled with tons of pros sharing their experience with PACKOUT. So why am I making this video?
What I noticed is I had a pretty unique journey when it came to my experience with PACKOUT. A lot of videos and articles online are of pros sharing their PACKOUT setups for the shop or in their vehicles… and while I certainly have those setups too… I’ve also had an interesting time creating a PACKOUT kit setup I can take directly out onto the job site.
I wanted to share this because, frankly, I haven’t seen a ton of people talking about how PACKOUT works for them when they roll it up onto the job site. So, let’s get into it…”
PACKOUT History
Milwaukee introduced the PACKOUT Modular Storage System in 2017 and they’ve continued to add yearly innovation and improvements to the system.
Having a secure and reliable way to store, protect, organize and transport tools is important, especially when you look at the price tag of some of your tools. PACKOUT helps achieve that goal.
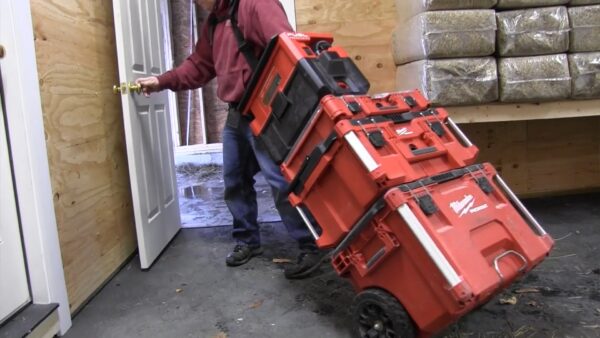
Stackable tool storage is great but keeping them in place is another matter. PACKOUT features an attachment system called Mod-Lock. Mod-Lock is an intuitive and quick attachment mechanism that gives users the freedom to stack and lock PACKOUT tool boxes, organizers, and totes of different sizes in numerous configurations that best suit their needs.
What PACKOUT Brings To the Table
Neither PACKOUT, nor stackable storage is new so what makes it stand out? This article is NOT a tool/product review, it’s about process and organization. Specifically my process.
That said, I’d be remiss if I did not cover some of the PACKOUT features that I think matter:
- Mobility
- Impact and weather-resistant
- Inter-locking latch system
- Customizable foam inserts
- Stack-able
- Transportable (2-3 options)
- Multiple sizes for different applications
How I Look At PACKOUT
Remodeling and construction job sites are busy, hectic arenas, with tools and equipment everywhere, contractors many times overlook the “tools that protect the tools” and their need for power tool storage.
I’ve personally run the gamut on tool storage. I started storing my tools in the original boxes they came in, then switched over to using a 100% Bosch L-Boxx system, and later started using tool bags because they took up less space on my trailer shelves.
I’ve always believed that modular organizers are designed to allow for better and more secure storage, better organization, and easier mobility. I’ve also preached that being organized is key to being productive at work.
PACKOUT seemed like the next logical step for me, but my 6×10 tool trailer disagreed. The trailer had welded shelves that were custom-designed for the L-Boxx system. As a result, I did not jump on the PACKOUT bandwagon until I replaced my trailer with a Sprinter van.
What Sold Me on PACKOUT
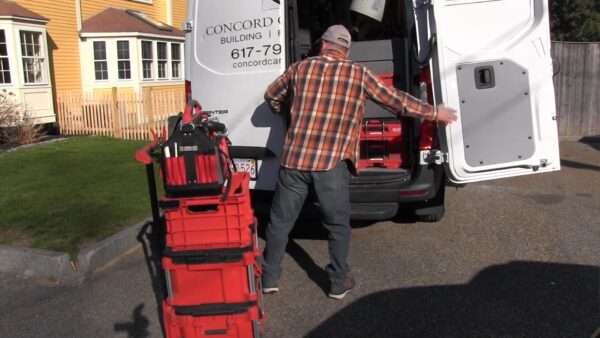
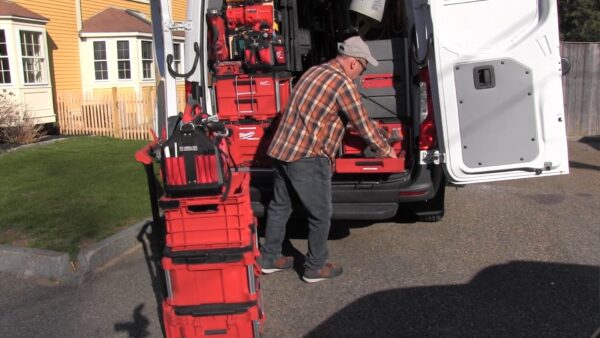
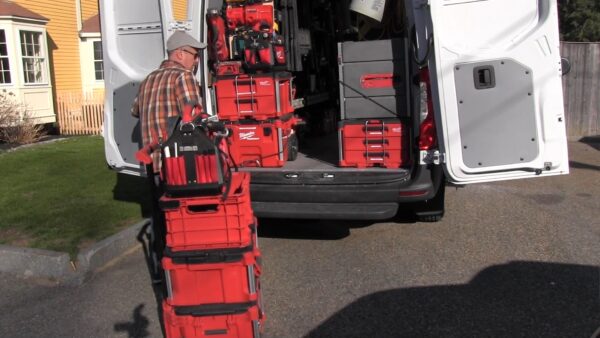
I recently watched one of my carpenters unpack his PACKOUT stack – he had everything he needed and brought it in on one trip. After seeing that, and knowing I was moving on from a trailer to a Sprinter van, I decided it was time to try PACKOUT’s stackable storage approach.
“Contractors use only 33% of their time on the job site working. The rest of that time is spent on tasks such as material runs, un-planned demands and interruptions, searching for tools and parts and running errands.”
Making A Milwaukee PACKOUT Everyday Carry Kit
I constantly evaluate how I work, and am always looking for that unicorn solution or improvement. Presently, I was making multiple trips from the trailer to the setup spot and wanted a way to bring that number of trips down. Every time someone goes to the trailer or lumberyard it’s what I call a “time-sink.”
Time-Sink Considerations
- How many times did you go back to the truck or trailer for a tool?
- Was the accessory with your tool?
- Did you search through your truck for a bit, blade, or accessory?
- How do you store parts and fasteners?
- Do you store task-specific parts, tools, or accessories together?
- Do you have a system to get multiple tools and accessories into a job in one trip?
- Where are your “time sinks” when it comes to tool storage, set up, and clean up?
I decided it was time to create tool kits of commonly used tools and ALL of their accessories. Depending on the work we’re doing I would grab that appropriate kit.
Milwaukee PACKOUT Kit Example
- Kit 1:
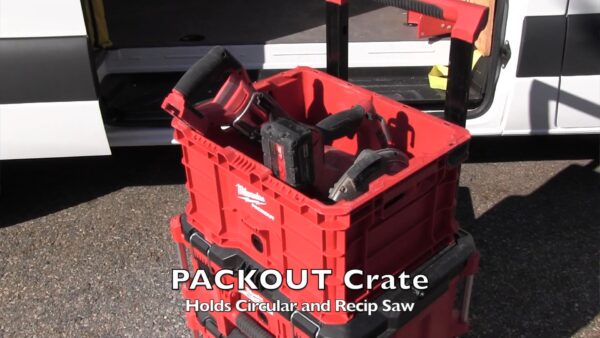
I combined my reciprocating saw, circular saw, and all their accessories in the rolling toolbox. This box goes in on every job.
- Kit 2:
I combined my 2 impact drivers, dill, right-angled impact, and every accessory in a large toolbox
- Kit 3:
I combined my jigsaw, cordless sander, and multi-tool in one large toolbox
- Kit 4:
I created a “bleed control” kit with a compact organizer
- Hand Tool Totes:
I used the 20” tote to make every day – mostly used hand-tool bag. I used a 15” tote to create a finished carpentry hand-tool bag
- Task-Specific Kits:
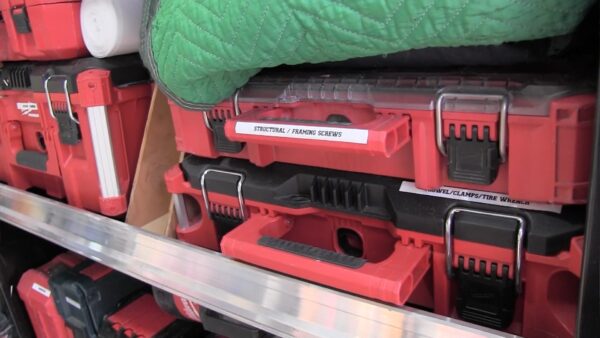
In addition to everyday tools I used the compact, and regular organizer boxes to create specific task kits, such as:
Plumbing kit, electrical kit, hole saw kit, router bit kit, and “Most commonly used fastener” kits.
A Great Approach, Until It Wasn’t
I was using the PACKOUT kits for a while and realized that there were times that I needed to make one cut with a circular saw and had to unclick and remove 3 Packout boxes to access the bottom circular saw case. After this happened a few times, I realized that this was a no-go for me.
Back To The Drawing Board
Right around this time, I started testing out the PACKOUT drawer sets. They come in two sizes. [ 2 drawers and 3 drawers]
The drawer units got my attention, as well as, my crew’s eye. The drawer sets instantly allowed me to access lower cases in a stack without removing the upper cases in that same stack.
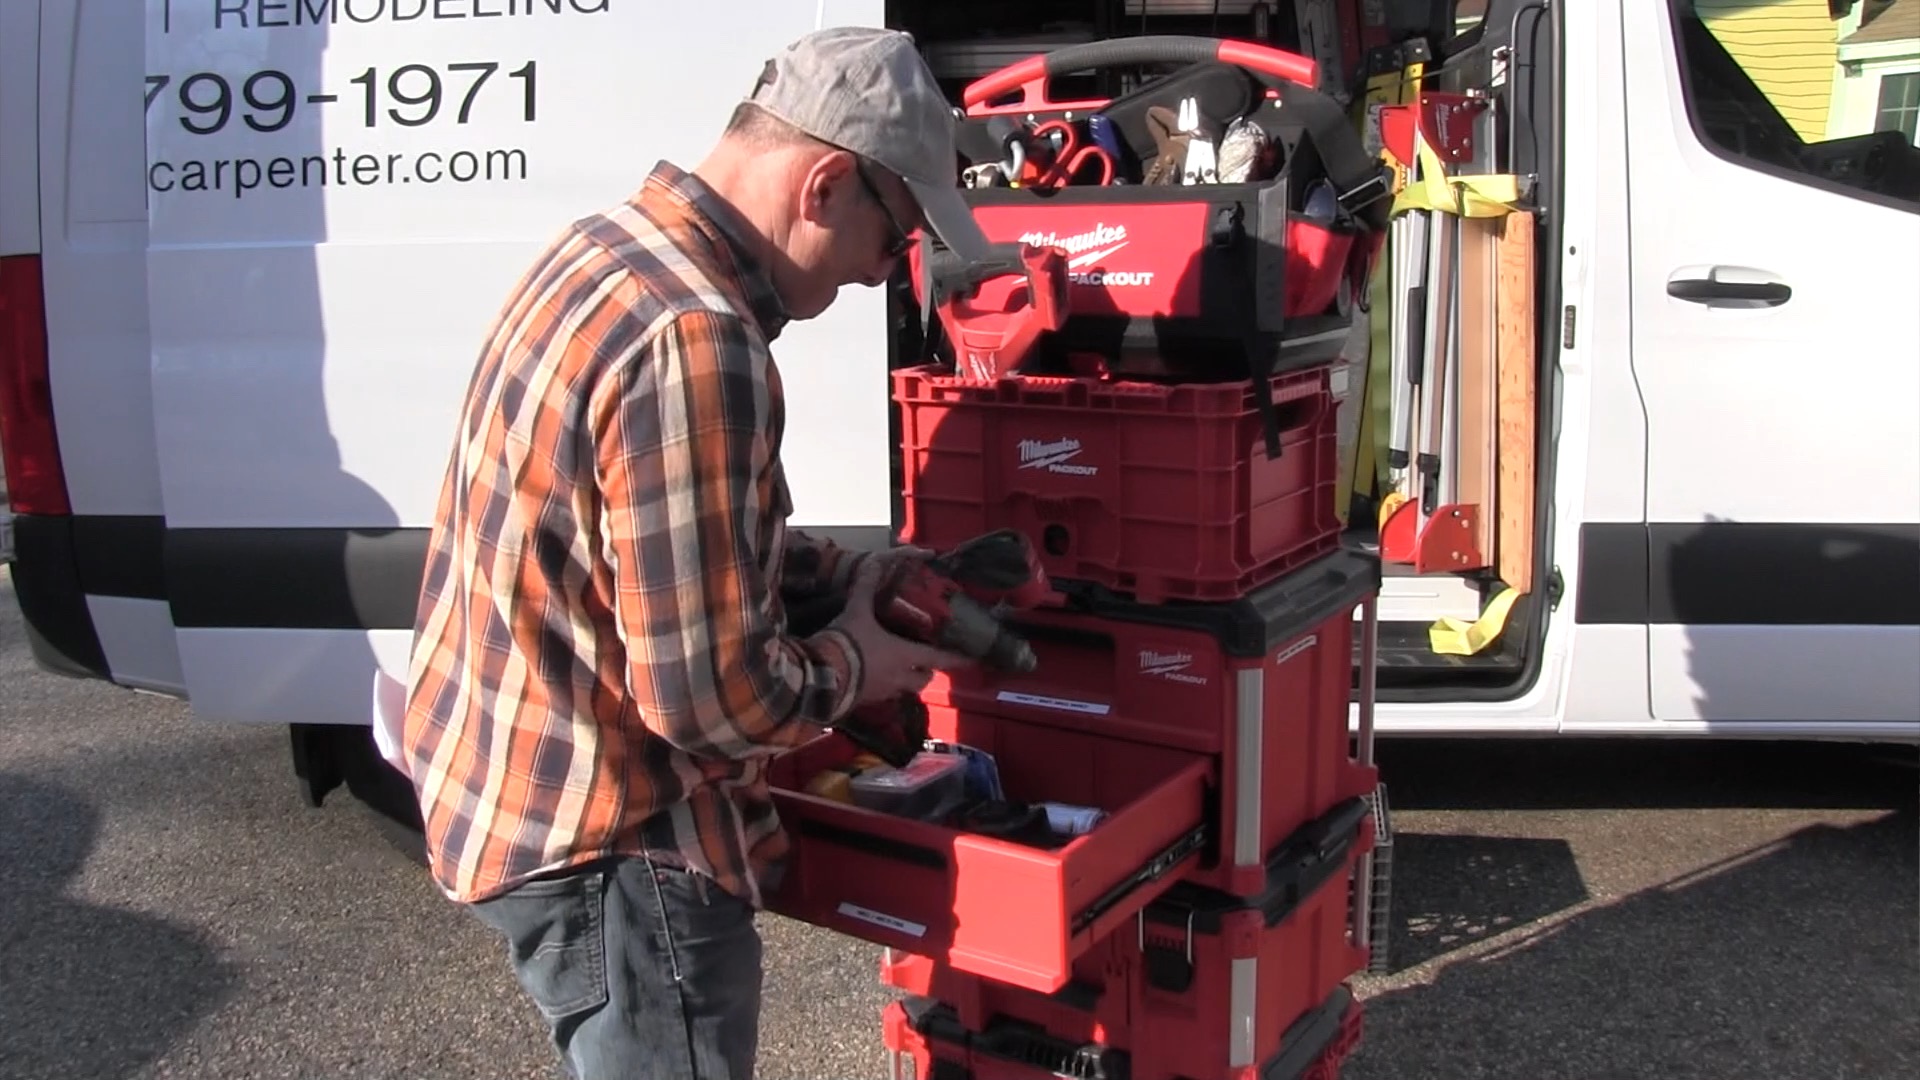
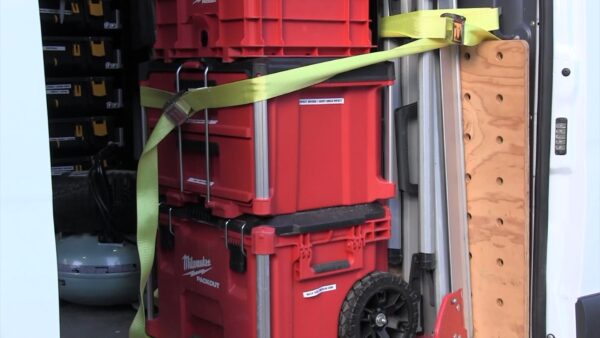
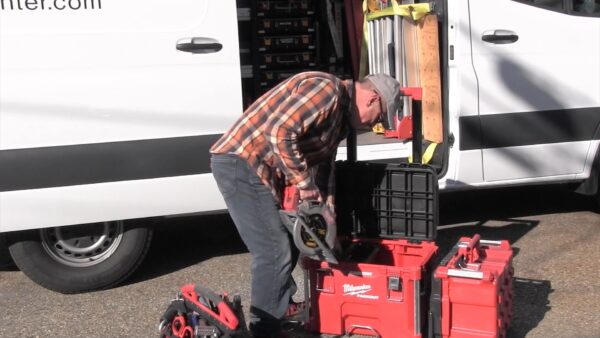
Hmmm – ok, maybe this is the unicorn I’m looking for. I started organizing my tools using the drawer systems, placing two of them at the rear doors of the van, facing out. My thoughts were that I could access the drawer contents without having to enter the van. Here’s how I laid it out:
PACKOUT Small Drawer Unit
- Drawer 1: Pneumatic finish nailer and finish nails
- Drawer 2: Pneumatic brad nailer and brads
- Drawer 3: Pneumatic pin nailer and M12 cordless pin nailer and pins.
PACKOUT Large Drawer Unit
- Drawer 1: 2 Impact drivers, 1 Right angle impact driver, and batteries
- Drawer 2: Drill, impact driving accessories, and sockets.
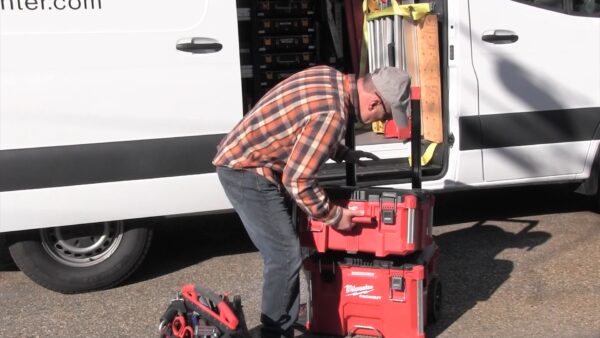
This setup has been working amazingly well. I use the Milwaukee PACKOUT crate to load up the tools I need and bring them in and keep the PACKOUT drawer units in the van, as a home base, for all of the accessories.
Using these drawers has to lead me to the conclusion that I definitely want to add more drawer units to my van for my multi-tool, jigsaw, sander, and maybe a mini-recip.
Improvements To PACKOUT
I know I said this wasn’t a product review but I think having a drawer solution on wheels is a must for Milwaukee. I also think that this drawer unit should be large enough for a circular saw or at least a reciprocating saw.
I’d also love to invest in the Milwaukee PACKOUT radio but feel it’s currently too big, and would prefer a smaller basic radio the size of a compact organizer. This would allow more side-by-side and vertical storage.
Overall Thoughts on PACKOUT
I really like the PACKOUT system, especially the drawer units. I’m planning on investing in more drawer units for my van. The next group of drawer units will be added to my mobile, “on-wheels,” stack. I’ll probably put seldom-used items, like cords, chargers, drop cloths, in the wheeled case. I’ll then transfer the circular and reciprocating saws out of the wheeled unit and into a top crate, and only drawer units in the stack.
My goal would be NOT to have to unclip the stacked drawer boxes and keep them as a constant “mobile tower.”
PACKOUT Lessons Learned
Shelves are the way to go! I’m closer than I ever have been to my quest to find modular, secure storage, better organization, and easier mobility.
Buy Now From Our Sponsored Retailers
Milwaukee Packout – Lessons Learned Video
About the author
Rob Robillard
Robert Robillard is a remodeler, general contractor, and principal of a carpentry and renovation business located in Concord, Massachusetts, and serves as the Editor of Tool Box Buzz and founding editor of A Concord Carpenter . Rob is in charge of our Tool and Product Review - Tool and Product Review - Video Channel, , where we post all of our tool reviews and video tutorials. Rob enjoys using his knowledge and experience to help and educate building professionals as well as DIYers on best practices in the remodeling industry. The Concord Carpenter's motto: "Well done is better than well said!" : Read more about Rob
http://www.aconcordcarpenter.com/@https://twitter.com/robertrobillardRob Robillard
5 Comments
Leave a comment
Disclosure
Product reviews on this site contain our opinion of a product or service. We will always strive for objectivity and transparency in our reviews. Our goal is to provide readers with honest, objective information based on our own experiences. We never have and never will accept payment in exchange for a positive review. Many of the products that we review are provided to us for free by a manufacturer or retailer. In some cases, we also have advertising or affiliate relationships with manufacturers and retailers of products and services we review. For additional information please visit our additional disclosure policies.


Rob …
Great article! You address an area that I’ve struggled with for years.
Would it be possible to get a more detailed listing of the specific items that you have included in each of your “boxes,” e.g., your finish bag, electrical box, etc.
You did such a good job with your write-up that I purchased my 1st piece of Packout yesterday, a large tool box. & plan to get more.
Thanx so much for your insight & help. – ED LINDLER
I’ve been looking at the pack out drawer setup but unfortunately my tools sit in the weather occasionally so they are not an option for me 🙁
You could, occasionally (when they do have to sit out in the weather), cover the stack of boxes with a tarp. Done. Deal. 🙂
Also, even though they are not weather-sealed, very little water goes in when it rains on them.
Also #2: one can add a homemade gasket/seal, if one would really want.
Also you can add some weep holes to make yourself feel better so it wont puddle in the drawer or base.
Thank you for taking the time to write the article and include photos of your Packout rigs. I have two rigs (2 wheeled carts with handles, each with 4 or 5 modular stacks on top) and like them a lot. The first modular accessory piece I got was the three-drawer chest and found it so useful that I picked up a two-drawer as well. I agree that not having to unpack everything to get to a bottom bin is really handy. Recently, I purchased the Packout (wooden) worktop and find it incredibly useful as well. My wife just rolls her eyes now when I come home with another Packout accessory…