


SawStop CTS Table Saw Review

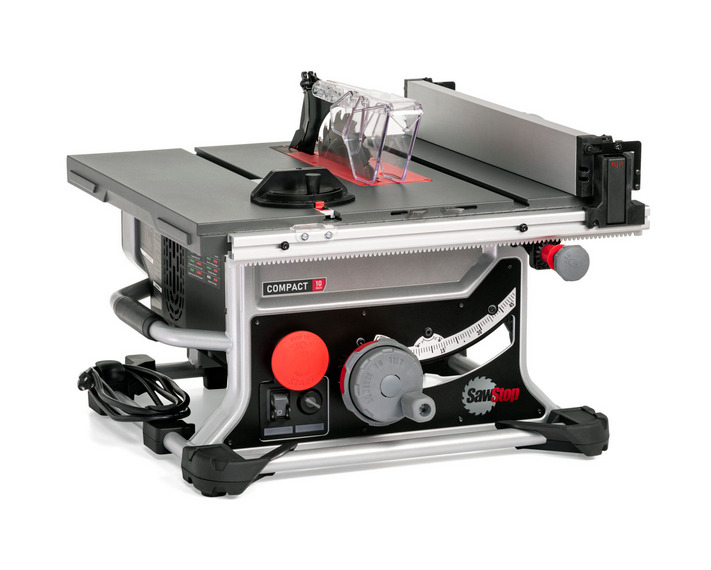
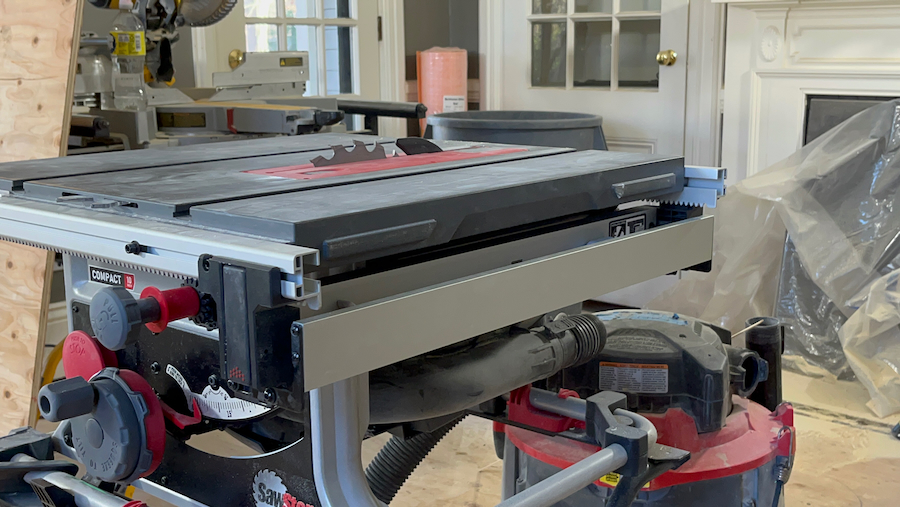
SawStop 10-inch Compact Job Site Table Saw CTS-120A60
SawStop Compact Table Saw
Like all SawStop saws, the CTS has outfitted with SawStop’s active injury mitigation [AIM] technology.
Specifications | SawStop Compact Table Saw CTS-120A60
• 120 VAC 60 Hz,
• 15A
• 4,000 RPM | No Load
• 10″ Blade
• Max. Depth of Cut at 0° 3 1/8″ (79.5 mm)
• Max. Depth of Cut at 45° 2 1/8″ (54 mm)
• Max. Rip Capacity 24 1/2″ (648 mm)
• Max. Rip Left of Blade 9 ½” [241 mm]
• Weight 68 lbs.
• Dimensions: 14 ¼” H x 23 ½” W x 27” D
• Table Surface: 23” W X 22 5/8” D
• Dust port: Inside Diameter 2.3” [58 mm] outside diameter 2.5” [65 mm]
First Impression
We reviewed the SawStop CTS Table Saw and stand together. The first impression with all SawStop tools is one of high quality. The tool looks and feels like a well-designed machine and comes in at $899 with active injury mitigation technology – well that’s just a win for us small guys!
At 68 lbs this 10-inch table saw is heavy and corded but that is a small consolation when you consider the cost of a table saw laceration or amputation.
How SawStop Compact Table Saw Works
The SawStop CTS table saw carries a small electrical signal through the blade which monitors and detects skin contact.
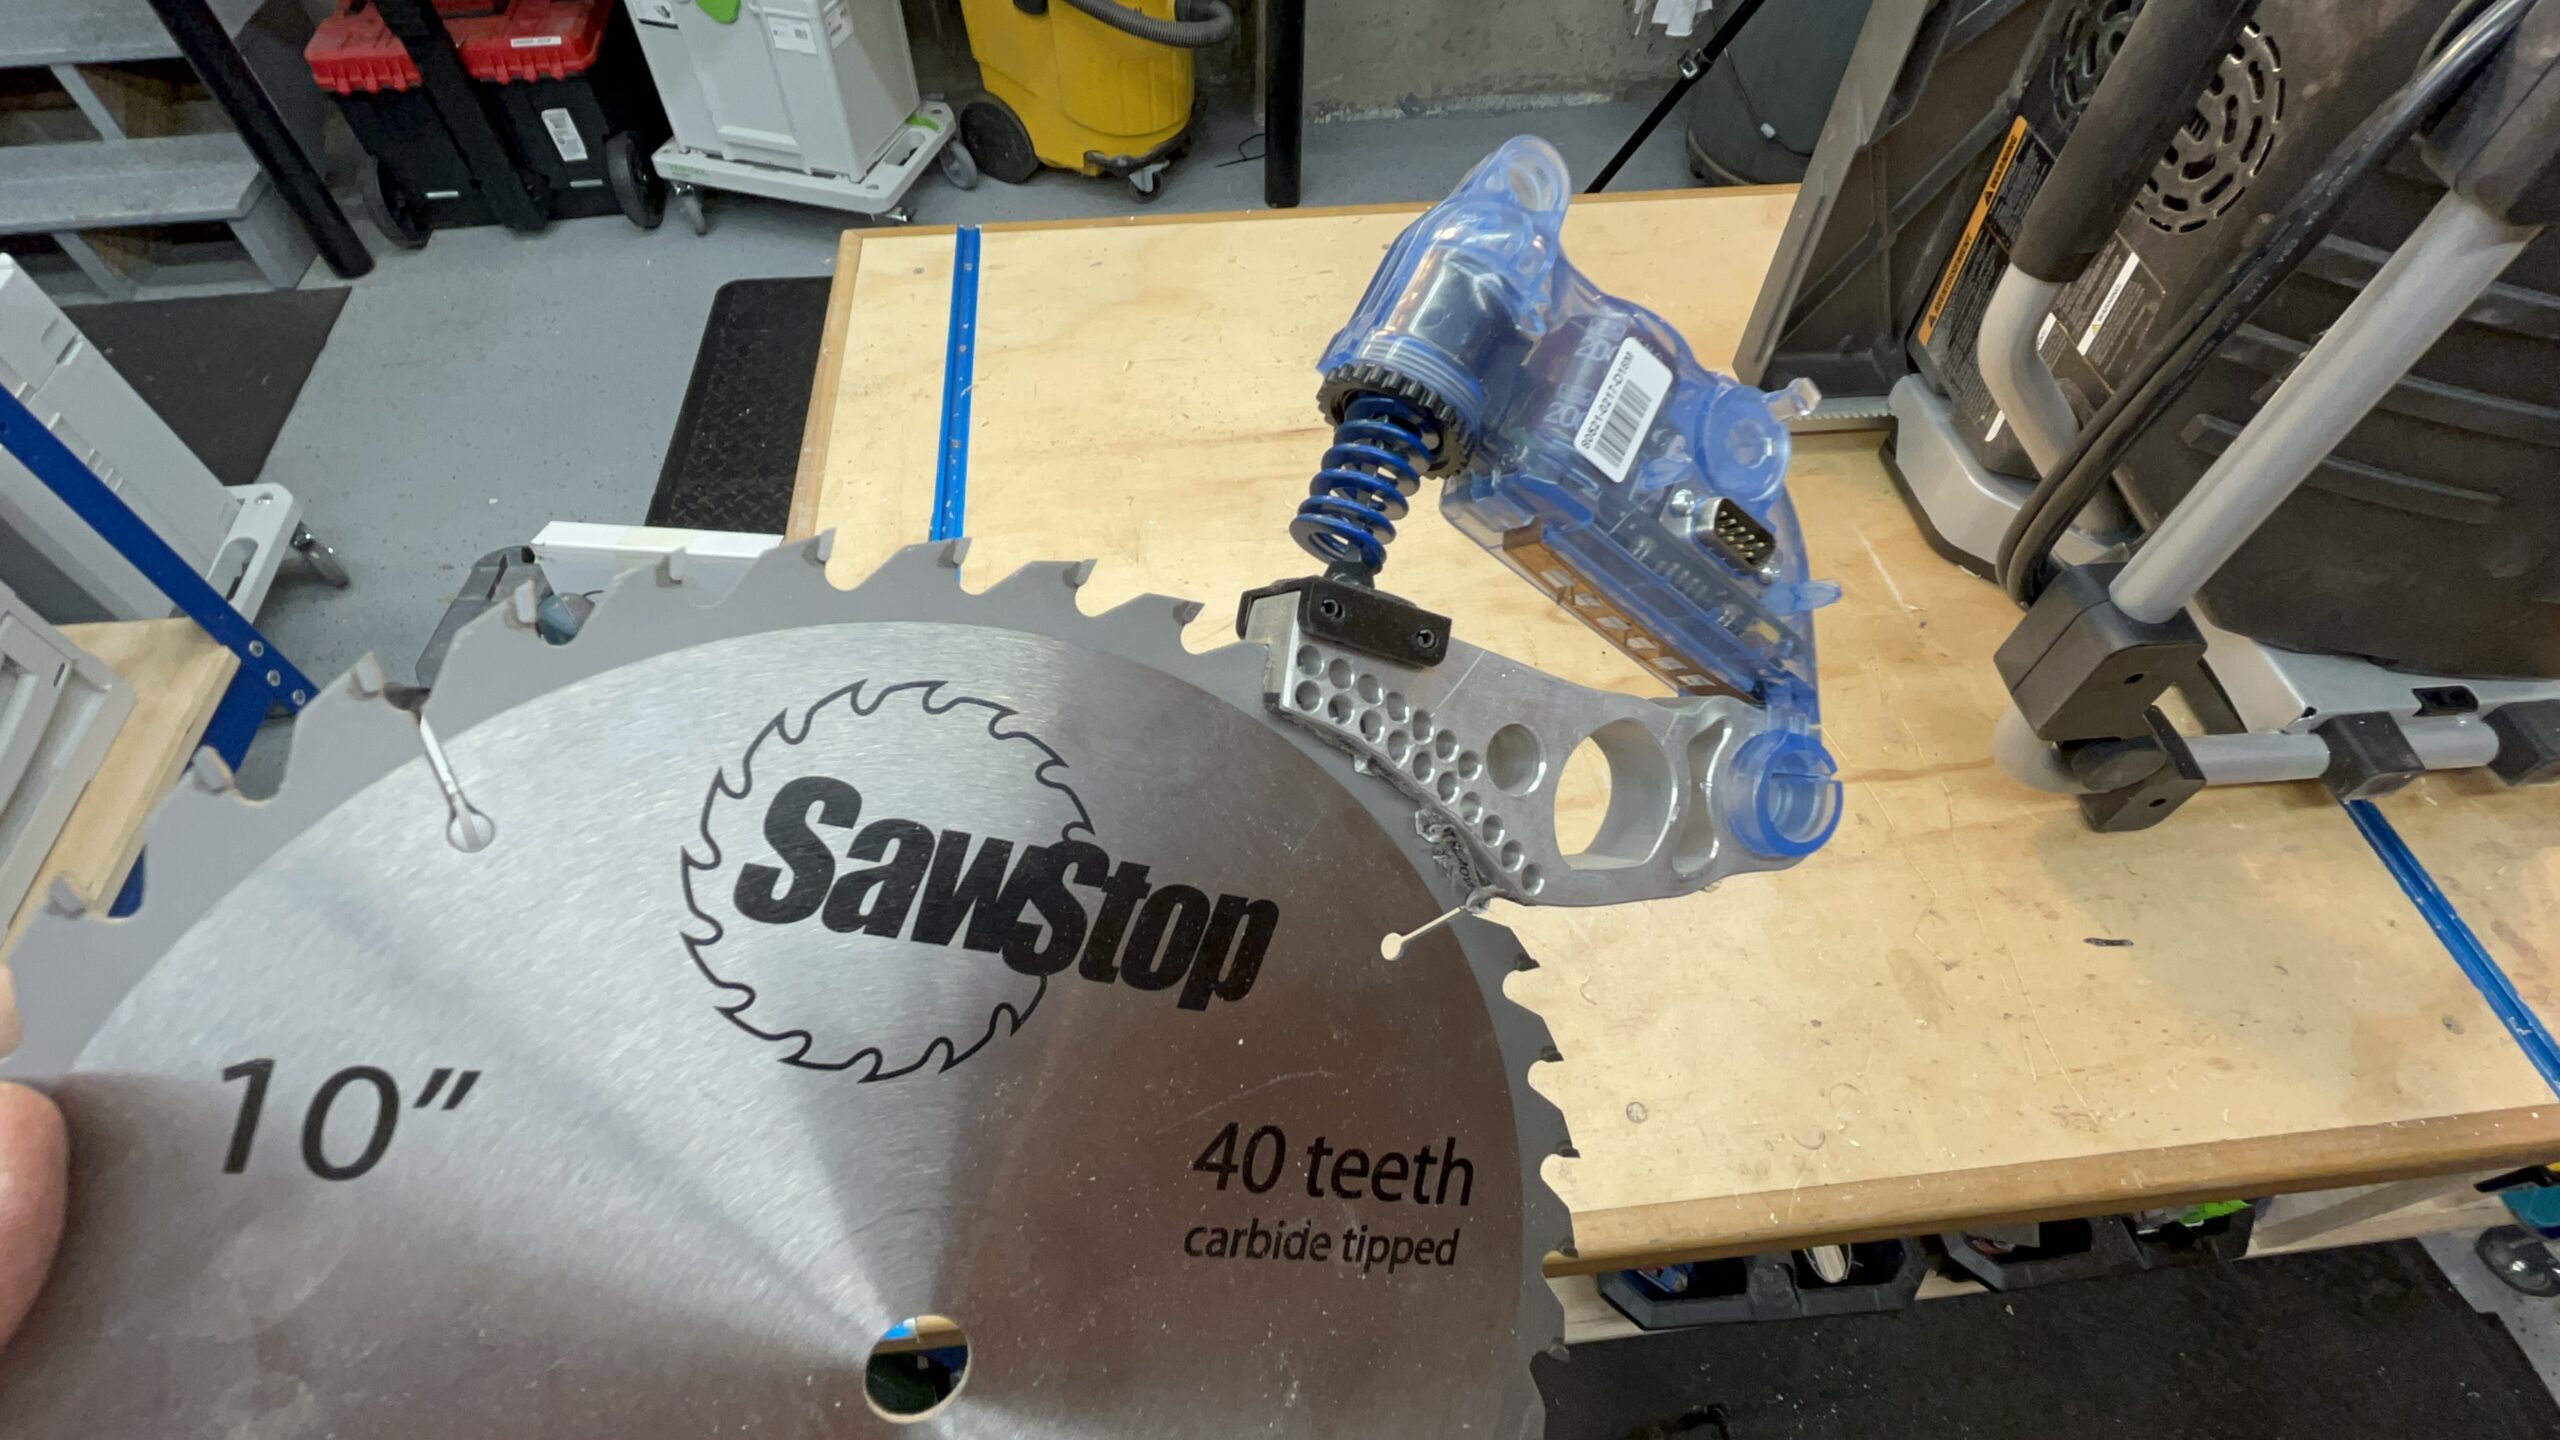
Once the signal changes with flesh contact, the saw activates a spring-loaded, aluminum block braking system that embeds itself into the saw blade stopping it in 3-5 milliseconds.
The degree of injury is dependent on the speed at which the hand or body part propels into the blade. Faster speeds can result in more serious injury. The brake and blade collision momentum drives the blade beneath the tabletop, removing the blade from view, and simultaneously turning off the saw motor.
After activation, the saw needs to be reset and the saw blade and AIM cartridge replaced, which took us 5 minutes to do. Any activation will require a new cartridge [$100] and a new saw blade [$50-100].
Pro Tip:
Make sure that you use only 3/32nd to 3/16th kerf saw blades that are NOT coated. Coated or lacquered saw blades are non-conductive and can reduce the speed that the system reacts to flesh contact.
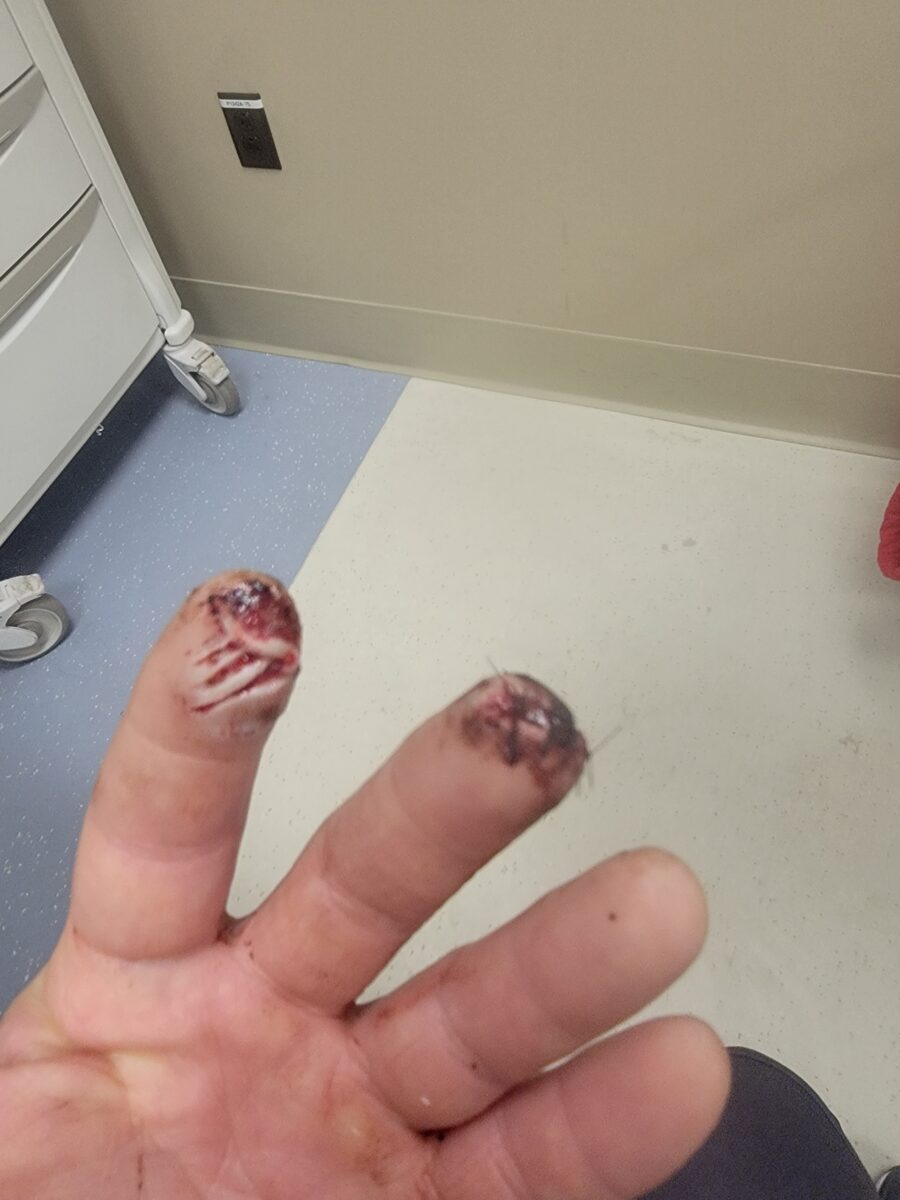
Our Table Saw Accident Story
Annually, there are over 30,000 table saw injuries in the US.
Last May, one of the guys on the crew slipped and fell into the blade. He was the 4th person in the ER that day to suffer an injury from a table saw, and it was a weekday, not a weekend, telling me that these were most likely Pro user injuries.
Luckily, he only suffered a broken bone and lacerations. In the end, he was out of work for a few weeks and on light duty for several other weeks. The entire accident was a drag for our team member to go through and cost the company $15,000 in worker compensation costs.
When I compare $15,000 to $900 for a SawStop there’s really no excuse NOT to outfit your crews with the saw.
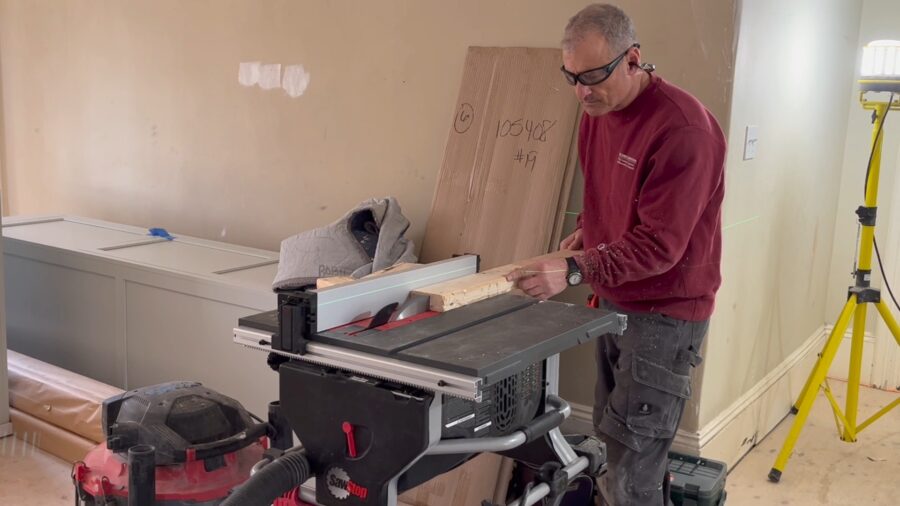
Power and Capacity
The SawStop CTS table saw is plenty powerful for job site cutting, we used it to rip down some 2x stock and it had zero issues. Its 15 Amp motor spins a 10” blade at 4,000 RPM. The CTS saw has a 23” W X 22 5/8” Deep tabletop with a maximum rip of 24-1/2” on the right side of the blade, and 9-1/2” on the left blade side. The CTS has a maximum depth of cut of 3-1/8” at 90° and 2-1/8” when set at 45°.
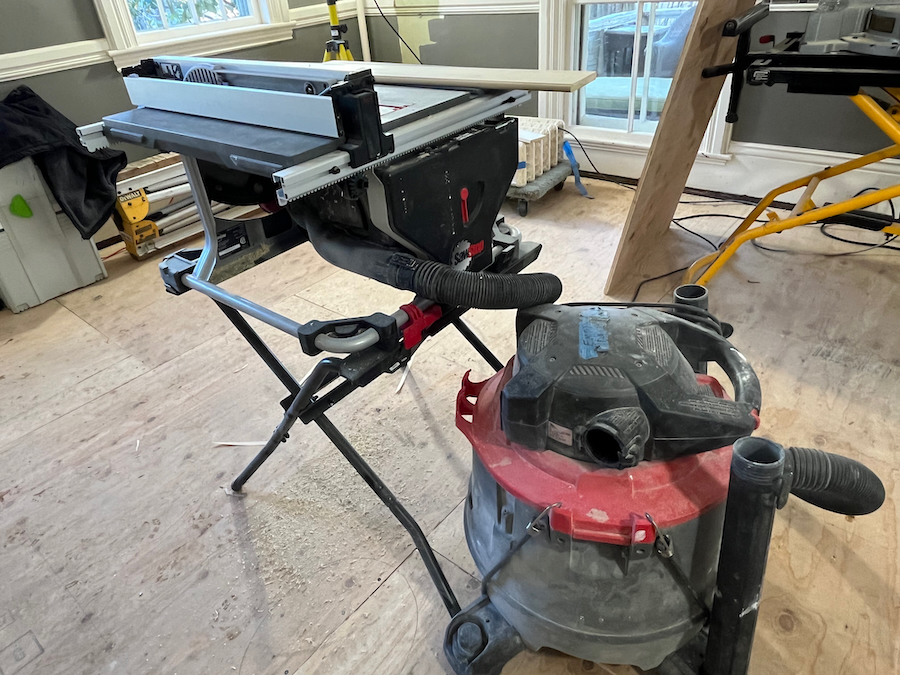
Dust Collection
The SawStop CTS table saw has a 2-1/2” rear dust port. SawStop recommends using a dust collector that has at least 170 CFM [4800 LPM] of airflow.
The dust port’s inside diameter measures 2.3” [58 mm] and the outside diameter is 2.5” [65 mm] The dust collection works well and collects approximately 90-95% of the dust. The only way to improve dust collection would be to use a blade guard dust port and connect it to a Y-connector and the lower port.
Important User Note:
It’s important to note that the CTS saw is not designed to run without dust collection attached at all times. The saw, brake, and trunion are enclosed and if dust collection is not used this area will fill up with sawdust and overheat the saw.
Precision and Accuracy
The quality of the cuts and more importantly the potential safety of the operator is going to be a function of the accuracy of a table saw. For many folks that means relying on the as-built accuracy from the manufacturer.
Let’s face facts many contractors, maybe most, take their table saw out of the box and start using it right away, for them, factory settings are good enough. Other folks like me, and probably you, take the time to true up their saw.
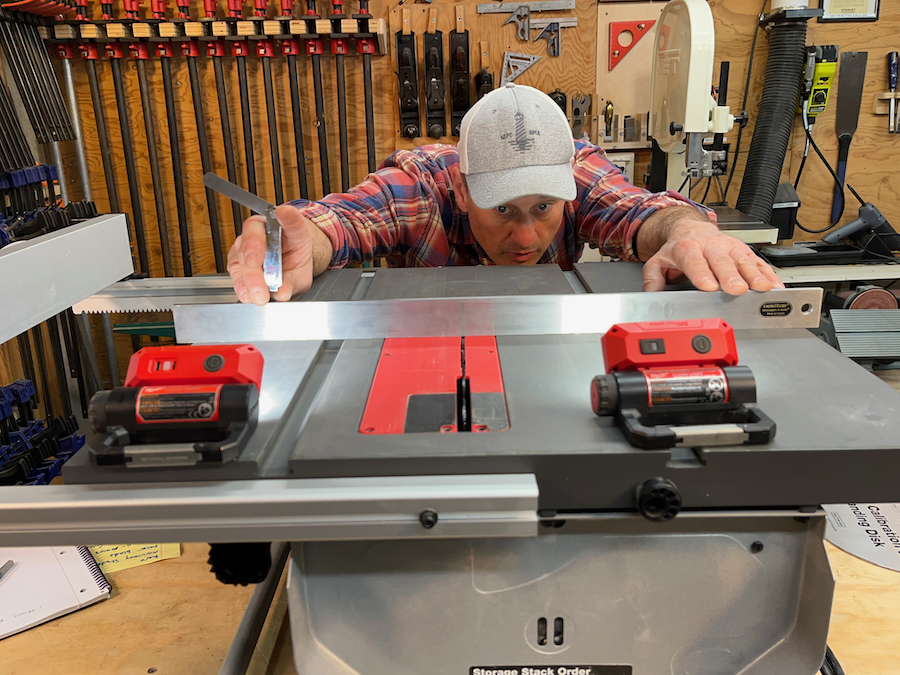
I want to point out that the SawStop CTS table saw is not a cabinet shop grade saw, it’s a compact job site saw. Some of you may build high-quality built-ins or make high-tolerance finished cuts on the job site, but this isn’t really the saw for that – no job site table saw is. I feel that if you don’t have access to a precision cabinet saw, you’d be better off using a track saw for that stuff. Either way, I wanted to see how the SawStop CTS measured up in it’s out-of-the-box accuracy.
Because accuracy equates to safety and quality, we assessed the manufactured accuracy of this saw, looking at five areas:
1. Accuracy of 45 Deg. Stop
2. Accuracy of 90 Deg. Stop
3. Blade Parallel to Miter Slot
4. Fence Parallel to Miter Slot
5. Blade Run-out
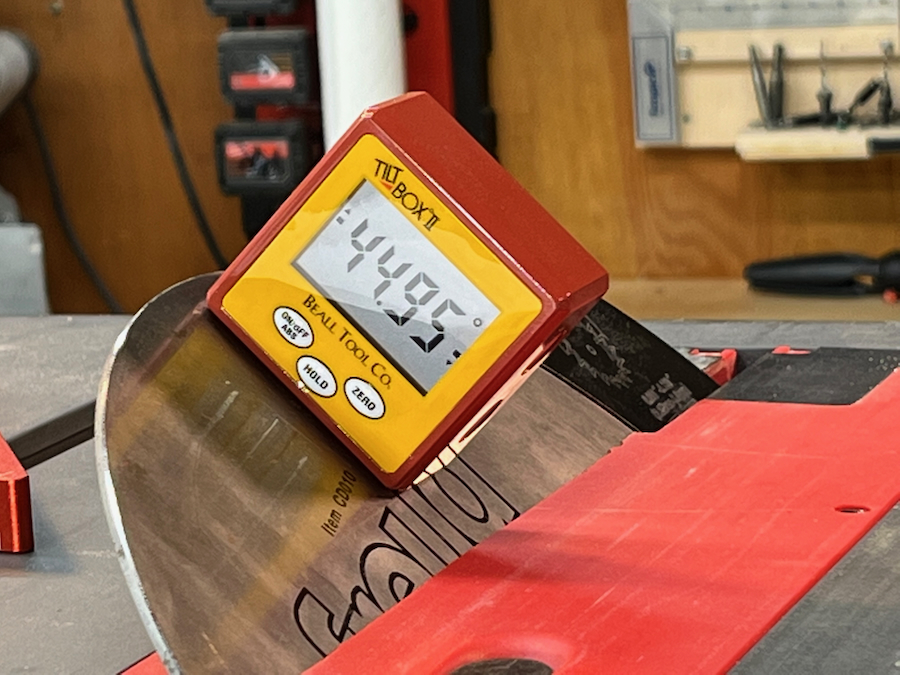
Accuracy of 45 Deg. Stop
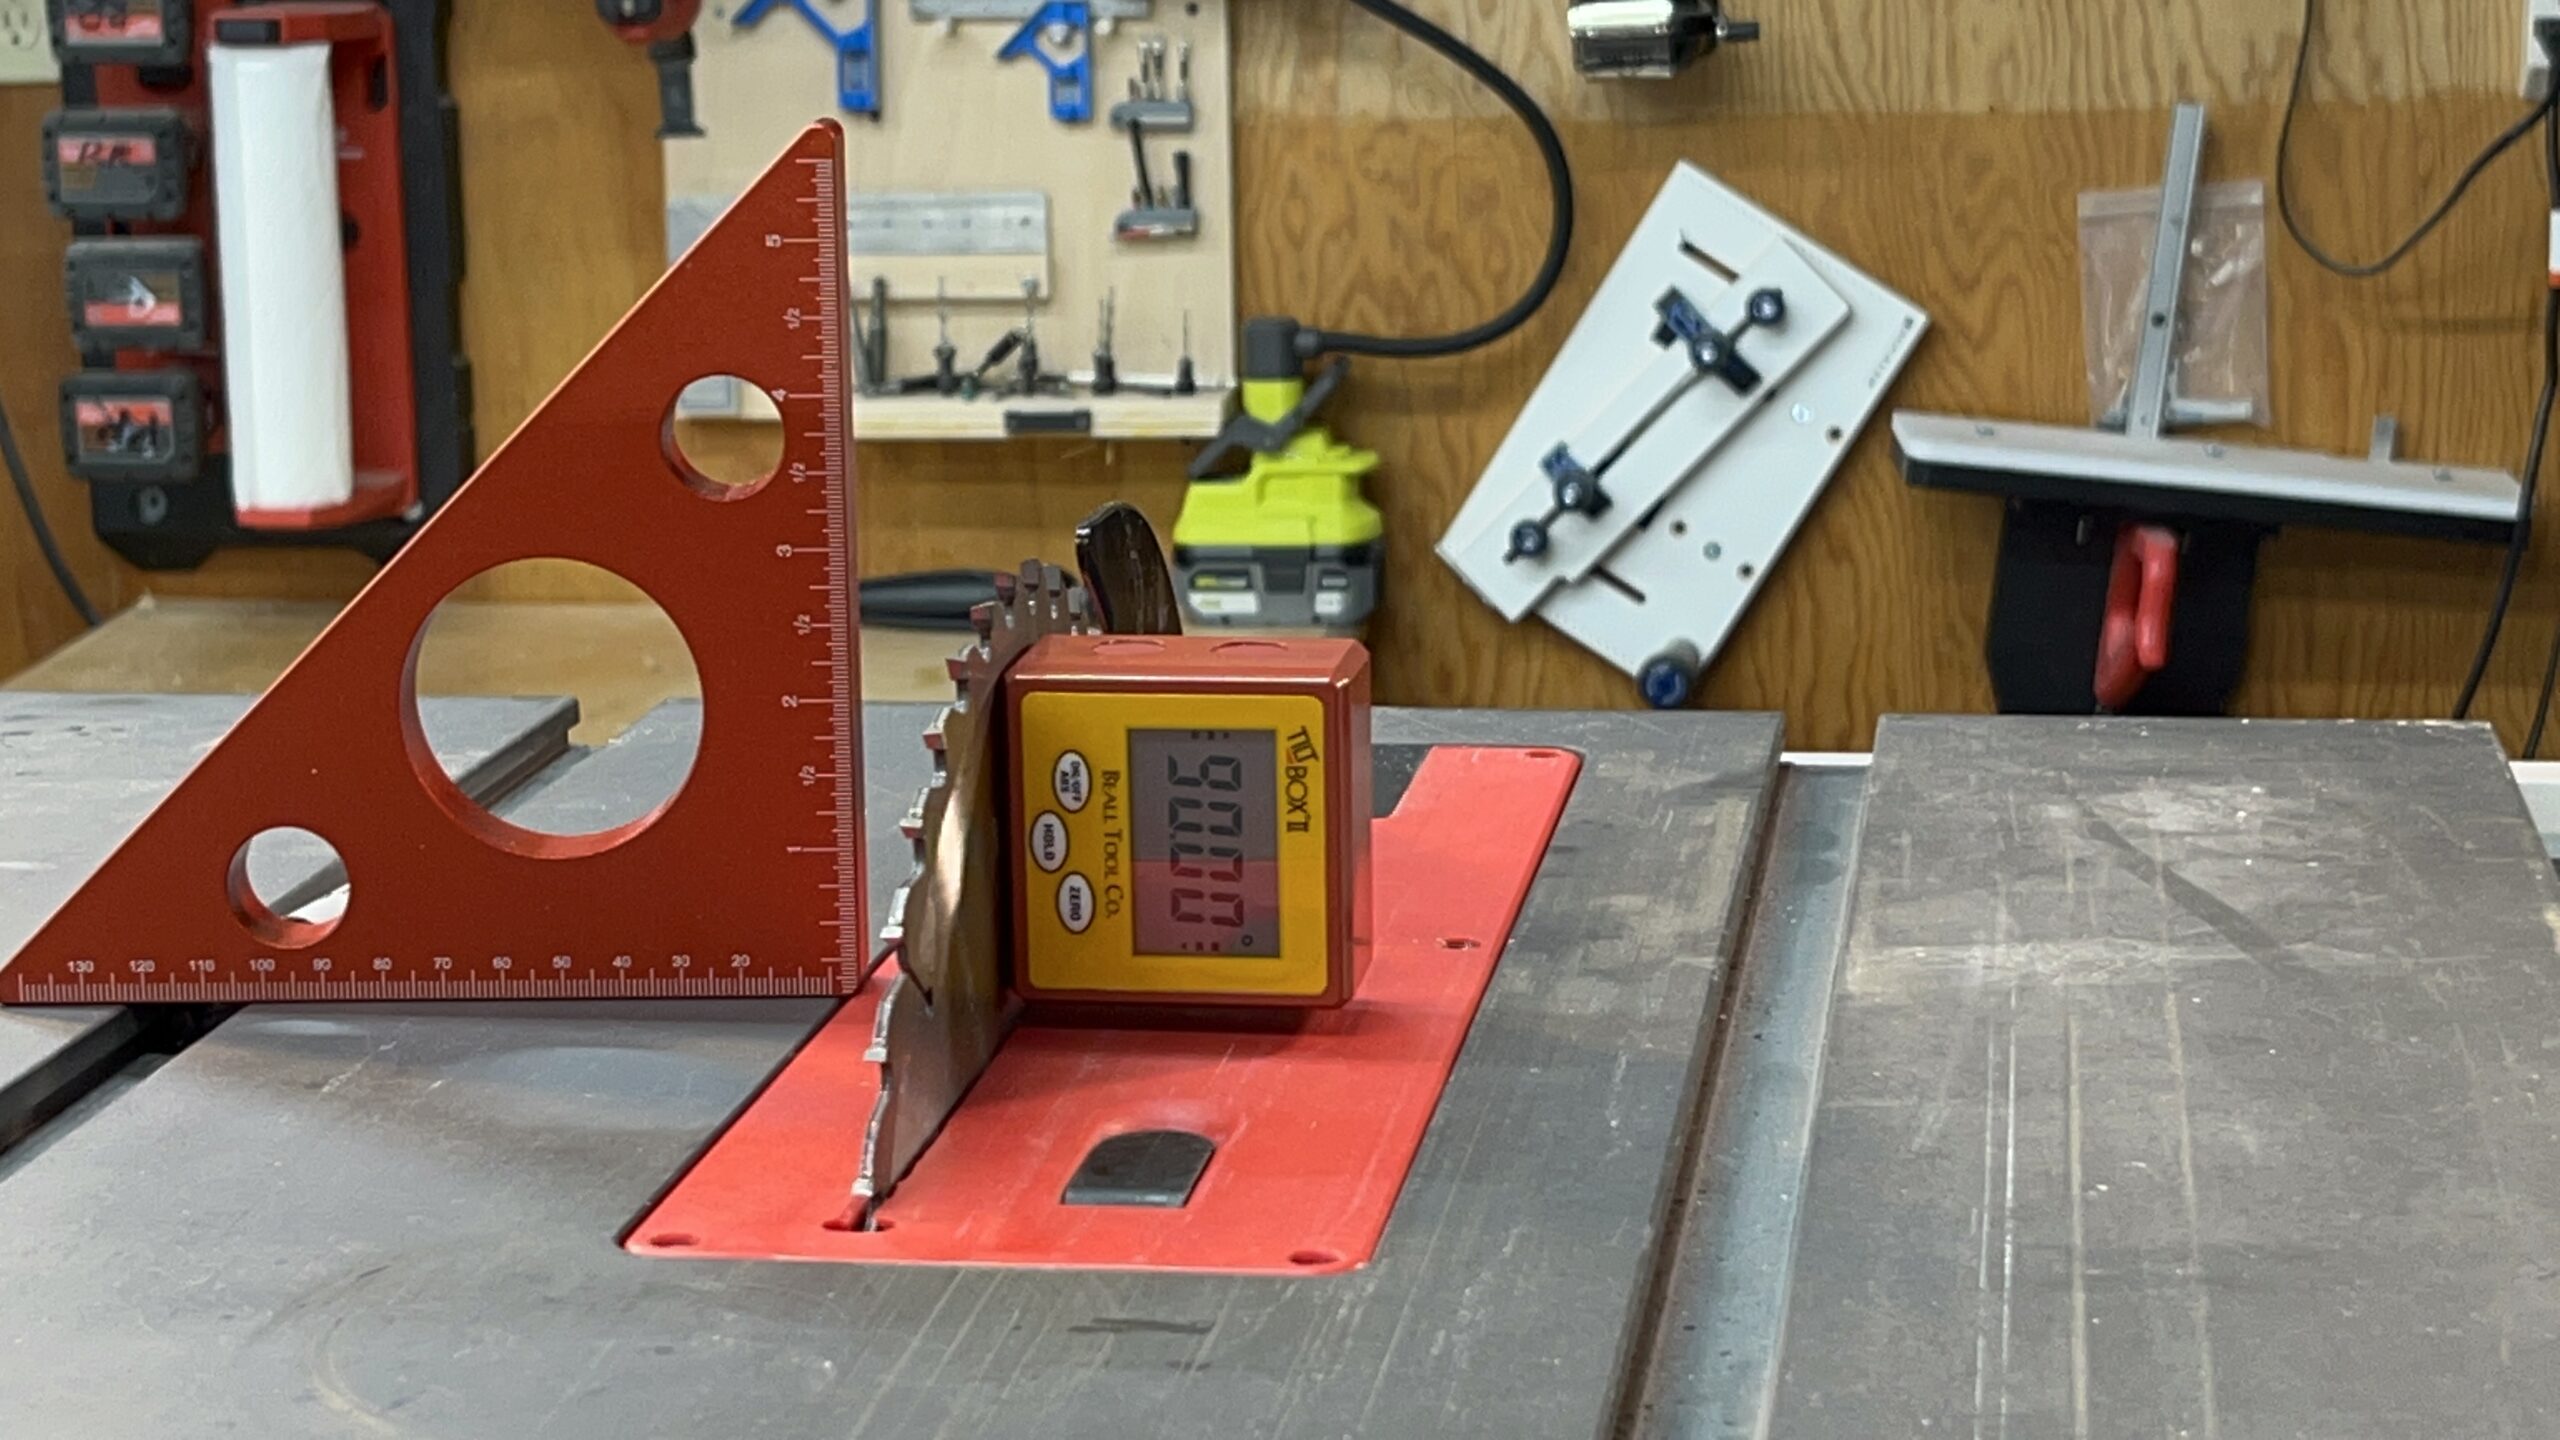
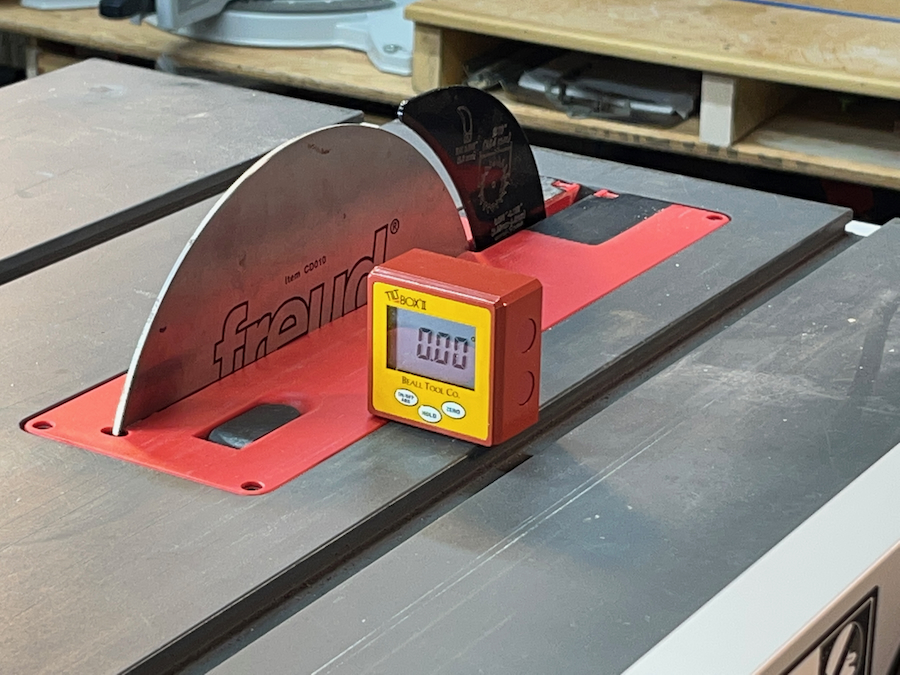
We measured the accuracy of the factory-set 45-degree stop by using a digital inclinometer with an accuracy of [zero point two] 0.2° degrees.
We placed the Wixey gauge on the table and calibrated the inclinometer to the table by zeroing out the gauge. After that calibration, the measurements shown on the gauge give a result that is relative to the saw table.
We attached the gauge to the blade and used the saw mechanism to adjust the blade incline to the point at which the blade or trunnion hit the factory-set 45-degree stop and recorded the measurement. We ran the test several times to ensure the repeatability of the measurement. In every case, the result came out to be 45.5 degrees.
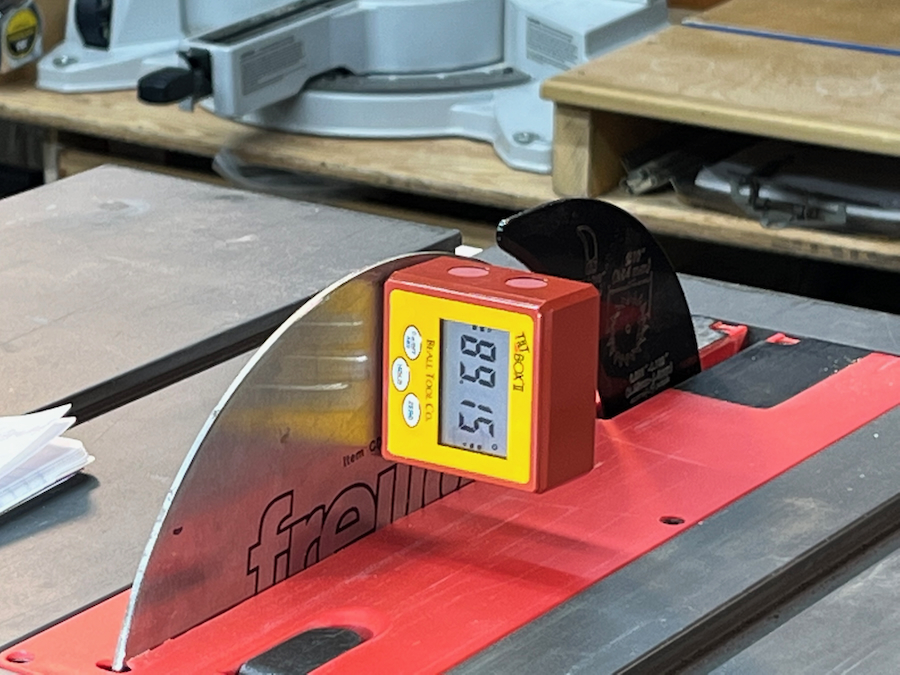
Accuracy of Vertical 90 Deg. Stop
We measured the accuracy of the factory-set 90-degree stop by using a Wixey WR365 digital inclinometer. After calibration, we used the saw mechanism to adjust the blade incline to the point at which the blade or trunnion hit the factory-set 90-degree vertical stop and recorded the measurement.
We ran the test several times to ensure the repeatability of the measurement. In every case, the result came out to be 89.20, and when we used the micro adjustment and cranked it hard we could get the saw to 89.70. We felt that most contractors won’t do that while using it, so we adjusted it.
Adjustment Results of 45 and 90 Degree Bevel
Adjusting the saw was easily accomplished with the onboard Allen wrench.
We were able to adjust the saw to a perfect 90 degrees with the red indicator needle at zero, but unfortunately, the needle when placed at 45 degrees measures 45.4 degrees, close but not perfect. I will note that the saw will move further and I will purposely move my needle to 45-1/2 degrees to achieve 45 degrees.
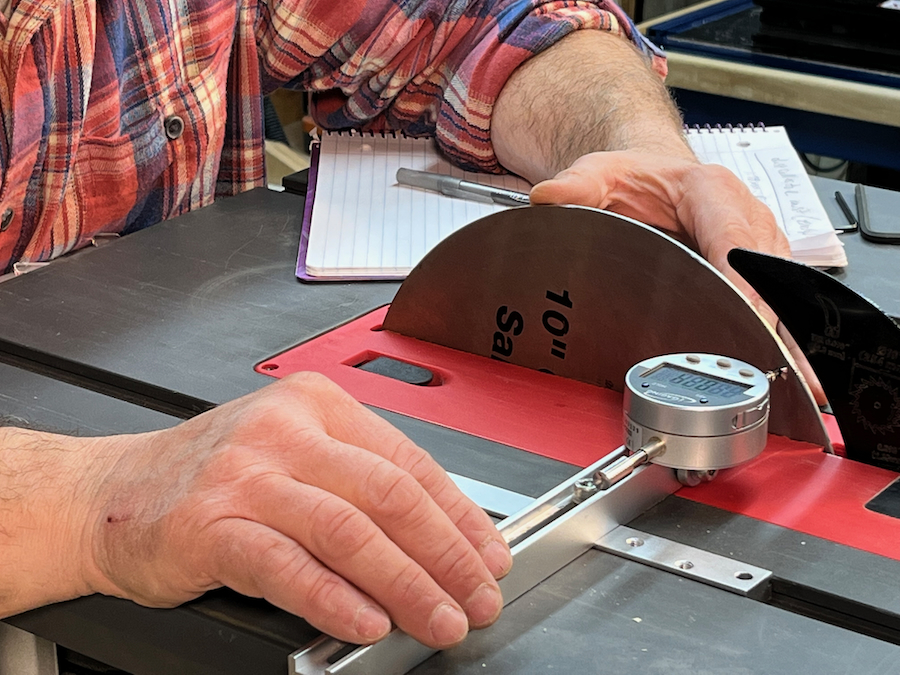
Blade Parallel to Miter Slot
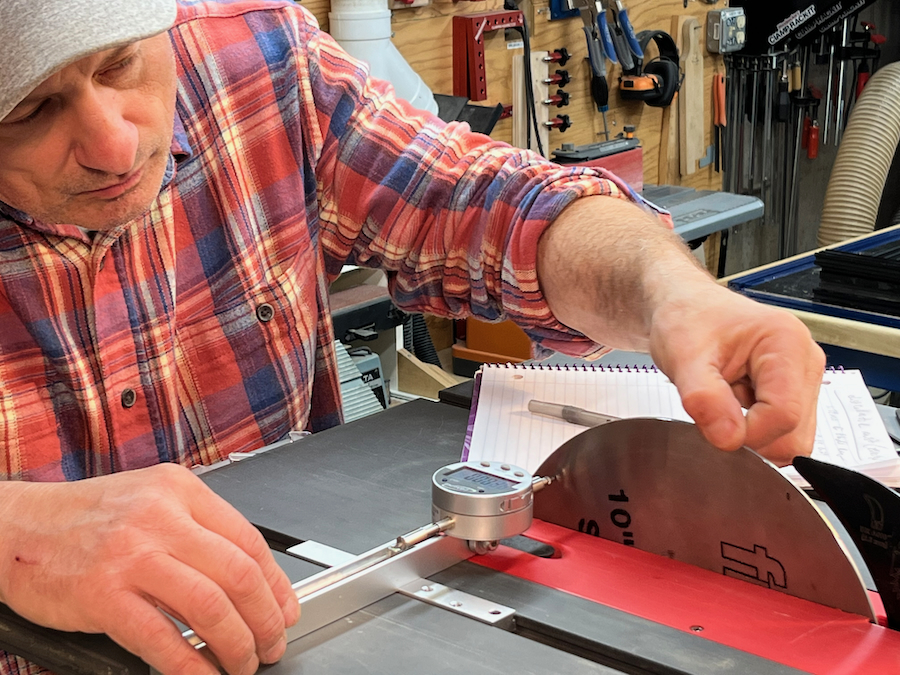
We used the iGauging 35-125-4 digital dial indicator and a Freud calibration plate to measure the accuracy of the blade position to the table miter slot. Freud manufactures this ground stainless steel plate to a tolerance of ± .0127 mm flatness across the plate.

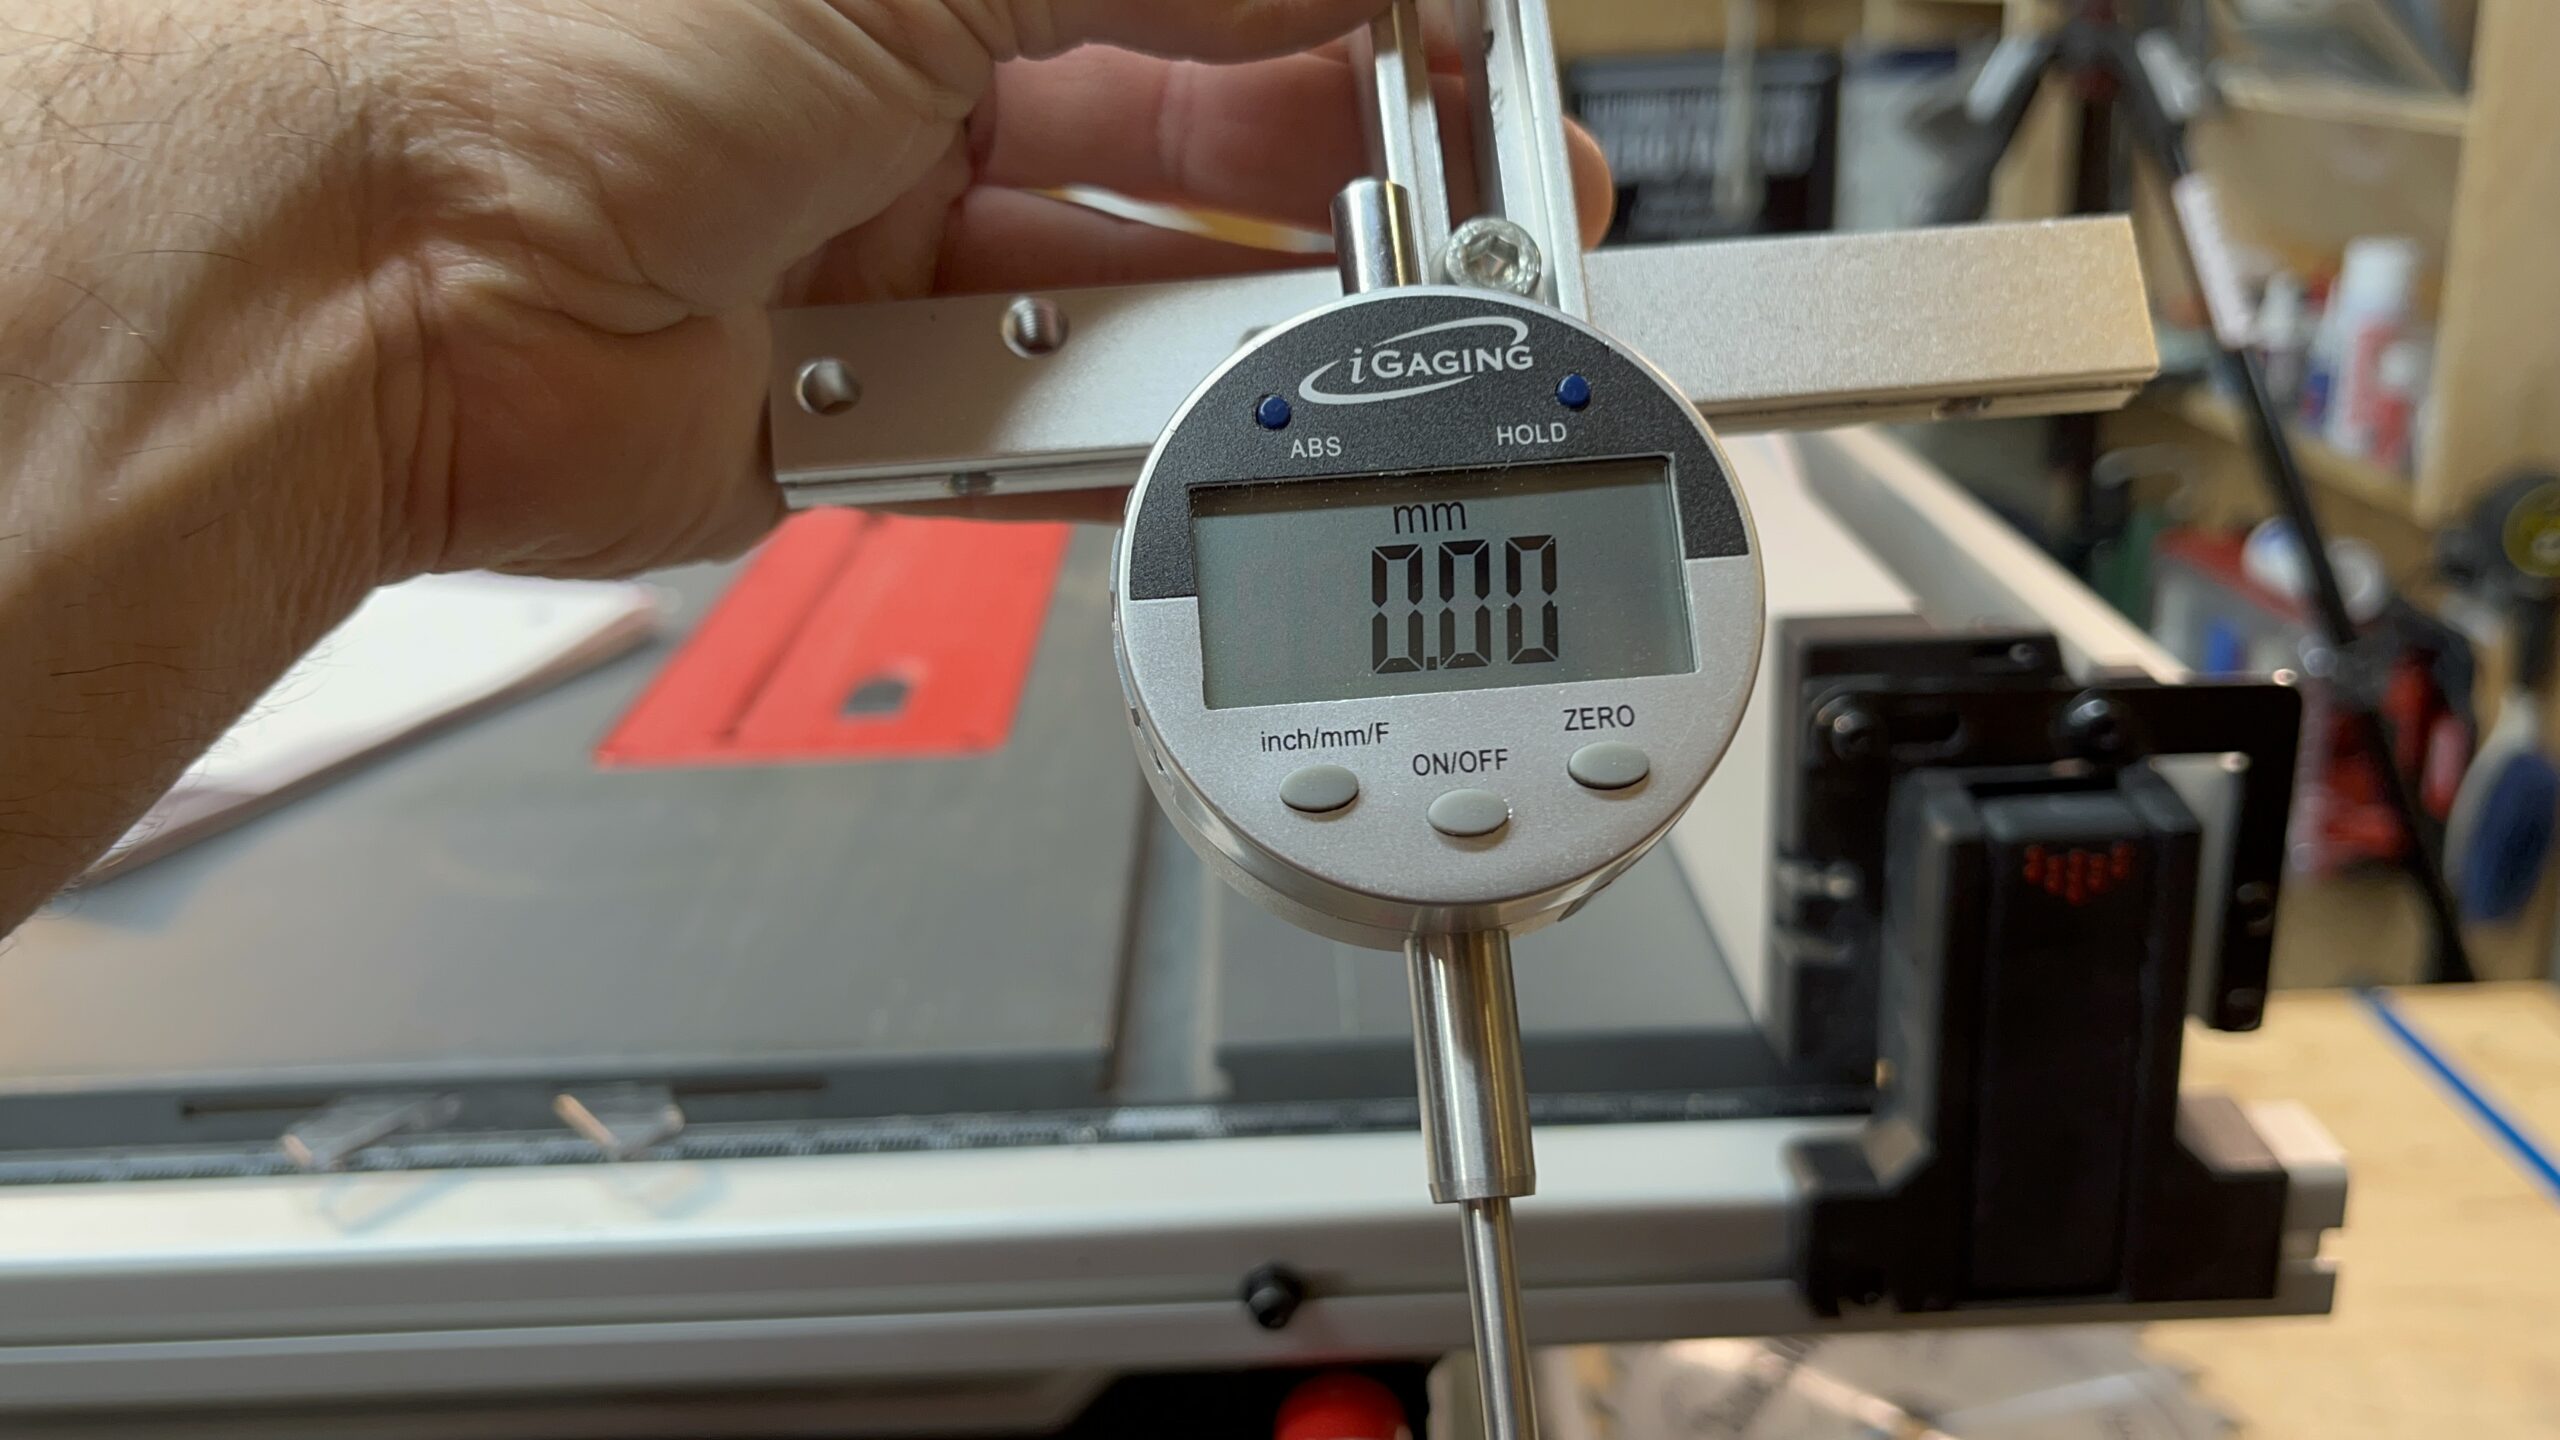
 We positioned the dial indicator to the rear and front of the calibration plate, marking the plate to ensure a consistent measuring spot. If the plate and the miter slot were closer together at the rear of the saw, the dial indicator has a negative reading. If the plate and the miter slot were farther apart at the rear of the saw, the dial indicator showed a positive reading.
The Saw stop measured 0 to 0.19 mm out of parallel to the miter slot. Compare that measurement to a sheet of paper which is approximately 0.10 mm thick. That’s an acceptable tolerance in anyone’s book.
Saw Fence Parallel to Miter Slot
The accuracy and safety of any given saw are dependent upon the blade being parallel to the rip fence. If the fence is at all out of alignment, it can result in burning on your workpiece, binding, pinching, or even dangerous kickback.
Since we tested the amount of difference in parallelism between the saw blade and the miter slot in the previous test, we need only to see if the miter slot is parallel to the rip fence to see if the saw has a parallel relationship between the blade and the rip fence.
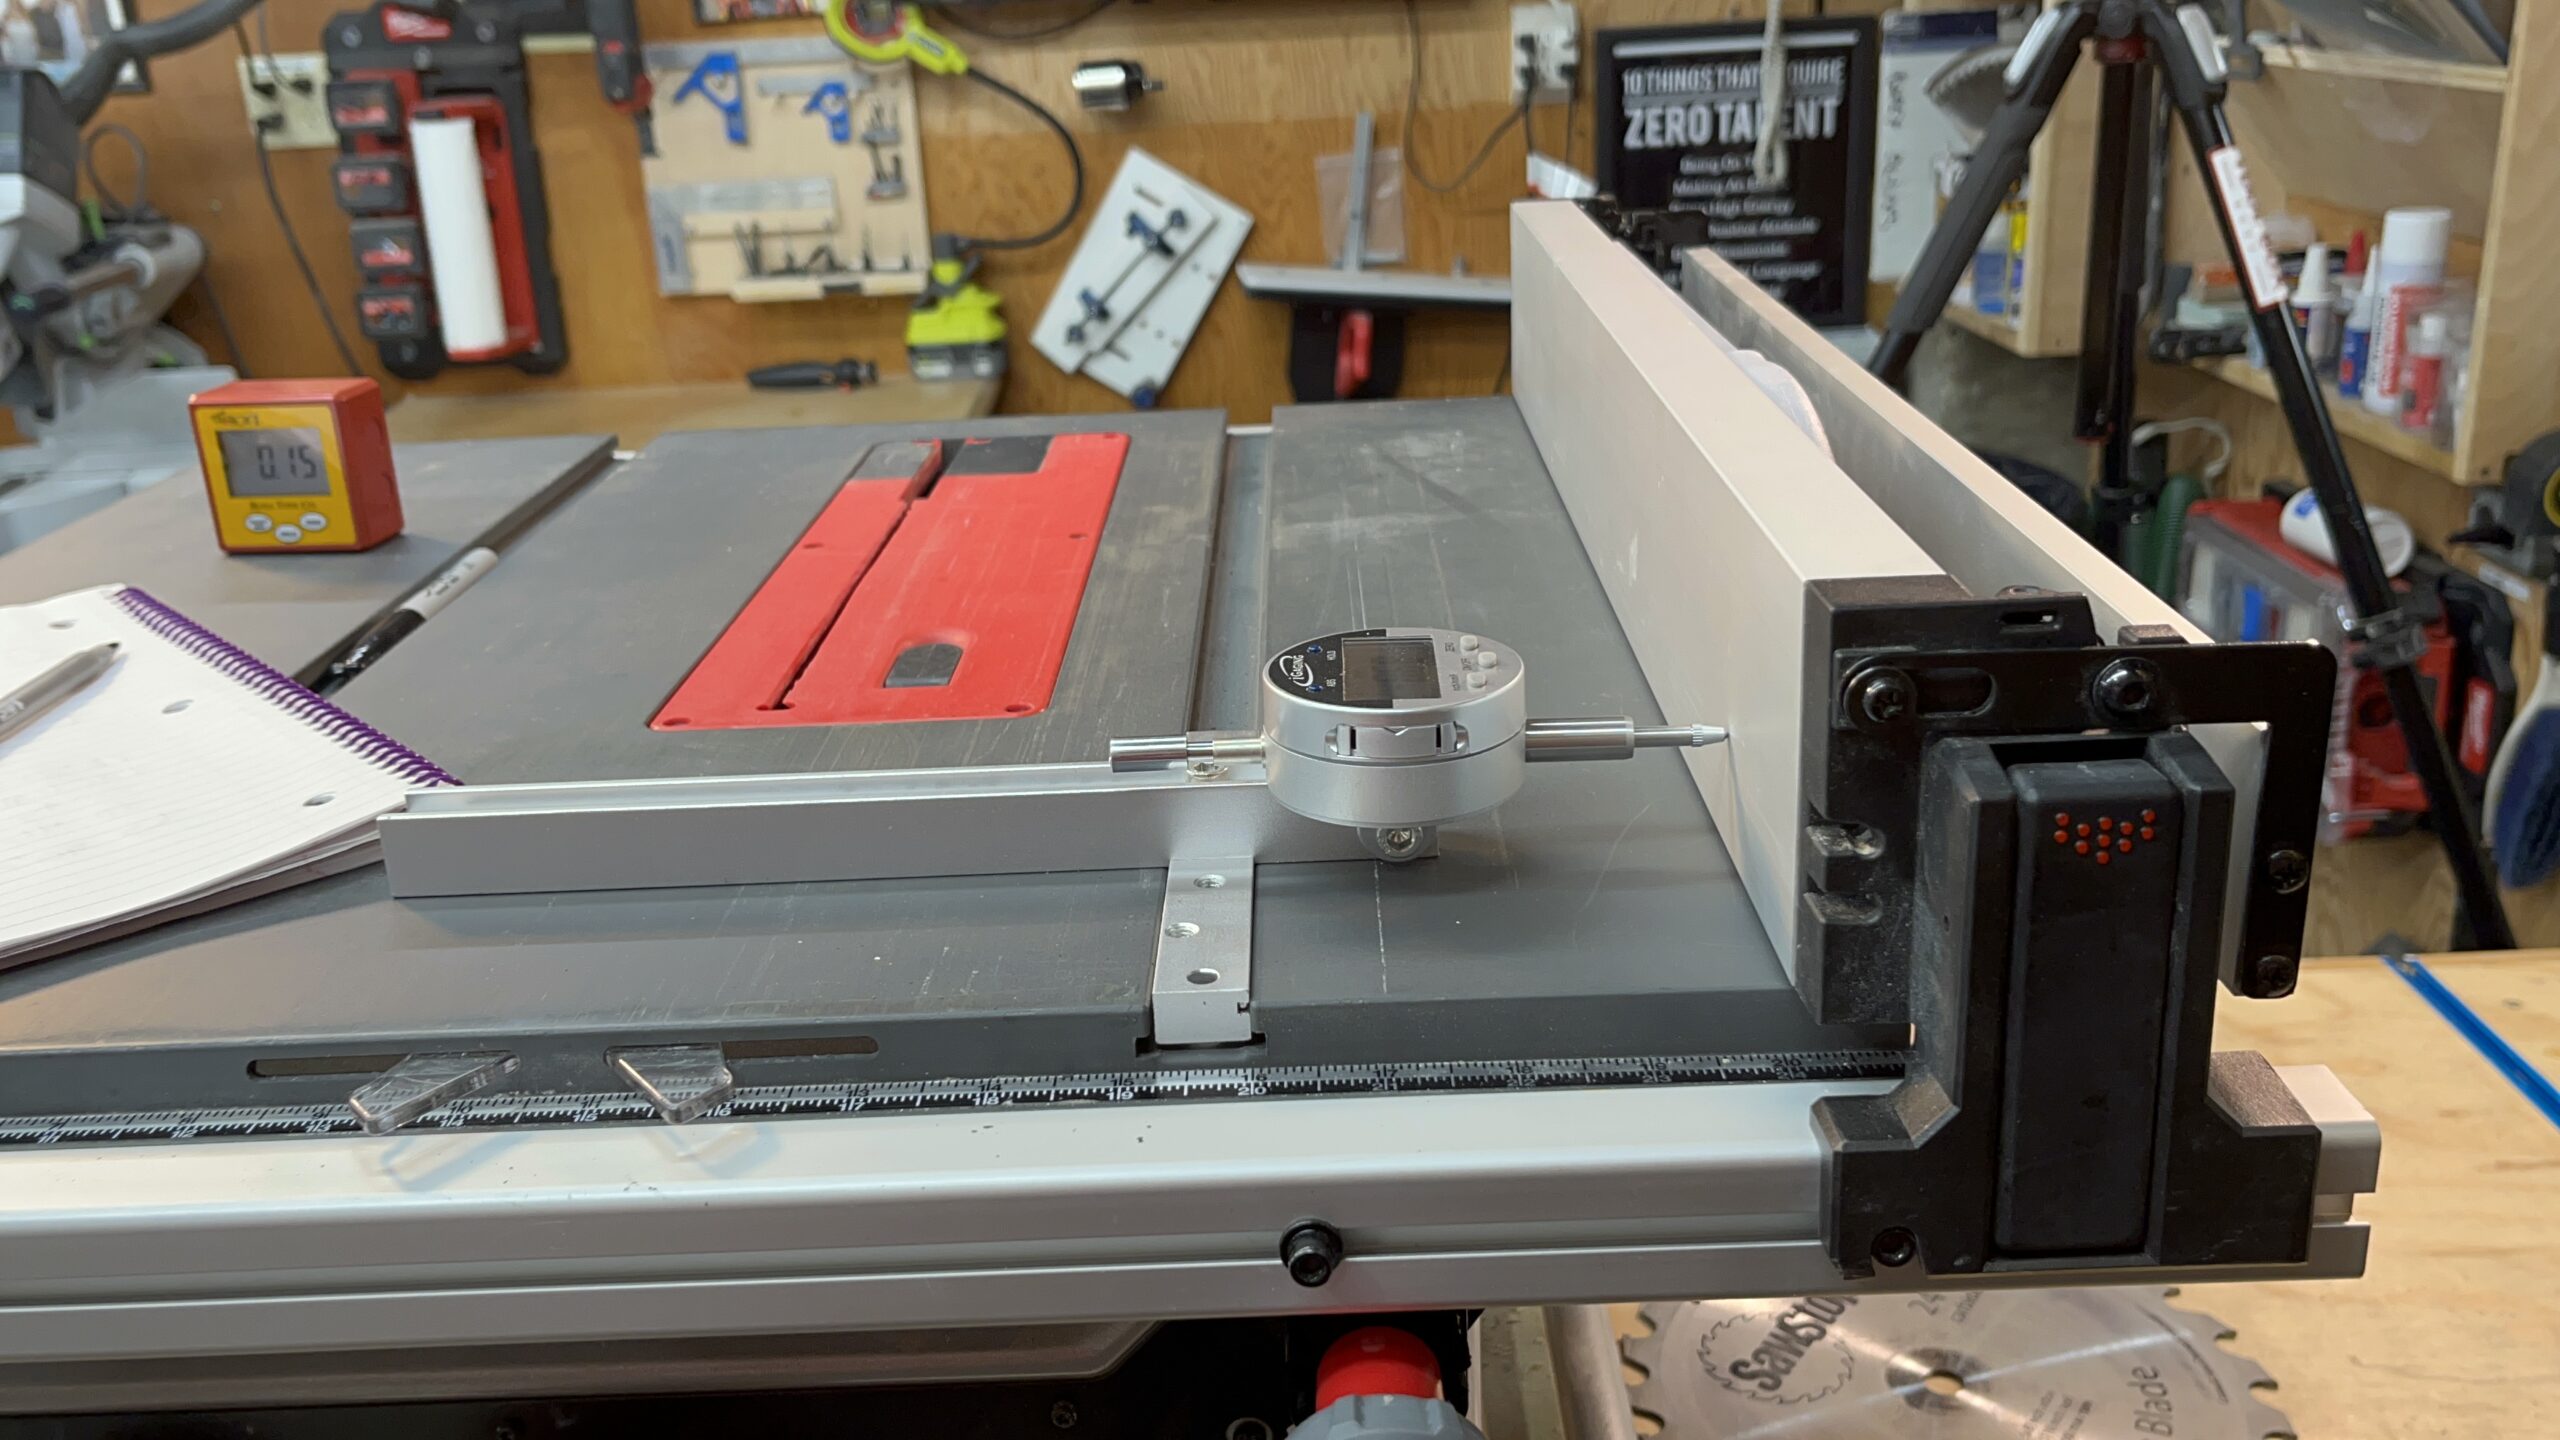
Reusing the same iGauging 35-125-4 digital dial indicator to measure the accuracy of the as-delivered factory fence to the table miter slot.
We calibrated the iGauging dial indicator to a zero reading at the operator’s end of the rip fence so that we started out with a reading of zero. Next, we positioned the dial indicator to the rear of the saw placed onto the rip fence and took the reading.
If the fence and the miter slot were closer together at the rear of the saw, the dial indicator has a negative reading. If the blade and the miter slot were farther apart at the rear of the saw, the dial indicator showed a positive reading. A negative reading meant that the materials being cut might be subject to being pinched and a kickback is more likely to occur.
Remembering that a sheet of paper is approximately 0.1 mm thick, the SawStop measured 0 mm at the front to -0.17 mm at the rear of the fence. Not bad but I adjusted the fence to parallel.
Blade Run-out
One term you may hear when reading about table saw accuracy is blade run-out. Run-out is a term that describes whether or how much the outside edge of a saw blade wobbles.
Sometimes, operators measure run-out by using a saw blade. In that case, the very use of a saw blade presumes that the specific blade is perfect or nearly perfect in its flatness. Using a saw blade that has any warping will not give a clear indication of blade run-out.
We used the Freud calibration plate to measure run-out. With the trunnion raised to its maximum vertical adjustment. Before measuring the run-out, we placed a black mark on the calibration plate to give a consistent starting position for the run-out test.
We placed the dial indicator on the starting position of the calibration disk and calibrated that position on the dial indicator to a reading of zero. We were very careful to rotate the calibration plate by using the outside rim so as not to impart any side-to-side force on the plate that might introduce errors in the measurements.
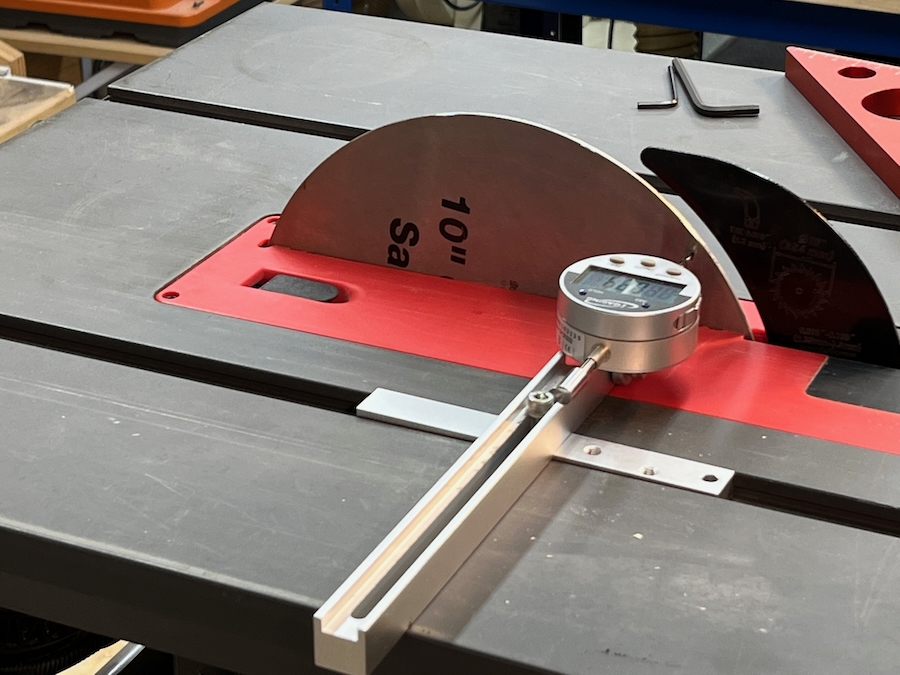
While we rotated the plate, we recorded the maximum reading on the dial indicator. We validated the maximum reading by running the test for a second time and noting that the readings were consistent. We also noted that as we performed this test, the maximum readings occurred at different parts of the plate along its rotation. The maximum reading was -0.008 mm.
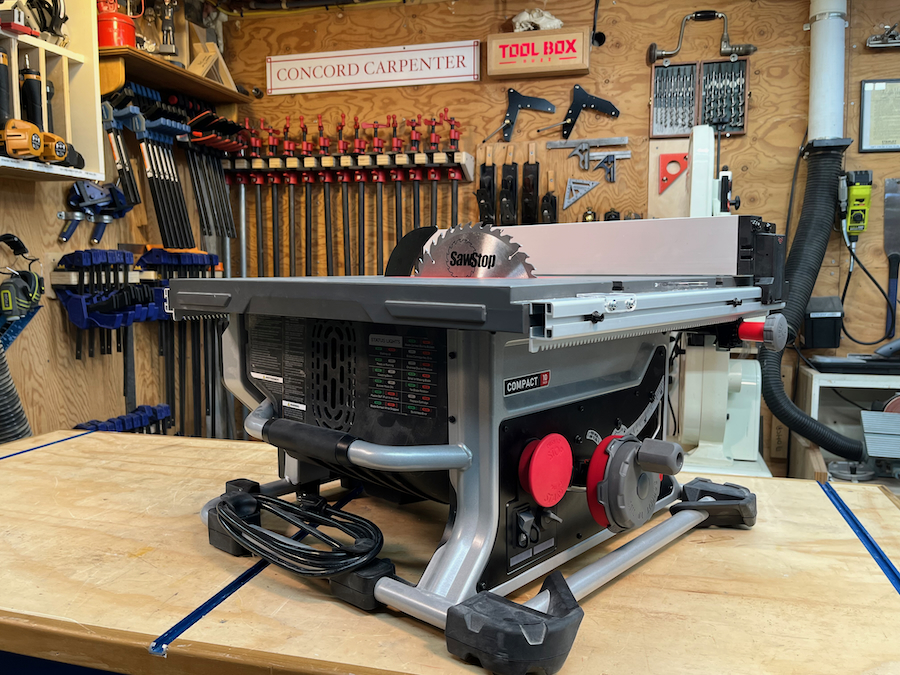
Using the SawStop Compact Table Saw
There are several features that I immediately liked, the first was the rack & pinion fence. This fence operates with a unique pull-to-unlock and push-to-lock mechanism. This is completely different from anything I’ve experienced in my 33 years as a carpenter and took some getting used to.
Rip Fence Adjustments
This fence is easy to adjust and reliably square, I liked the push stick attachment design on the fence. The push stick indexes on a fixed peg, which is different, but more secure than most of the table saws I’ve used.
The fence can mount to 3 sets of adjustable mounting lugs and adjusted with a 4 mm hex-key wrench.
The fence has an auxiliary fence or what SawStop calls a low fence. This low fence stores on the rear of the main rip fence and rotates over to provide two different functions:
- The lowest position provides a shelf for material support for ripping wide materials when the fence is extended beyond the table saw top.
- The higher position rests on the tabletop and allows for narrow rips and the use of the push stick when the saw has the blade guard attached. A nice safety feature!
Rip Fence Extension |Accuracy
Lots of folks have been commenting online on how the fence can be lifted up and down. This is something that is common on many saws, and in my opinion, is a non-issue.
If the lower fence holds its position at the bottom position, that’s all that matters. The bottom position is important and needs to hold the weight of a board on it. This bottom position should be in the same plane as the tabletop.
We used a level to compare the tabletop to the fence shelf height, while fully extended to 24-1/2 inches.
We noted that the SawStop CTS table saw rip fence shelf [out of the box] was indexing ¼-inch below the tabletop and needed to be leveled.
NOTE:
SawStop has a service document that addresses this issue and it’s called the CTS Puck Adjustment Procedure.
We performed the puck procedure and were able to obtain a perfect straight-line alignment between the tabletop and rip fence shelf. I will note that this adjustment does stiffen the rack and pinion action of the fence, a little silicone applied to the inside slots of the fence rails alleviate this issue.
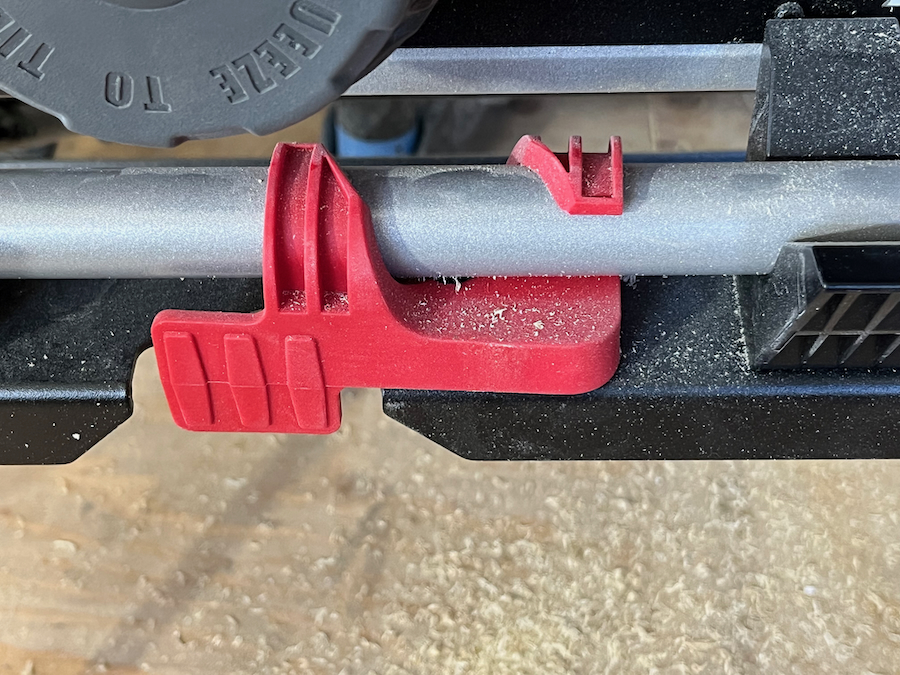
Rip Fence Storage
The rip fence storage is under the table. To release the fence, you simply push the “red dot” area on the end latches. The latches pull out and the fence can be quickly and easily relocated on another set of adjustable fence lugs or stowed under the table. We noted that the CTS latch system is nicer to use than the DEWALT and Milwaukee fence systems.
Integrated Blade Control | Raising and Beveling the Blade
Another feature that was different, but one that I really like was the blade elevation and quick-tilt bevel feature. The blade elevates fast and easily – not much more to say about that other than this wheel rotates clockwise to raise the blade and counterclockwise to lower it.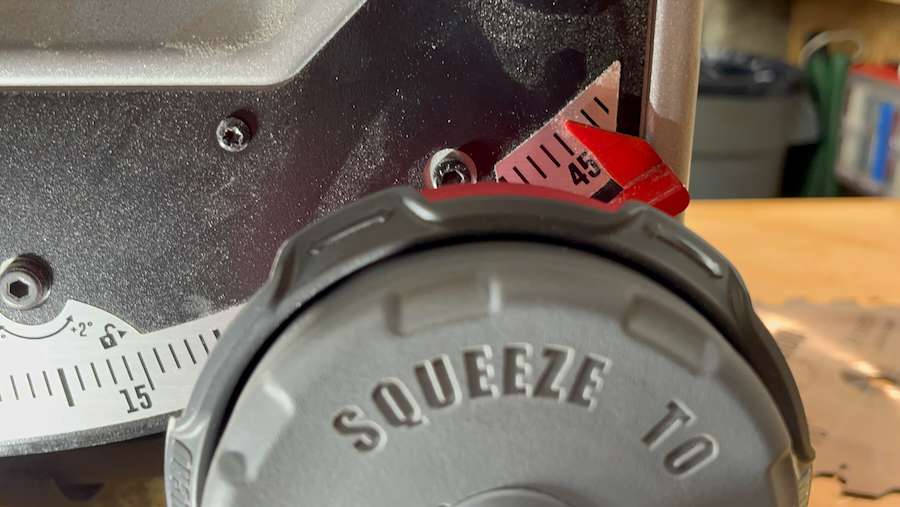
Behind the elevation, the wheel is the bevel adjustment knob. Now, this is a slick detail on the SawStop CTS saw. The bevel control knob is spring-loaded control, activated with a quick squeeze and hold. Once activated the bevel control will unlock and you can slide the bevel manually or release it and rotate the wheel for micro-adjustment to dial in a precise bevel angle. Once satisfied with your bevel, push the bevel control to lock the bevel in place.

Zero Clearance Insert
This saw comes with a bright red zero clearance insert that is pre-cut at the factory. When compared to other job site saws with wide open plates, these zero clearances maximize the support you’ll have with narrow cuts, reducing the risk of a kickback. A simple, easy-to-miss, if you’re not looking, safety feature.
Removal of the insert is easily accomplished by listing a spring-loaded lever and sliding it toward you.

On-Board Storage Compartment
A storage compartment in the rear of the saw holds the blade wrenches, a spare cartridge, accessories like the miter gauge, and anti-kickback pawls. I like that this compartment has everything in one location.
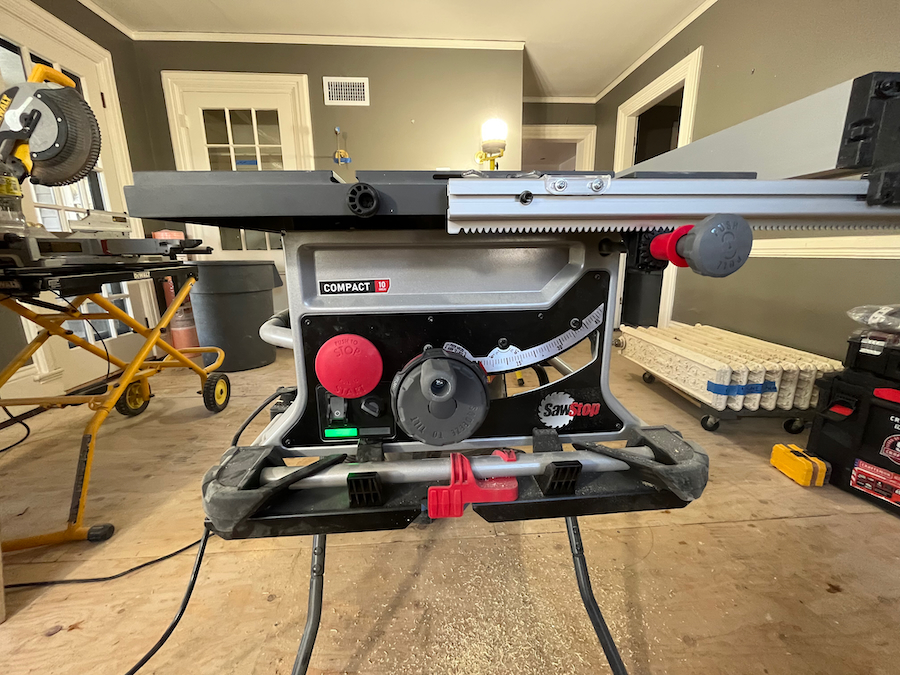
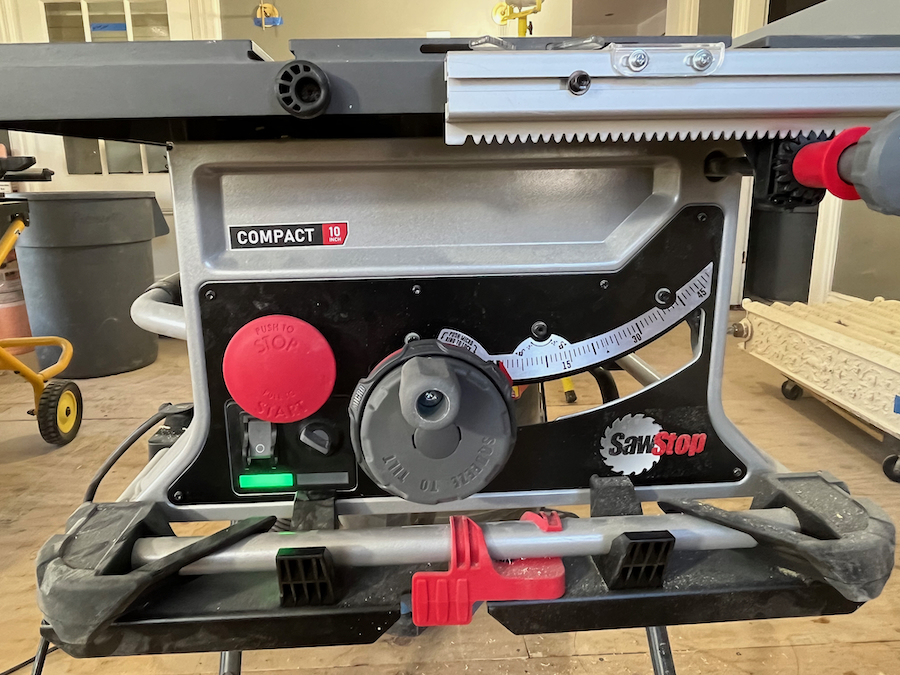
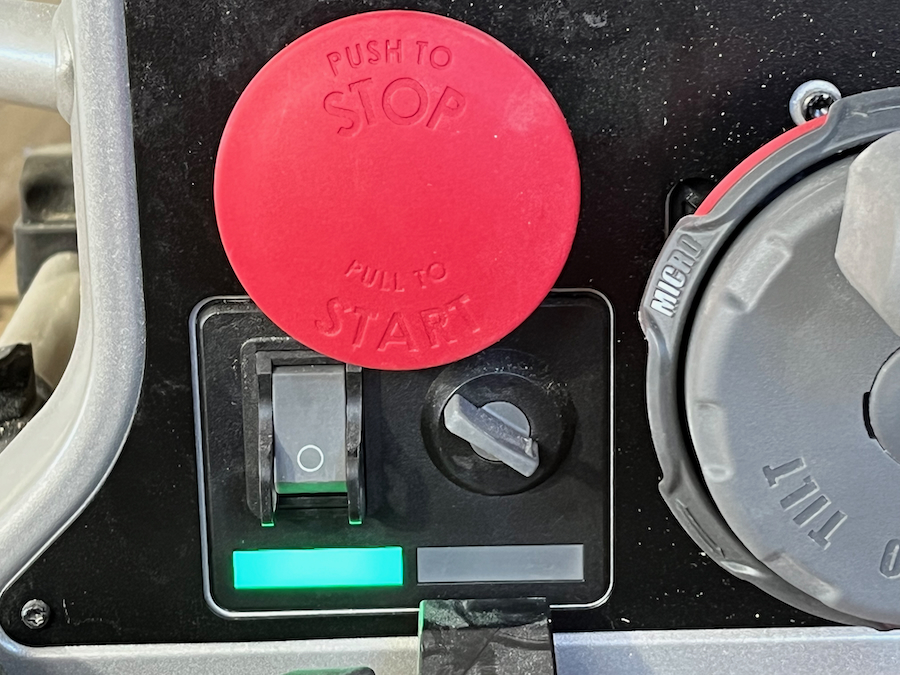
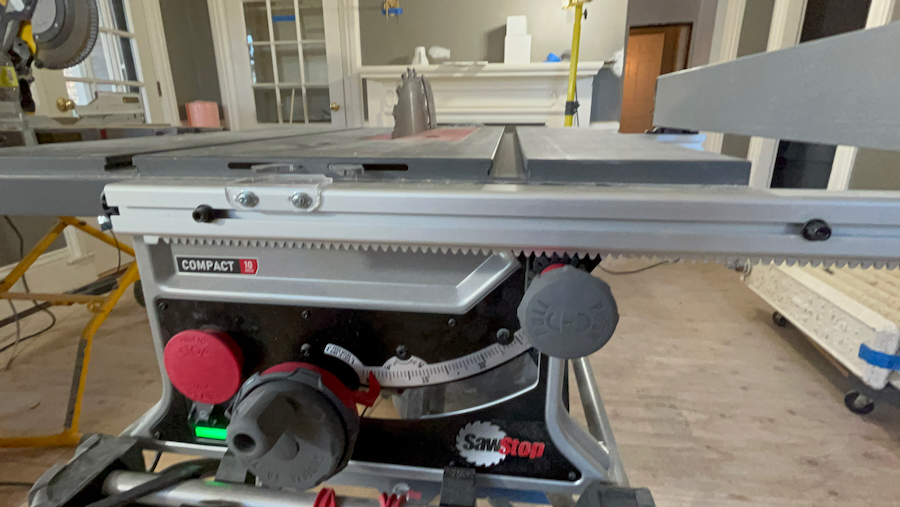
Power Controls
The SawStop CTS table saw power control switch can be confusing at first glance. There is a power switch that controls the electronics for the saw, and then a larger start/stop paddle. In between the two switches are green and red LED indicator lights.
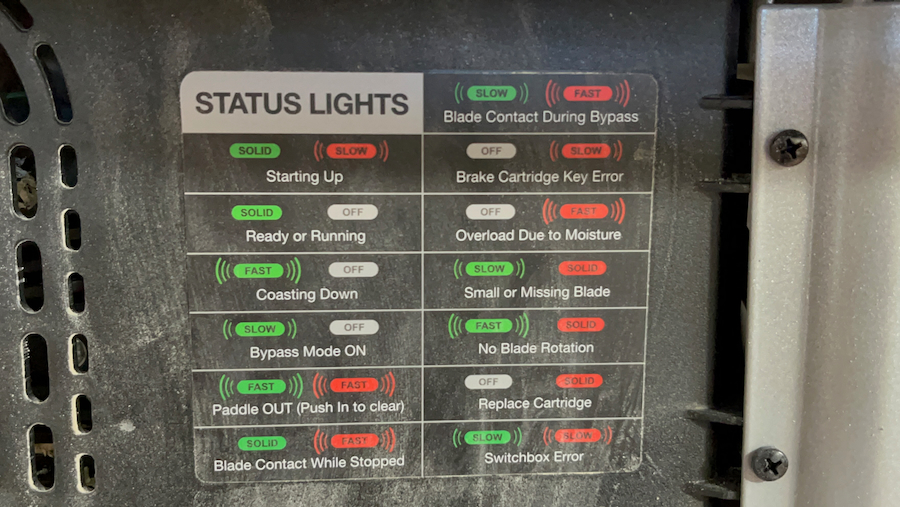
The LED indicator lights provide up to 12 different conditions, and a quick reference, all weather label is attached to the side of the saw, near the switch for quick reference.
Status Lights and Codes
The green and red LED lights under the power switch provide feedback on the saw’s status.
The lights function independently or in a combination with each other depending on the saw’s status. Either light can flash slowly, fast, or be lit continuously. The red light can flash once indicating the saw is in bypass mode. Basically, there are 12 different status situations.
This is where I think SawStop could improve the design for users. While they provide a label with all the possible light status conditions, it’s confusing and not intuitive.
I’d like to see subsequent SawStop saws simply have a display screen that shows the saw’s status using words. For example, “Replace Cartridge.” With today’s technology, how hard could that be?
 Flesh Sensing Feature | Testing
We did not test the flesh-sensing feature in this review. SawStop’s flesh sensing technology is well documented, and they have proven to reduce injuries. If you’d like to see this feature in action check out SawStop JSS saw review.
Avoiding Non-Flesh Activations | Bypass mode
The bypass mode on this saw is used when cutting conductive materials that can activate the AIM system. It disables the safety system so you can cut conductive materials. We did not test these non-flesh conditions because it’s been proven by SawStop, us and others. We tested many of them on our previous review of this saw’s JSS bigger brother. [link below]
SawStop Jobsite Table Saw JSS Review
Some examples of these non-flesh activation materials are:
• Green or wet wood
• Wet pressure-treated wood
• Very wet plywood or sheet stock
• Aluminum or other metals
• Carbon-filled materials
• Foil materials
• Saw fence contacting the saw blade
Testing Conductivity of Material
If you suspect that the material you want to cut may activate the brake cartridge, then you can utilize the bypass mode to test the conductivity of the material. The saw is put into bypass mode after cutting the questionable material if the RED light is flashing fast, then the material is too wet or green to cut. If this happens, you will want to keep the saw in bypass mode to finish cutting this material
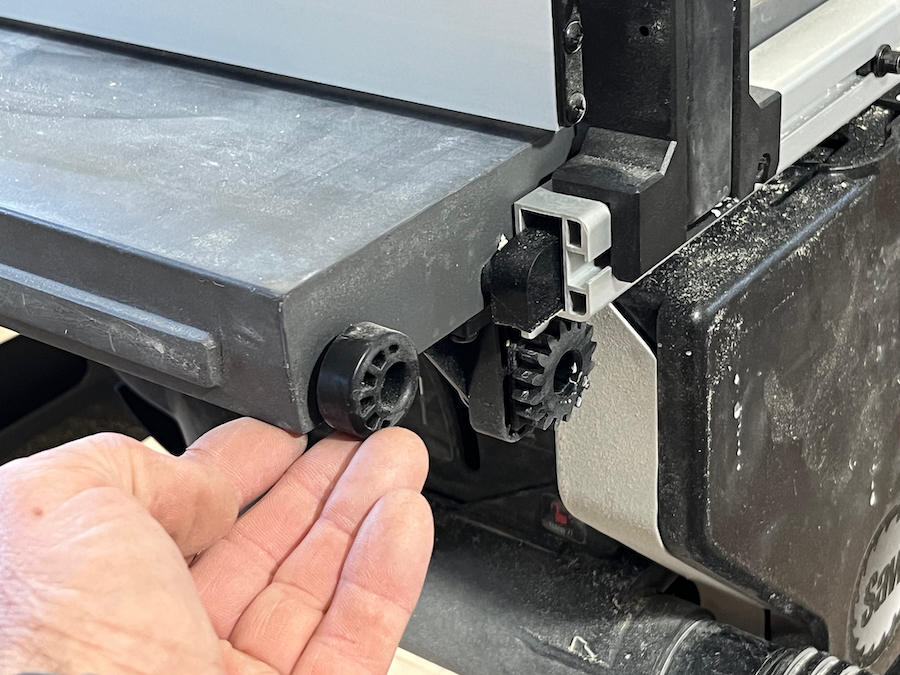
Leveling Foot
One cool feature, that can easily be missed, is the leveling foot, which is located on the base of the saw, not the folding stand. This leveling foot is designed if using the saw on a tabletop or flat surface and is not used when the saw is on the stand.
SawStop CTS | Folding Stand
The stand is durable and easy to set up. It has two red clips that rotate open to allow the saw to be placed on the stand and then rotate over the saw frame and lock the saw down.
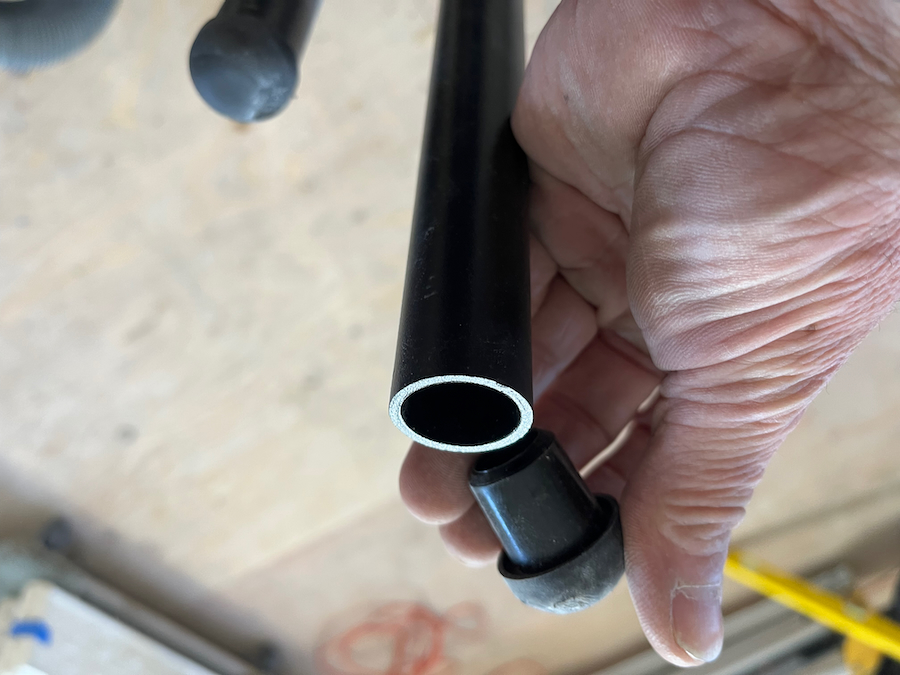
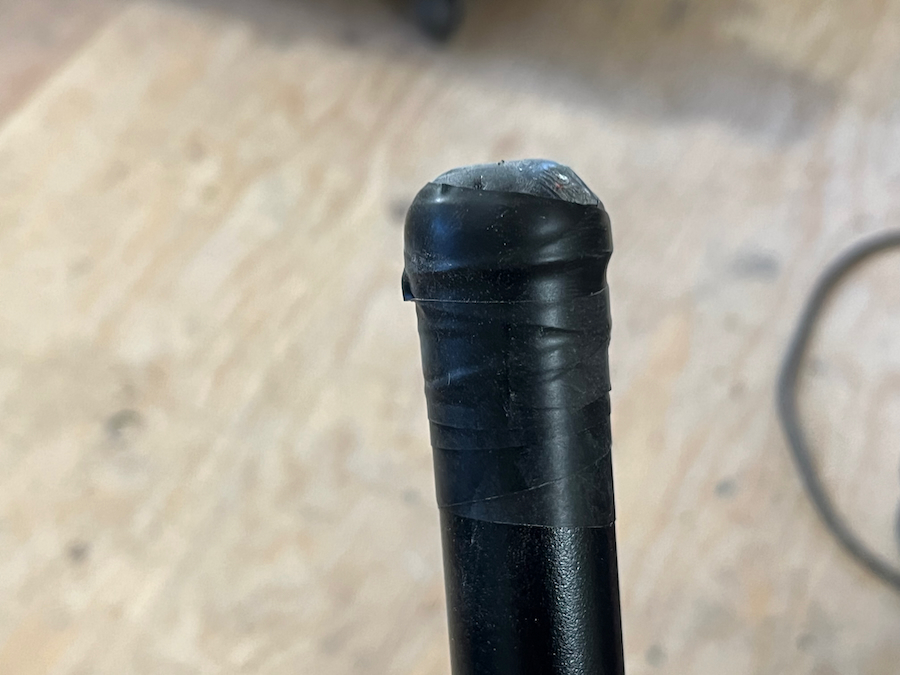
One thing I did notice was that when taking the saw out of the van on a project the stand slid on the van floor and one of the leg caps fell out. This is a common issue with all stands – and I addressed it like the others. I placed electrical tape on all the caps to prevent them from being lost.
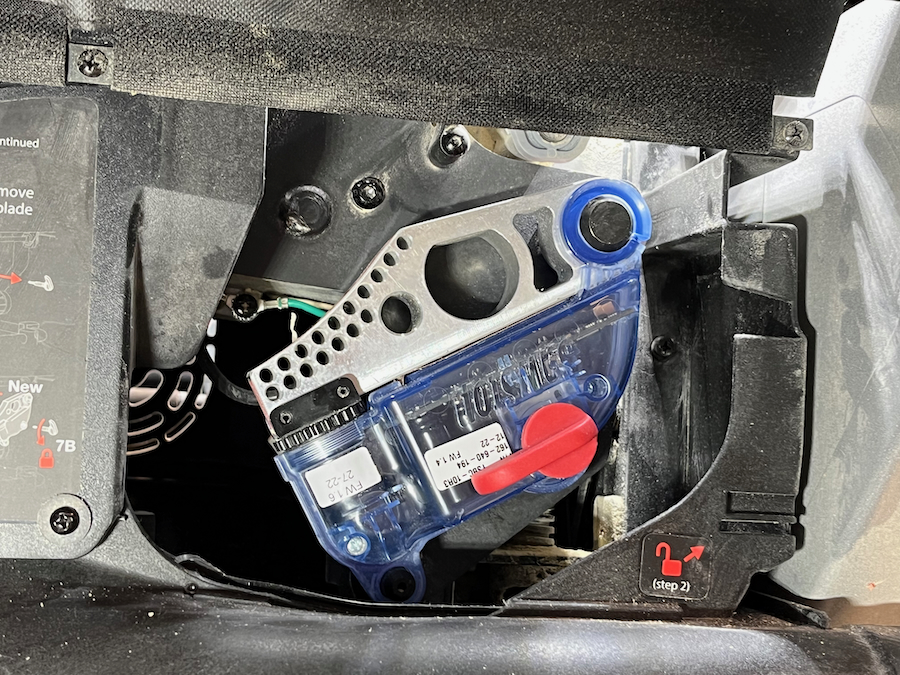
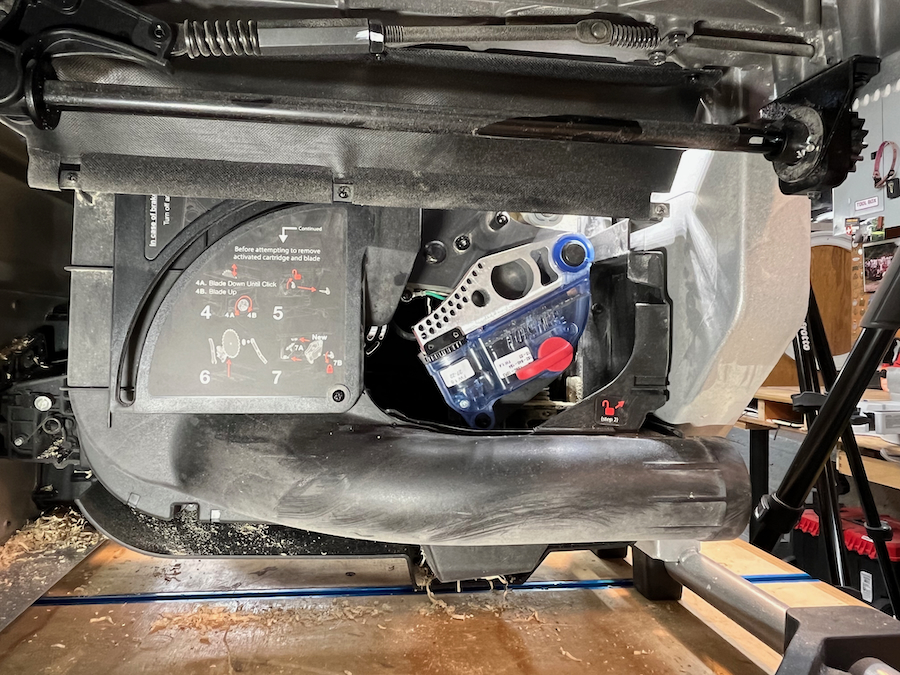
Blade, Riving Knife, and Brake Cartridge
The blade change process is accomplished with the two onboard wrenches in the rear of the saw.
The saw guard, and separate riving knife remove with a flip of a lever. The aluminum brake cartridge easily removes with a removable lever pin.
SawStop CTS Table Saw | Room For Improvement
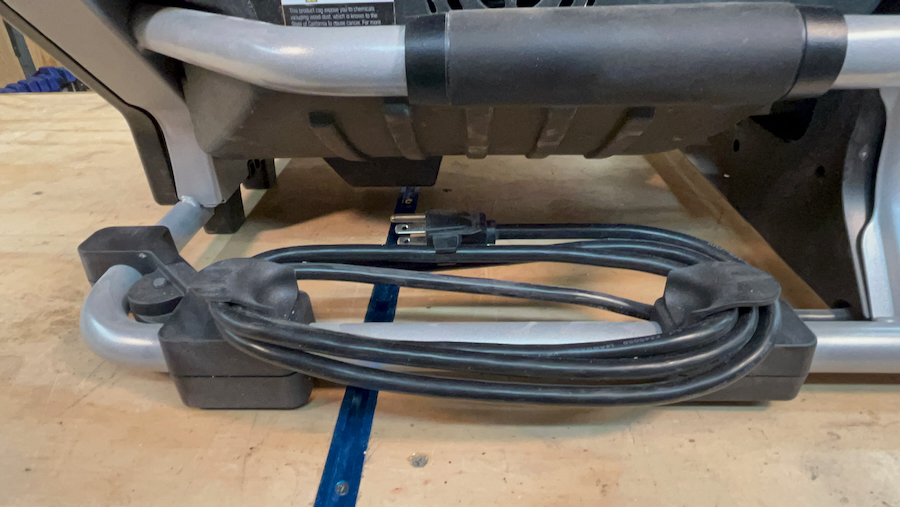
This saw is great but if I could offer two points of improvement it would be for SawStop to make the status lights and codes show on a lettered display screen. The other improvement would be to make the power cord length longer.
SawStop CTS Table Saw | Cost
The SawStop CTS-120A60 sells for approximately $899.00, a new brake cartridge, model# TSBC-10R3 $95.00 and the folding stand model# CTS-FS $129.00.
All three items are available at Acme Tools, I’ll put a link in the description below.
Overall Impression
The trade-off for many contractors who recently went to cordless table saws is cordless, size, and weight vs flesh sensing protection. There is no argument that the SawStop CTS table saw is corded, bigger, and heavier. You’re buying this machine first for the protection it offers, and second for the quality of the tools build. The SawStop CTS compact table saw is well built with precision fit and finish, resulting in a very smooth and easy-to-operate saw.
The biggest takeaway is that SawStop is now making a more compact job site saw for under 1,000 bucks. Yup that’s a lot of money compared to other corded table saws out there, but you just need to talk to one contractor who has had a table saw injury claim and see what they think of that cost.
SAWSTOP Compact Table Saw CTS | Video Review
About the author
Rob Robillard
Robert Robillard is a remodeler, general contractor, and principal of a carpentry and renovation business located in Concord, Massachusetts, and serves as the Editor of Tool Box Buzz and founding editor of A Concord Carpenter . Rob is in charge of our Tool and Product Review - Tool and Product Review - Video Channel, , where we post all of our tool reviews and video tutorials. Rob enjoys using his knowledge and experience to help and educate building professionals as well as DIYers on best practices in the remodeling industry. The Concord Carpenter's motto: "Well done is better than well said!" : Read more about Rob
http://www.aconcordcarpenter.com/@https://twitter.com/robertrobillardRob Robillard
1 Comment
Leave a comment
Disclosure
Product reviews on this site contain our opinion of a product or service. We will always strive for objectivity and transparency in our reviews. Our goal is to provide readers with honest, objective information based on our own experiences. We never have and never will accept payment in exchange for a positive review. Many of the products that we review are provided to us for free by a manufacturer or retailer. In some cases, we also have advertising or affiliate relationships with manufacturers and retailers of products and services we review. For additional information please visit our additional disclosure policies.


The throat plate is absurd