


RIDGID Jointer Review

RIDGID Jointer Review Model JP0610

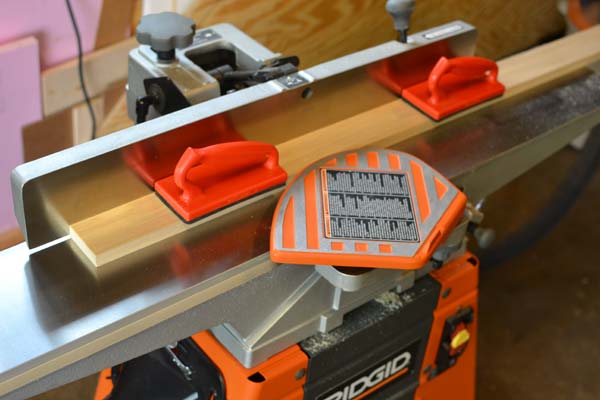
RIDGID Jointer Planer 6-1/8" model JP0610
Some Assembly Required
I had the tool shipped to my house so I didn’t have to lug it’s 208 lbs more than I had to. Just had the truck driver wheel the pallet into my shop. The tool is very well packaged with instructions right on the top as the box is opened. What is really nice about the assembly is that all the critical components are already assembled. Just the base needs assembly and then it can be mated to the jointer bed and fence. Like the RIDGID 4512 Table Saw, it would be a good idea to invite a friend over to help you flip the tool over since it is assembled upside down.
RIDGID Jointer Features and Specifications

Onboard storage for push blocks and angle gauge
- 6-1/8 in. maximum cutting width
- 1 HP, 3450 rpm heavy-duty induction motor operates at 120 volts but can be easily rewired for 240
- Dual-bevel fence with stops at 45-, 90- and 135 degrees
- Versatile long 45″ bed/table gives greater support to large pieces
- Belt drive delivers smooth consistent power
- Machine-ground cast-iron bed and fence
- Rabbeting ledge for precise rabbets up to 1/2 in. deep, adjustable front- and rear tables
- 4″ dust port but can be slid out of the way to just let the shavings fall
- Sturdy, wide-stance cabinet with on-board storage for blade-alignment tools
- Dimensions: 45.5″ long, 31.25″ high, and 19″ deep.
- Weighs 208 pounds
- Lifetime Service Agreement
RIDGID Jointer in Use
The first thing I noticed when firing it up for the first time is how quiet it is and how smooth it operates. It is probably the quietest stationary tool I own. You can still converse over top of it although I don’t recommend it considering how fast the blades are spinning. Your concentration is best spent thinking about safety. The included blade guard and push blocks really assist with the safe operation of the tool as well.
The second thing to note is how well the surfaces are machined. I didn’t find any appreciable dips, crowns, or twists when setting up the tool. After squaring the fence with the on-board gauge, it was pretty much ready to go. Of course since the tool is cast iron the very first thing I did after assembly was coat all of the machined surfaces in paste wax. This helps protect the tool from rust as well as slicking up the surface to help the material pass over more easily.
The third thing to note is how well this machine processes wood. I’ve put hundreds of feet of wood through this thing and have loved the results every time. The results are always smooth and square. Every once in a while I push a board through with the grain oriented the wrong way and minor tearing occurs but as with any jointer, flip the board end for end and run it again for a smooth as silk result.
Logs to Lumber
Like I mentioned above, when I got this jointer I was tired of being limited to the stock on hand at the big box stores. Now what I use this tool for most often is processing rough lumber or edges for panel glue ups. It has really opened up the world for different wood species.
The latest stock I’ve run through was from a tree I processed myself. A buddy had a large maple go down in a storm. I helped him saw it up but we kept some of the straighter logs intact. Using my chainsaw mill I slabbed up some of the logs, stacked and stickered the pile, and dried it in my shop for a year. Then using the RIDGID jointer, a planer, and a table saw I made a bundle of usable maple lumber that I paid $0 for. Granted I had a little bit of time into it but with woodworking the joy for me is in the journey.
I love the idea of being able to make my own useable stock. I get to pick the species, thickness, and figure. It takes a little time for drying but it’s totally worth it. The RIDGID Jointer is key in this operation. It’s the first step in making straight and square lumber.
- Joint a face and an edge
- Plane the opposite face
- Run the piece through the table saw with the jointed edge next to the fence to make the final edge parallel.

Buisiness card holder I made from the fallen maple
Conclusion
Having a jointer in the shop is a tool that can really bring your woodworking to the next level. The RIDGID Jointer fills a nice gap between the benchtop units with really short beds and the professional level jointers that most don’t have room for in their shops. I put my unit up on a mobile base so that I can keep it against the wall and out of the way unless I need to run big stock and then I can roll it out to the center of the shop. At $549 it’s a good bargain that will serve a woodworkers needs for many years to come.
About the author
Jeff Williams
Contributing Editor Jeff Williams is a carpenter for a commercial General Contractor specializing in concrete, steel, and wood buildings. Jeff comes from a long line of contractors. His parents started a commercial General Contracting firm many years ago and it has afforded him life-long, hands-on learning opportunities from rough and fine carpentry all the way to structural steel and concrete. Jeff has a Construction Management degree and loves the thrill of coordinating and successfully managing large jobs from start to finish. Inspired by the difficulties sometimes encountered to complete punch lists his motto is, "Work hard until the job is done."
7 Comments
Leave a comment
Disclosure
Product reviews on this site contain our opinion of a product or service. We will always strive for objectivity and transparency in our reviews. Our goal is to provide readers with honest, objective information based on our own experiences. We never have and never will accept payment in exchange for a positive review. Many of the products that we review are provided to us for free by a manufacturer or retailer. In some cases, we also have advertising or affiliate relationships with manufacturers and retailers of products and services we review. For additional information please visit our additional disclosure policies.


How do you rewire for 220?
Take the cover off the motor (peckerhead) and follow the diagrams shown inside. One will be for low voltage (110v) and the other will be for high voltage (220v). The low voltage will show the motor leads in parallel and the high voltage will show the motor leads in series. If confused, talk to an electrician. They deal with dual voltage motors all the time. (I are one). 🙂
when i click the buy now the price changes from $549 to $699 what’s going on?
It was $549 when I originally wrote the article back in 2014. I’ve updated it to the current price of $699. Nothing has changed on the tool, it’s unfortunate that it has gone up so much in price.
Price is now $799.
You had a chainsaw mill before a jointer?
Actually I did. I use the mill mostly for making live edge mantels and use a circ saw and power planer to flatten and square them up. The mantels are too big to run through this jointer anyway.