Rockler Dust Collector Review
Rockler Dust Right 750 CFM Dust Collector 57841
Rockler Dust Right Dust Collector
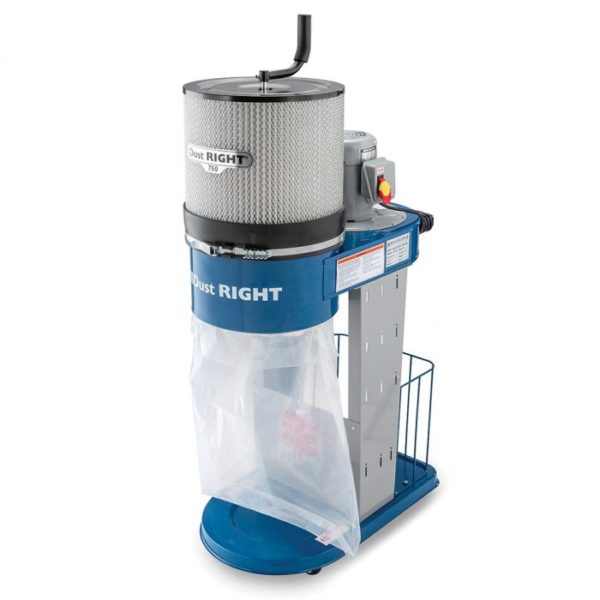
Dust Right 750 CFM Dust Collector
I have a very well equipped woodworking shop that is full of high-powered tools that rapidly create cubic feet of dust. As every woodworker with similar equipment knows, dust collection becomes critical to how your shop operates. Said another way, reducing workshop dust can lower your health risks, increase safety, and improve the overall cleanliness of your workshop environment.
A Problem Looking for a Solution
I have owned a stationary dust collector for almost twenty years. During that time, I have modified the bag attachment system to prevent dust leakage. To mitigate dust leakage, I retightened and added foam tape to help with leaks from under the filter and, in general, looked the other way when a fine coating of dust fell in every corner of my shop. For safety reasons, I use dust masks to ensure my lung safety, but I reached the point where I needed to replace the old dust collector.
I hope the Dust Right Mobile Dust Collector is the right replacement unit.
Dust Right® 750 CFM Product Features:
- Powerful dust collection, plus a canister filter that captures particles down to 1 micron
- Mobile cart with built-in storage for hoses and accessories
- Powerful 1 HP, 60 Hz, 12 amp, 110v motor delivers 750 CFM of suction
- Holes on the frame allow easy mounting of Dust Right® accessories
- 2″ rolling casters allow easy mobility
- The crank-style agitator in canister filter dislodges dust
- Snap band ring makes removing and installing the collection bag easier
- 4″ diameter inlet port fits standard dust hose
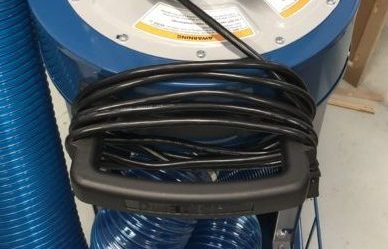
- Pull Handle allows for neatly wrapping the 10′ power cord, and also includes clips to hold extension cords if necessary
Dust Right® 750 CFM Product Specifications:
- Inlet Port Diameter: 4″.
- Caster Diameter: 2″.
- Power Cord Length: 10′.
- Decibel Rating: 75 dB.
- Amps: 12.
- Volts: 110.
- Approximate Dimensions: 16-1/2”W x 30”D x 54-1/2”H.
- Bag Capacity: 11 gallons (about 1-1/2 cubic feet).
- Flow Rate: 750 CFM.
- Filter Type: Canister.
- HP: 1.0.
- Weight (lbs): 88.
Product Assembly:
The dust collector came in a large box, and I recently set aside some time to set it up and put it to work. The product ships in a knocked down configuration, and it needs assembly. I found the instructions very clear and easy to follow. It took about 45 minutes from unboxing the pieces until I had an operational dust collector working in my shop.
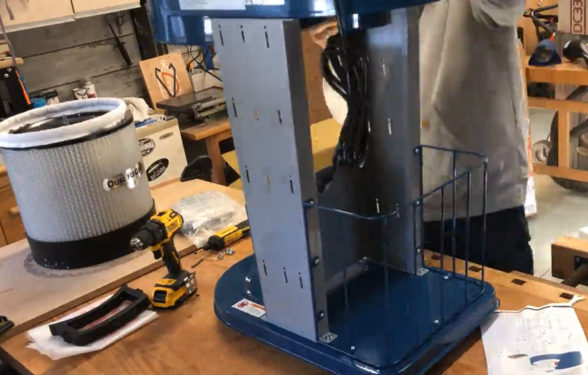
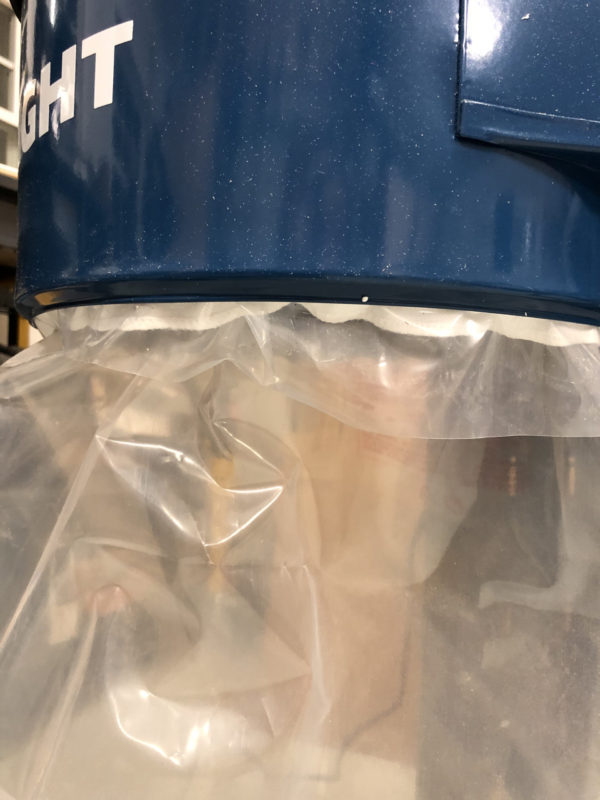
I had no difficulties with the assembly, but I will confess to feeling like a monkey playing with a football when it came to putting the spring band ring and collection bag into the unit for the first time. I think a few hints on how the bag fits and where the band ring should ultimately sit would be a welcome addition to the instructions. Since then, I have removed the bag and re-installed it a few times, and it is much easier to install after the initial fitting’s learning curve.
For me, the most challenging part of the entire assembly came after I had the unit complete. I tried to put the dust hose underneath the fan housing on its flange while the collector was standing upright. A brand new hose and a newly painted clean fitting are not easy to fit together when they are upside down to the user. I finally used some talcum powder and tilted the dust collector on its back to get the new pieces to go together.
I should note I had to ream out the hole in the filter agitator handle. Out of the box, I could not get it to fit onto the shaft on the top of the filter. I did not want to force the handle on to the shaft by whacking it with a hammer or otherwise forcing it to fit. The aluminum handle made for an easy reaming process. I think it should not be necessary to have to make such a modification to the handle of a new piece of equipment.
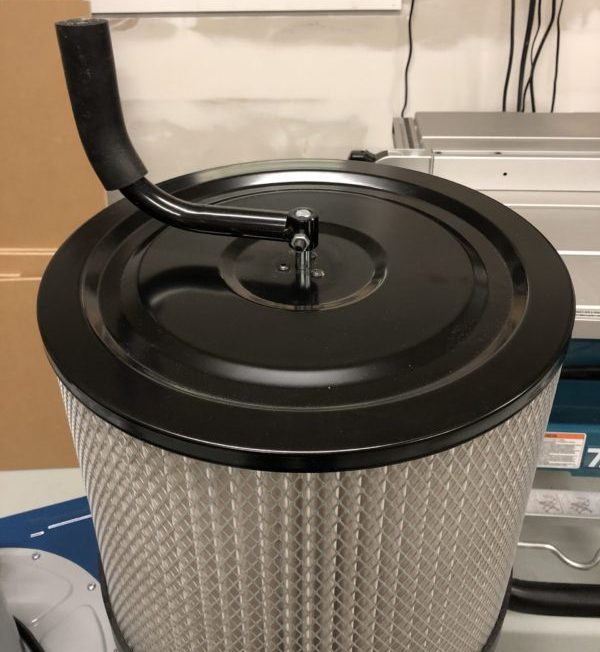
Modifications Made To Improve Efficiency
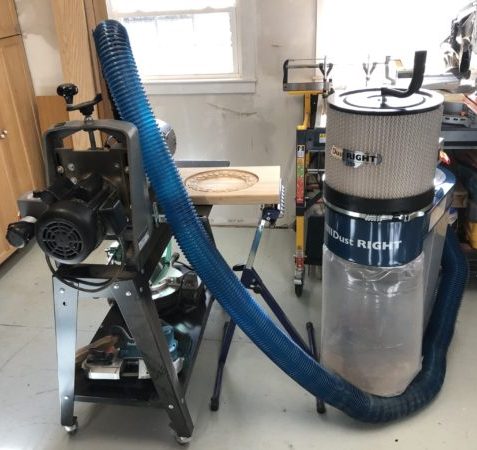
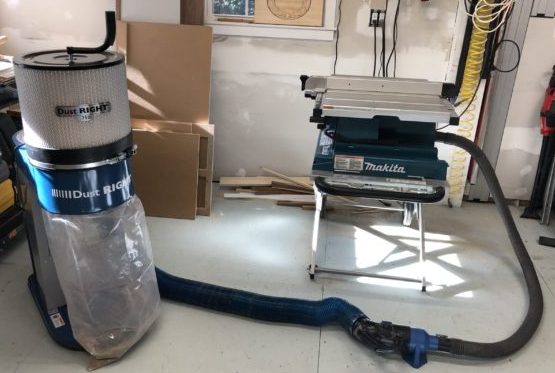
When I put it together for the first time and started to use the dust collector, I did not like the way that the expandable dust collector hose was oriented. It went straight down into the storage basket. So when I changed directions with the hose, the hose was catching on the metal bars of the storage basket. I thought that would be a great way to wear a hole in the vinyl hose or even cut into the hose. I purchased a Rockler Dust Right® Quick Connector 4″ Elbow fitting and installed this fitting onto the flange of the fan housing. Then I mated up the hose to the elbow. This fitting now allows the hose to swivel from side to side and miss putting the dust collector hose into the basket altogether.
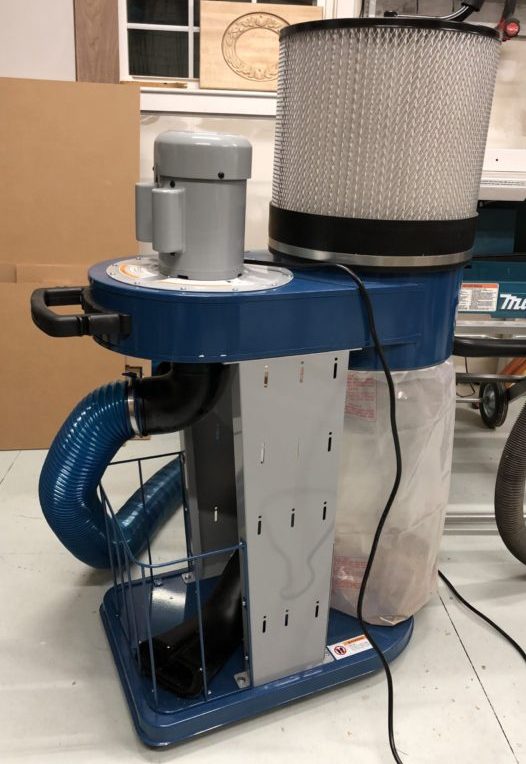
Additional Hose Fittings
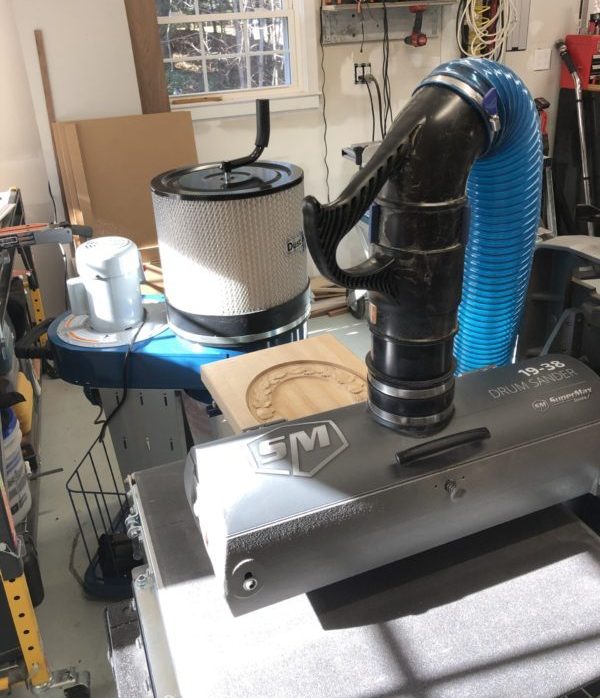
I also purchased a few more fittings that allow the hose handle to interface with my belt sander and table saw. These fittings make it easy to take the handle and plug it into the port fittings and give me quick connections; I no longer have to attach the hose directly to any of my machines with 4″ band clamps. Rockler accessories, like the Dust Right ® Quick Change Handle, make changing the dust collector from one stationary tool to another both easy and quick.
Run Down on the Dust Collector
Like all of this type of dust collector, the Dust Right ® 750 CFM mobile dust collector does not have any controls except for the On-Off switch. This switch is next to the motor on the top of the fan housing. It is easy to find and to use.
The unit comes with a 10-foot long cord, and that is sufficiently long enough to give the collector the range, with the hose, to reach any part of my shop. I am glad that Rockler put on a long cord. Rockler made its front handle so the user can wrap the power cord around it and secure the end of the cord in a clip.
The spring clamp does a great job of holding the sawdust bag in place, and I noticed no telltale signs of sawdust leaking from under the machine. Removing and replacing the bag is simple and easy to do. I did have a learning curve the first time I tried to install the bag during assembly. Now there is no mystery to that process.
I am fortunate to have a lovely flat wooden floor in my shop. As a result, the small casters work well in my environment. However, if I used the dust collector in my barn where the flooring is very worn and irregular, I can assure you I would be making a new base with industrial quality swivel casters.
The Rockler Dust Right Dust Collector accessories is very extensive. I can see adding pieces to my initial dust collection system in the future. I am already plotting to get the Dust Right ® pieces for my router table into my near-term plans.
Woodworking CFM Lesson
- Table saws, miter saws, shapers, and band saws need 350 cfm.
- Joiners and disc sanders come in at 450 cfm
- Belt sanders 550 cfm,
- Thickness planers are 785 cfm.
- Other factors to consider when choosing a dust collection system include:
- Will you operate more than one machine at the same time?
- Use of blast gates
- Lengths of dust collection pipe, including elbows and vertical rise
Given the air movement requirements, above, I knew that the Rockler Dust Right® 750 CFM dust collector would be large enough to handle the CFM needs in my shop. However, the capacity is not large enough to handle simultaneous dust loads for multiple machines.
Testing the Rockler Dust Right Dust Collector with Tools
The first machine I tested with the Rockler Dust Right Dust Collector with my19-39 SureMax belt sander. This belt sander is capable of generating vast amounts of dust. The increase of cfm with the Dust Right® was immediately noticeable. The new Dust Right ® collector picked up virtually all of the dust generated by the sander. None of the sawdust I was used to seeing travel down the feed belt was present. Very impressive.

The next tool I tried was my table saw. The table saw exhaust port is 2 ½” in diameter. As a result, I needed an adapter to go from 2 ½” to a 4″ diameter hose. The Rockler Dust Right ® 2 ½” to 4″ Mountable Dust Coupler was what I needed. With this connection, the Dust Right ® 750 CFM Dust Collector performed quite well. While I noticed a minor amount of dust under the saw, the residual amount was far less than what I experienced when using a shop vacuum. Again, I was impressed.
Finally, the last test in my shop was using the Dust Right ® to clean up the rest of the shop floor and tools. I purchased a Dust Right ® Bench Nozzle and used this attachment to pick up the dust in the balance of the shop. The accessory is well made and has a stiff brush at the pickup end of the nozzle. I had an easy time cleaning up the floor dust and debris. It made quick work of the shop cleaning. I was surprised to see the sawdust that was inches away from the nozzle leaping into the air stream. This Rockler 750 CFM mobile dust collector has an impressive amount of air volume.
Would I Recommend The Rockler Dust Right Dust Collector?
I liked the Rockler Dust Right Dust Collector and decided to give it a permanent home in my shop. Appropriately, it is now in charge of the table saw, SureMax belt sander, jointer, and router table (soon). Besides minimizing the detrimental effects of airborne contaminants, it was easy to set up, use, and change the replacement bag.
At a price of $549.00, the Rockler unit is priced appropriately for the 750 CFM capacity of the unit.
I think Rockler has a real winner in this tool. As a result, anyone who purchases this dust collector will significantly benefit from the large variety of Rockler accessories. That is a winning combination.
About the author
6 Comments
Leave a comment
Disclosure
Product reviews on this site contain our opinion of a product or service. We will always strive for objectivity and transparency in our reviews. Our goal is to provide readers with honest, objective information based on our own experiences. We never have and never will accept payment in exchange for a positive review. Many of the products that we review are provided to us for free by a manufacturer or retailer. In some cases, we also have advertising or affiliate relationships with manufacturers and retailers of products and services we review. For additional information please visit our additional disclosure policies.


I’m wondering about this dust collection’s ability to collect concrete dust from grinding concrete surfaces. Can you provide any help in determining if this would be a good purchase with collecting concrete dust?
Carl – These really are not set up for collecting dust from concrete, especially in large volumes. Really need an industrial concrete dust collector made for that application.
Sorry I’m late to the review (6 months!) but I has hoping you could speak to the ease (or lack of) emptying the Dust Right collector, and how the filter faired with the sanding dust. Can you clean the top filter, or is that something that needs to be replaced? How about the bags?
I’m using a large shop vac now, and if I were to add this to my basement shop, would I want add a cyclone pre-filter for the large chips? The cyclones I have on my shop vac work wonders in keeping the majority of the sawdust out of the vac.
Mine leaks dust. What bag installation changes do I need to make?
check that seal and see if you can get it tighter, inspect connections and seal
I’d like to know if anyone else has had trouble with loss of vacuum over time.
In order to confirm my feelings I used inexpensive anemometer to measure air flow speed. I have noticed reduced speed over time. After removing the filter I found that the paddles have not cleared the filter of dust. I used my shop vac with brush to remove the large amount of the remaining dust. I called Rocklers and was told to use a compressor to clean the filter. Seriously? Frustrated.