


Adding a Bandsaw Riser Block

Adding a Bandsaw Riser Block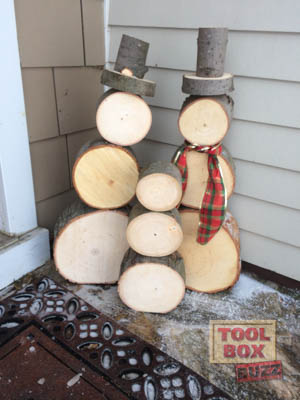
In the last article, we shared some tips on how to tune up a RIDGID Bandsaw. We alluded to some additional accessories that can make the saw even better. In this article you’ll see how to install a 6″ bandsaw riser block so that the saw will be able to cut stock 12″ thick. Just like the last article, this applies to many saws in the 14″ class so having a RIDGID saw isn’t required. At the end of the article there is also a quick project to turn logs into little wooden snow people so if you add the riser block give the project a shot.
Order a Bandsaw Riser Block kit
When I was first looking to add a bandsaw riser block I was discouraged because the RIDGID brand ones were hovering right around the $250 mark. That’s more than a used saw is worth, there’s no way it should cost that much. After a lot of research I came across a bunch of postings on Amazon about how people were using the Grizzly brand blocks and they worked perfectly with the RIDGID saw. Further research led me to find the Polar series block from Grizzly. It was the exact same kit as the green painted one but cheaper and painted white. When I bought it in November of 2013 the Polar series was just north of $80 and the green, $100. Prices have risen slightly since then but still reasonable.
Grizzly H3051P Riser Block Kit for Polar Bear Series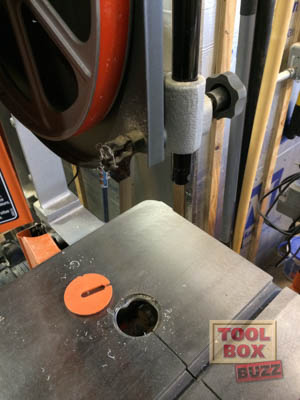
Grizzly H3051 Riser Block Kit for G0555
Disassemble the saw
Remove the blade, the upper blade guides and bearings, and the power switch. Do not remove the upper guide adjustment rod at this time. There is a spring loaded bearing that keeps the post aligned so push out the old one with the new one at a later step. That way the bearing won’t fall out and get lost. Finally undo the bolt that holds the top and bottom halves together. Be careful and set the upper portion down gently, it’s pretty heavy.
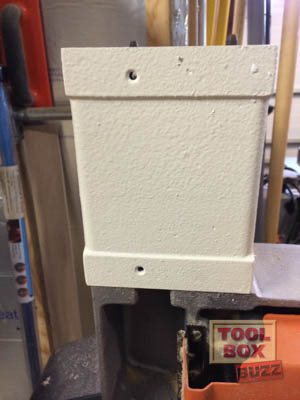
Test fit the block
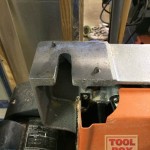
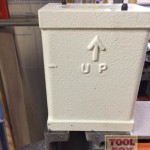
The bandsaw riser block can fit two different ways. The side with the two holes is the one you want facing the front of the saw. It is where the power switch gets mounted. Make sure that the block fits. It’s a tight fit but it should fit. Make sure the mating surfaces are clean of any sawdust since that could affect the fit and alignment.
Add the top half of the saw back
Now that the block is in place on the lower half, take the top half and the new longer bolt and fit it onto the block. This is a two person job. One to lift the top half and the other to guide the bold through the block. Don’t be alarmed if it doesn’t sit down on the pins yet. Add the washer and nut and start to snug it up. When it’s tight be sure to check the upper and lower wheels with a straightedge to ensure that they are still co-planer.
Continue assembling the saw
Add the new 105″ blade back onto the wheels. Add the new taller rear blade guard and upper guide adjustment rod. After the upper blade guide assembly is fitted, add the new extended blade guard. Finally attach the power switch to the holes in the riser block. The saw is now ready to go.
-
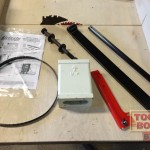
- Bandsaw Riser Block kit comes with everything you see here.
-
- Remove power switch and rear blade guard
-
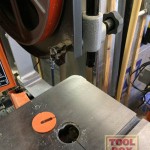
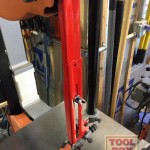
- Remove blade and upper blade guide assembly
-
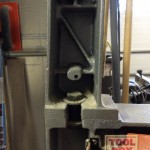
- Loosen bolt and remove the top half of the saw
-
- Holes should be facing out
-
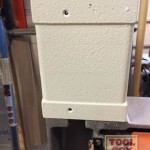
- This is backwards


-
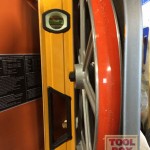
- Make sure the wheels are co-planers
-
- Attach the upper blade guide and blade guard
-
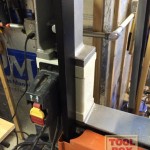
- Attach the power switch to the bandsaw riser block
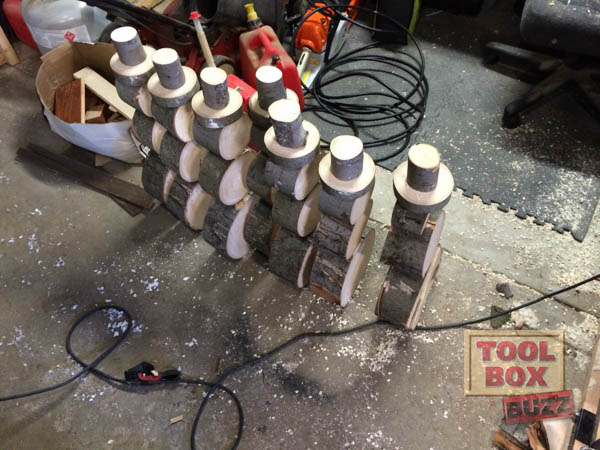
Make a stacked log snowman
The impetus for adding the bandsaw riser block for me was two fold. One, I wanted to resaw my own large stock and Two, my wife had just purchased a stacked log snowman from the local nursery and they charged over $40! She was skeptical that I could make it myself. Challenge accepted! After I sorted through all the logs on the wood pile I couldn’t make just the 3 for our front step. I had to make it an even 10 so we could give them away to friends and family as well.
Snowman dimensions (diameter)
- Hat top: 2-1/2″
- Hat brim: 4-3/4″
- Head: 5″
- Mid body: 7″
- Lower body: 10-1/2″
Snowbaby dimensions (diameter)
- Head: 4″
- Mid body: 5″
- Lower body: 7″
The snowmen parts are all connected with short 2″ sections of 1/2″ dowel. The hat components have a 3″ section so that the dowel can pass all the way through the brim section. The dowel pieces need a light sanding to break the edges where they were cut. A mallet or hammer will aid in seating them into the holes. Wood glue is optional. Enjoy!
Related Posts
About the author
Jeff Williams
Contributing Editor Jeff Williams is a carpenter for a commercial General Contractor specializing in concrete, steel, and wood buildings. Jeff comes from a long line of contractors. His parents started a commercial General Contracting firm many years ago and it has afforded him life-long, hands-on learning opportunities from rough and fine carpentry all the way to structural steel and concrete. Jeff has a Construction Management degree and loves the thrill of coordinating and successfully managing large jobs from start to finish. Inspired by the difficulties sometimes encountered to complete punch lists his motto is, "Work hard until the job is done."
1 Comment
Leave a comment
Disclosure
Product reviews on this site contain our opinion of a product or service. We will always strive for objectivity and transparency in our reviews. Our goal is to provide readers with honest, objective information based on our own experiences. We never have and never will accept payment in exchange for a positive review. Many of the products that we review are provided to us for free by a manufacturer or retailer. In some cases, we also have advertising or affiliate relationships with manufacturers and retailers of products and services we review. For additional information please visit our additional disclosure policies.


Great article! I just purchased a used Grizzly G1019 (mfg 1993). First thing I did with it was run a dried tree limb through it, to see how thin I could resaw with it. I was able to get a slice just a hair under 1/16″, able to see light through it. That’s with a bad tire that was taped on and 1/2″ blade. Now I’m hooked! New tires are ordered and now I’m researching a riser. Any thoughts on blade manufacturer, once I have a riser? Thank you for the informative article.