


Milwaukee REDSTICK Box Level Review

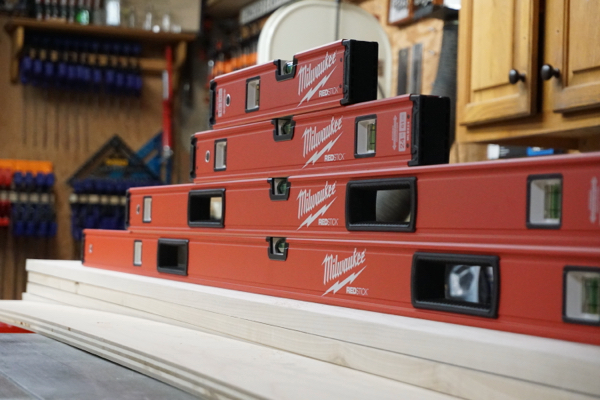
Milwaukee REDSTICK Levels
Box beam levels have a rectangular, box-like shape and are considered the heavier duty level when compared to I-beam levels. In contrast, I-beam levels are shaped in the form of an “I,” use less material to make, are lighter, and not as strong as a box level.
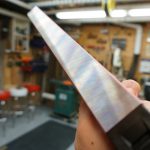
If you were to cut the box level in half, you would see an extruded aluminum rectangular cross-section, generally hollow in the middle. The key to a box level’s strength is it’s shape. A rectangular tube provides significantly more torsional rigidity, and ultimately greater flexural strength.
Better constructed box levels are made from high grade aluminum, and have distinct features over I-beam levels, these features are:
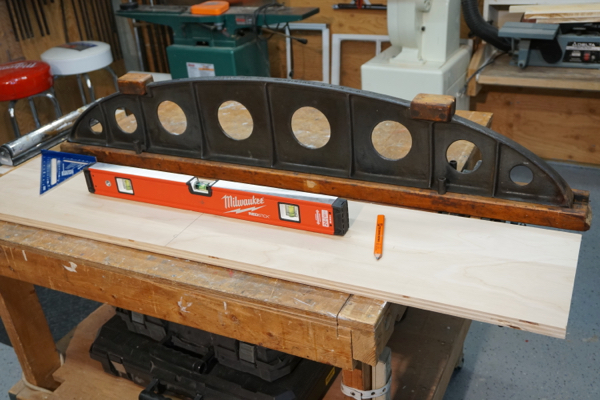
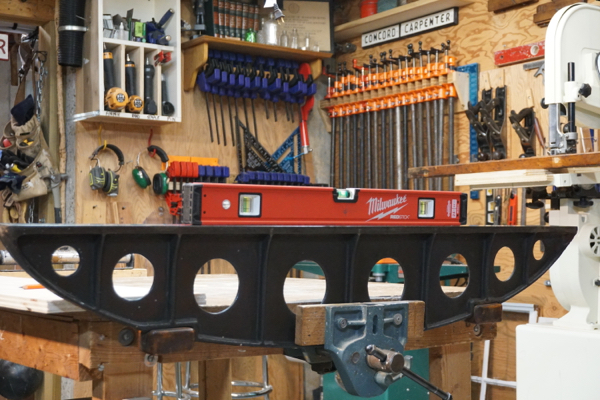
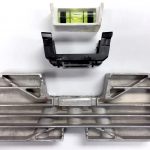
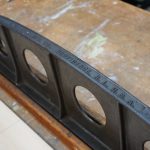
Level and flatness testing station – jig
- Rigid Frame – The rectangular construction provides a very torsional resistant structural shape compared to an “I” shape. It is more difficult to twist and bend, and the aluminum frame has a memory, allowing it to return its shape.
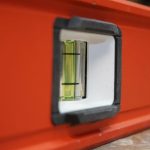
- Solid Acrylic Block Vials – All one-piece, solid acrylic vials [mono-block system] resist impact and accurate to 0.5mm/m in all level positions.
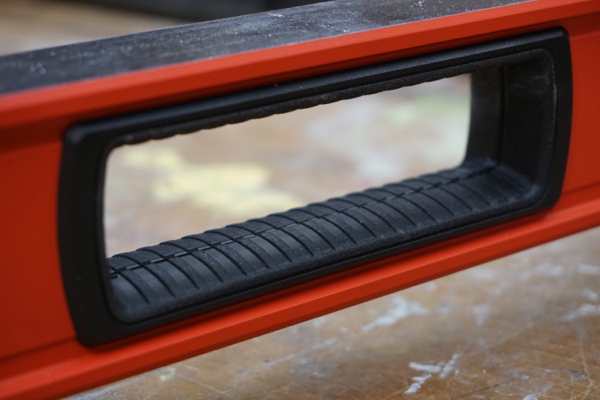
- Hand Grips – A quality level will have larger opening for hands grips and these grips will be screwed into the frame, rather than glued. Screws are a sign of a better constructed level. The negative to hand grips are that the aluminum that is cut out weakens the frame. It’s a tradeoff.
- Rubber End Caps – Rubber, impact absorbing end caps will transfer vibration and help absorb impact damage.
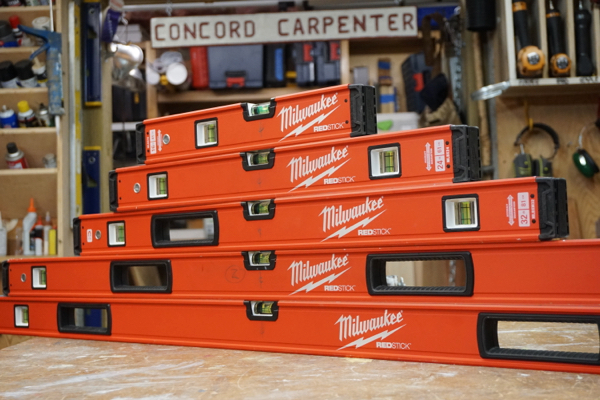
Milwaukee REDSTICK Box Level Review
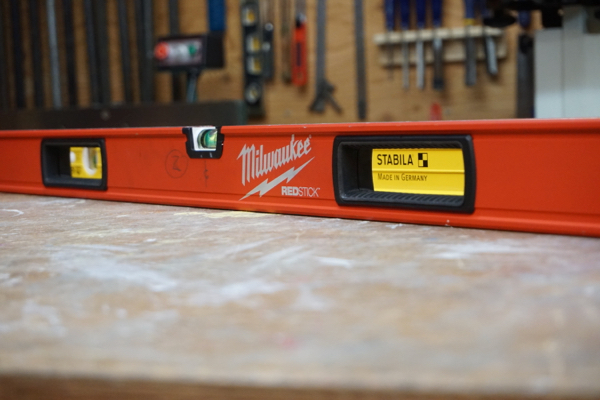
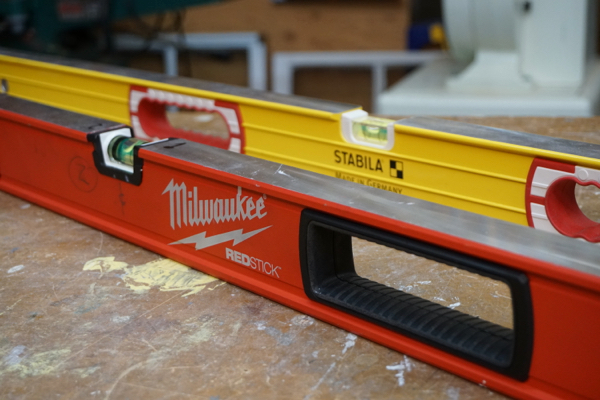
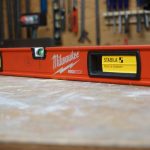
We recently took a look at the Milwaukee REDSTICK Box Levels. A few years back, Milwaukee acquired Empire Levels with the plans of expanding their hand tool offering. Empire produces mid to high quality levels. Milwaukee decided to design their new REDSTICK to compete in the premium level arena, and more specifically, with the Stabila 196 model. For many years, Stabila has set the bar with their high end, extremely accurate levels. We recently reviewed the Stabila 196 level in our Best Construction Level Head 2 Head – check that out for our full thoughts on the Stabila.
Here’s our thoughts on the new Milwaukee REDSTICK.
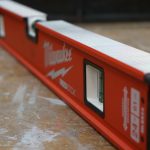
Fit And Finish of Levels
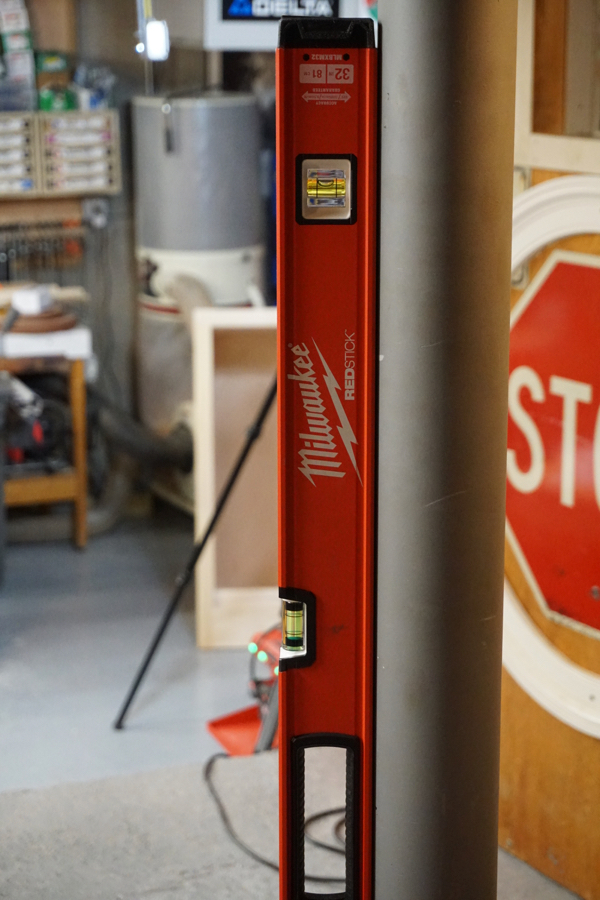
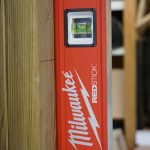
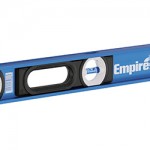
The first impression of any tool that we test is usually the fit, finish and quality of the materials used in the tool. The REDSTICK has a stout, heavy duty feel. The fit and finish of the REDSTICK is beautiful, it has the sharp red Milwaukee color coupled with shiny, bright milled working edges.
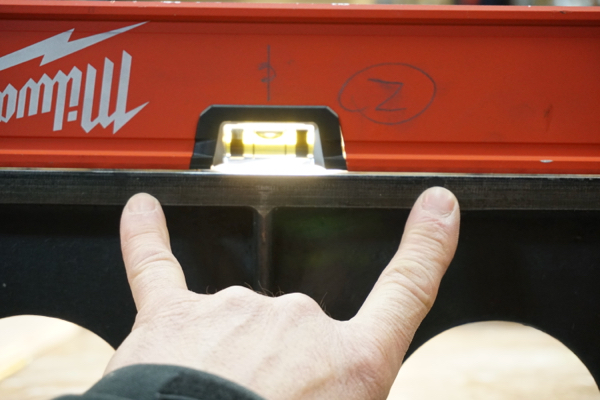
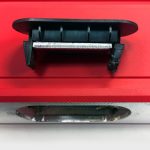
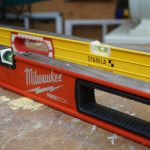
One side of the level vials has over molded, non-slip grips [located around the vial] to prevent marring milled surfaces and hold the level to the wall and prevent sliding.
Flatness of Milled Faces
We evaluated the flatness of the milled surface on the REDSTICK levels. To do this we placed a machined straight edge on each level and checked for gaps between the two surfaces using feeler gauges. All of the level contact surfaces were very flat.
The largest gap between the milled face and a level was 1/100th of an inch. The bottom line is all of these levels come with a very flat surface to start with.
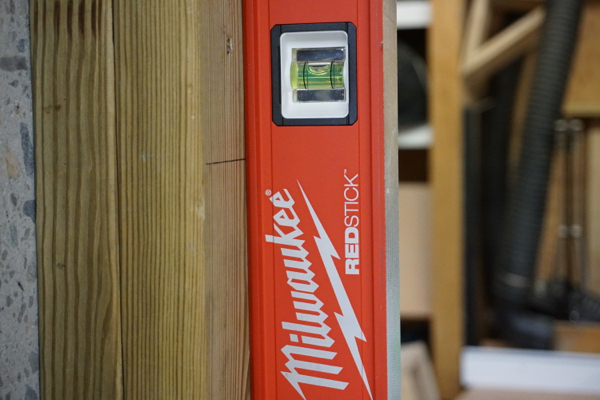
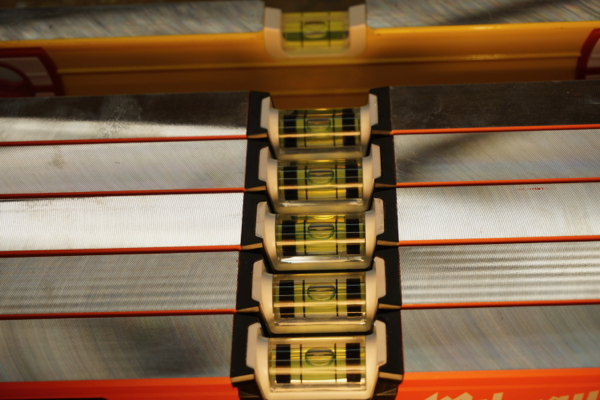
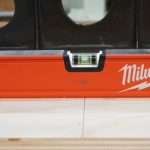
High-Vis Vial Fluid
One of the key features of a good level is the visibility and readability of the vials. The REDSTICK has excellent visibility – it’s probably it’s BEST trait.
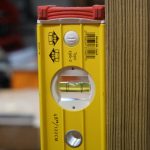
Level manufacturers will tell you that their recipe for vial juice is a combination of mineral spirits, alcohol, and proprietary fluids all designed to create a visible bubble and fluid that is resistant to UV degradation, temperature deviations and particulate controls. Color of the vial juice is another matter. There are a lot of theories on vial fluid color; blue, green or yellow. For example, Empire uses a bluish vial juice. The bluish color is easy for the eye to decipher and see the edge of the bubble meniscus. It also does not have a lot of color change when used indoors or outdoors.
Milwaukee chose a high-visibility color similar to and mimicking the ANSI 107-2010 standard for High-Vis safety clothing. They felt it is easier to see in all light conditions and really highlights the bubble meniscus.
After using several levels in our Head-2-Head testing, over the past several months, we feel the yellow/green color is preferable in most low light conditions.
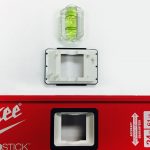
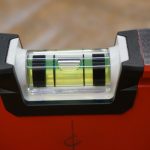
Visibility – SHARPSITE Technology
Some of the features that Milwaukee used with the REDSTICK and their vial approach was to use oversized vial surrounds to bring more light to the vial. According to Ryan Schwoegler, Product Manager at Milwaukee:
The internal geometry of the REDSTICK vial is identical to other vials in terms of machine coring, arch and radius shape. The REDSTICK vial has large black bands at the outer edges of the vial are designed to bring light to the edge of the bubble meniscus. The vial is also rounded instead of a square block, this rounded vial edge creates a magnified visibility.
In addition to the visibility of the actual vial, the placement of the vial within the level frame also contributes to the overall visibility of these levels. The REDSTICK vials are definitely easy to see.
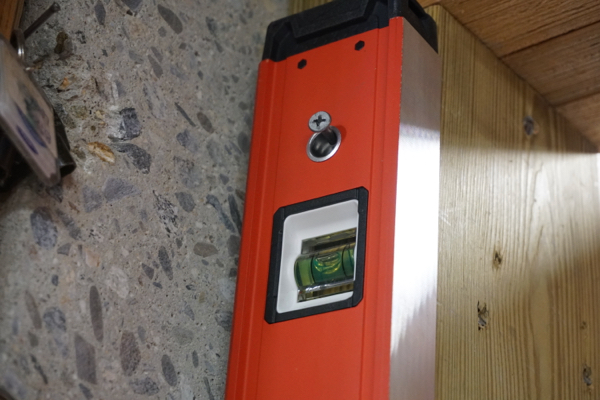
The large black bands on the vial creates high contrast edges that make the magnified bubble easier to read. The REDSTICK vials have a guaranteed lifetime accuracy and are guaranteed to be accurate to .029° (.0005″/in, 0,5mm/M). For the vial material, Milwaukee used high-impact acrylic, which they claim delivers 10X more durability than the standard competitive block vials and protects the accuracy over the life of the level.
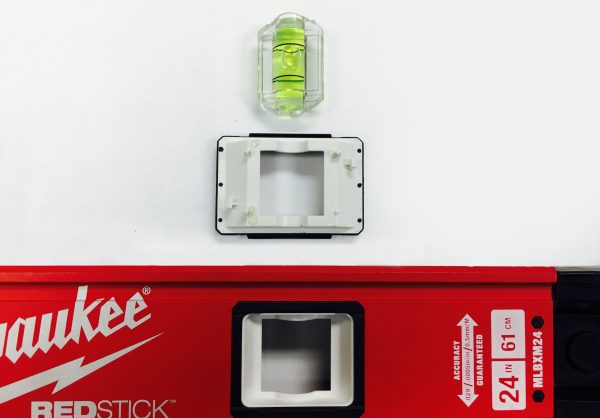
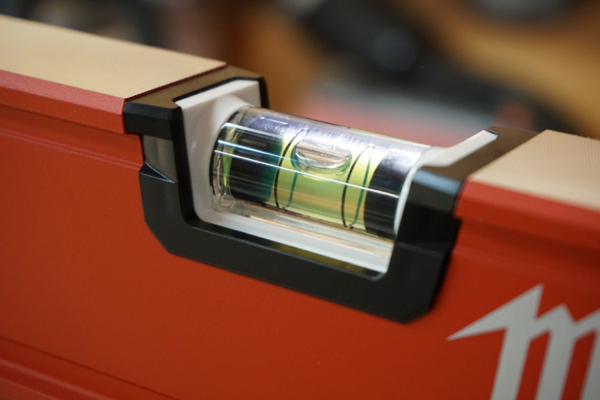
Right vial
Level Accuracy
Accuracy is obviously important with construction levels. We performed a basic evaluation of the level to check accuracy. The test involves placing the levels on a fixed surface in both directions and checking the level to see that it reads the same from both sides. The REDSTICK vials are rated accurate to .029° ( .0005″/in, 0,5mm/M). I tested five different size REDSTICK levels, 16″, 24″, 32″, 48″, an 72″, for plumb and level. All five levels passed the test, with one level being slightly out of level only.
The REDSTICK level was finicky when determining pitch. Pitch is important with the wet trades (wherever water is flowing), like masonry, where slope is important in setting driveways, patios or landscapes.
A machined vial should read accurate no matter degree or angle. When testing the REDSTICK [Holding the level plumb and slowly lowering it to a level position] the level bubble stayed buried, until it reached a 100% “level” position. Masons work in terms of the bubble from level, such as, “a quarter bubble out” or “half a bubble out”, providing pitch. If your working in a wet trades or need to establish pitch we suggest using a pitch vial, not the REDSTICK.
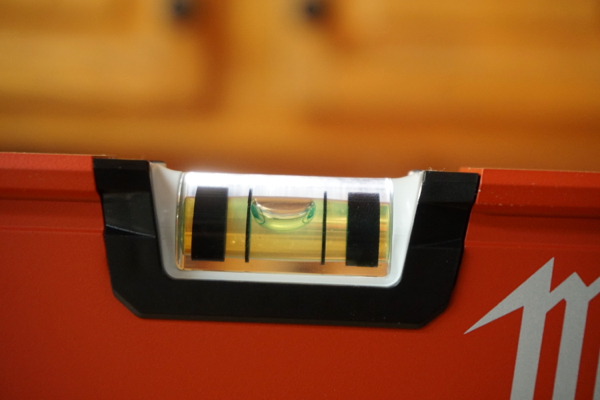
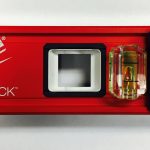
Center Vial

Frame Strength
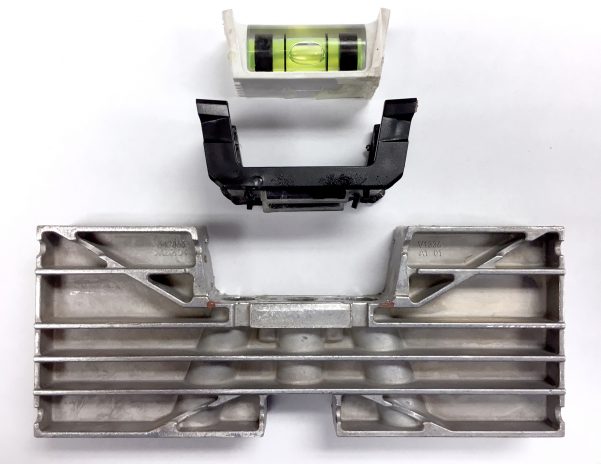
Milwaukee accomplished a rugged frame design, by milling a beefy rail system on all four edges of the REDSTICK box level and by inserting a Magnesium “backbone” into the level. This Magnesium backbone is an internal rib structure that sits in the center of the cut away section, but it doesn’t run the entire length of the level because it would make it too heavy. It protects the open vial and reinforces the frame to prevent frame deformation.
Milwaukee’s choice to use the Magnesium backbone is an interesting one. While I’m not a metallurgist, I wonder if the block inserted into an aluminum frame will cause a memory or a crumple zone when exposed to stress. Milwaukee told me that the amount of stress needed to accomplish a crimp could never be obtained under normal jobsite use.
Testing The Frame Strength
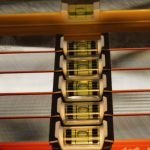
For us at ToolBoxBuzz, testing levels often involves placing the level under the stress of weight, on both edges. We load up these levels to 200, 260, and 320-pounds. The purpose of these tests is to mimic jobsite use and also the scenario of a level getting caught in a door jamb. [i.e., pushing a cart through a door and jamming the level against the door frame and cart rail] The cart and doorframe scenario is real and one that could potentially create up to 250 pounds of stress on a level.
The strength testing rig is the same one we used for our Construction Level Head-2-Head article. It’s a pretty simple but effective set up. We used a motorcycle/atv jack to prop up the pallet, hence the slack chains above. When everything is set, we lower the jack until the weight is completely suspended from the center of the level. We take measurements before, during, and after so that we have a complete picture of the level’s strength and elasticity (how well it returns to shape). The load isn’t applied for long, just long enough to measure the deflection.
In order to put the bend test measurements into perspective, we added the data to the set from the Head-2-Head article so that you know how the REDSTICK stacks up against other level offerings, specifically the premium offerings from Stabila. As shown in the table below the strength of the REDSTICK is right on par with the Stabila 196.
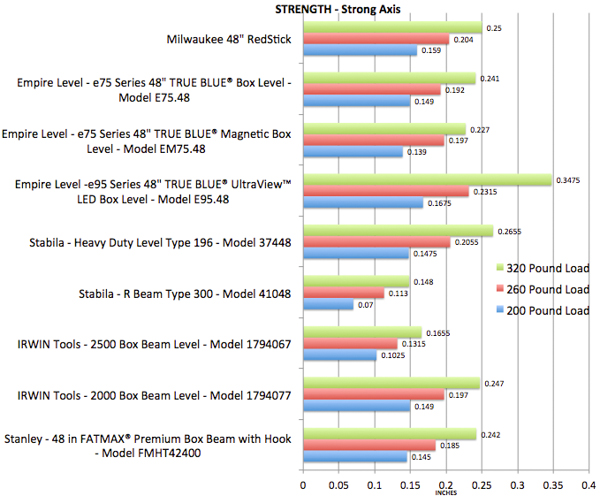
When it comes to elasticity, the REDSTICK didn’t fare as well as we thought it would. Looking at just the numbers the REDSTICK is the third worst in the Post 320 and the worst in the two lighter loads. That isn’t the whole story though, when we applied a 320 pound load to the opposite strong axis the level returned to flat.

NOTE: One concern, with longer levels, is having too many cut outs in a level, that it can weaken the frame. The same principle applies to the middle cutout for the level vial. Some level manufacturers use a metal bridge over this vial to keep strength, which is also useful for continuous scribing.
Milwaukee could not add a bridge design to their REDSTICK line due to Stabila patent issues. They instead rely on their magnesium back bone, and are looking at other future innovations to improve. The lack of the “bridge” may affect the strength of the longer level over time, time will tell.
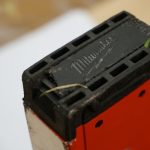
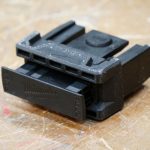
End Cap
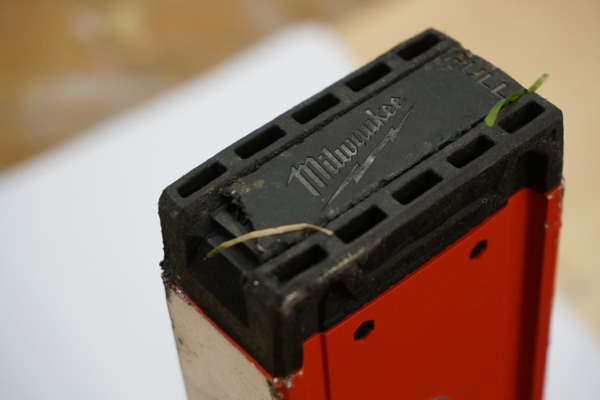
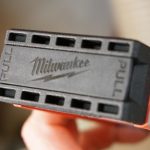
Shock absorbing and removable end caps is always a plus and a key feature on a premium level. The REDSTICK has high density, removable end-caps to protect frame and provide access in corners for scribing. Removable end caps let you scribe into corners – the key is to have high-quality removable end caps that stay in place. We want to see uniform end caps, with dense over mold. Rubber is better than plastic or resin.
The REDSTICK has a 2-part system. A plastic type, pull-tab level disengages a rubber end cap, allowing it to be removed. We found the level to hold securely, and to date have not seen the end cap loosen or fall off.
The best part of the REDSTICK end cap pull tab design, is removing these end caps is a conscious decision. The only negative on this end cap, pull tab, is not 100% rubber and one concern we have is that it will not transfer vibration as well as if it were an all rubber end cap.
Handles
Cutout handles are useful in handling a level, most levels 48” and over have them. Milwaukee included one handle in their 32” level for overhead work and two handles on all levels over 48”. These longer REDSTICK levels have wide, durable handles for holding the level. The REDSTICK handles have a soft rubber touch, with minimal texture to keep debris from building up in the grip area. This is important to concrete, thin-set and drywall end-users. The grips are a multi-part system that is press fitted into place.
Note- Cut outs on a level, like handles, weaken the frame, as a result manufacturers will often make the level bigger /higher.
Level Height
Height often is decided as a strength to weight ratio optimization. The more holes in the frame, the weaker it is, so sometimes manufacturers make the level higher. There is no rule of thumb but there are some advantages to a certain height. For example a 2-1/2” height level is the height of a brick course and masons use their levels as a gauge for course setting. Roofers, siding, aluminum, and gutter installers use levels as gauges too.
The REDSTICK is a dedicated 2-1/2” tall. One thing we noticed was that the milled edges [face] is wide and sturdy, which helped keep the level from tipping over when aggressively shimming or moving an item, like a cabinet.
Hang Hole
While you may think the hole is for hanging on a nail, MOST manufactures add a hole for “point of sale,” hanging on the store racks. A TRUE nail hanger, like seen on premium levels, will be reinforced in the frame. The REDSTICK hang hole is reinforced.
Durability – Drop Test Results
I dropped the 48″ level [most commonly used levels the job site] ten [10] times from a height of 6-feet. Prior to dropping the level I photographed and recorded a level and plumb reading. After the test the level was unscathed – measuring both level and plumb.
Thirsty for some drama, I decided to toss the level 15-fet in the air. [It even hit the overhead power lines a few times] I tossed the 48″ level 10 times in the air, inspecting it each time.
The 15-foot toss knocked a plastic, plumb cover off the vial area of the level, chipped one plastic end cap and dinged up the aluminum frame at the ends. When I tested the plumb and level for accuracy the level was off. It also had a slight bow in the frame. Assuming you take care of your levels, this type of abusive testing would best simulate approximately 10 years of daily job site use.
The moral of the story here is, don’t drop this level 10-times on pavement from a 15-feet height! If you do it on my job site, I’ll make you sit in the truck for the rest of the day.
Vial Strength
I spoke to both Stabila and Milwaukee and as you can imagine, both companies claim they have the stronger vial. Milwaukee uses a high impact polymer acrylic for their vials. They chose to pursue a different vial than Stabila interns of process to achieve a 10 x more durable vial.
When a company makes 10x more durable claim, I want to test that claim! So we decided to put the vials to an impact test, which is summarized on the next page.
Vial Strength – Impact Testing
I constructed a vial impact jig by rigging a gas pipe filled with metal fasteners, a metal plumb bob and a PVC pipe to jettison the weight.
We rounded over the plumb bob tip but it still represented a concentrate point which we theorized would cause a piercing failure vs a larger, more rounded over mass. [similar to a hammer head]
The weighted pipe weighed 6.5- pounds and I rigged it to drop from a height of 12-inches. This was done to simulate the impact of a tool or jobsite material dropping on the level to test, and demonstrate impact strength of both the Sharpsite and Stabila vials.

Milwaukee Results
The Milwaukee level vial [center vial] survived 25 consecutive hits with 6.50-lb weight dropped from 12” height. One of the strikes [not part of the 25] was a glancing blow and scraped off some acrylic but did not negatively impact the vial integrity or its visibility.
After 25 blows we decided to raise the 6.5 -lb weigh to 24′ high and dropped it 13 times until complete failure. We noticed that the point of the plumb bob started to leave an indent after 6 strikes and eventually the point did pierce the vial, draining the fluid. It was at the 6th strike that I would classify the vial visibility [failed] as difficult to read.
We tested the plumb vials and the impact from the weight dislodged the vial from the frame. We were able to reinsert the vial back together but question the accuracy at this point.
Stabila Results
The Stabila level vial failed [smashed] on the first hit. The plumb vials also failed, by breaking, after one strike.
Available REDSTICK Box Level Models
Non-Magnetic
- 16” REDSTICK™ Box Level (MLBX16) – $59.99
- 24” REDSTICK™ Box Level (MLBX24) – $79.99
- 32” REDSTICK™ Box Level (MLBX32) – $94.99
- 36” REDSTICK™ Box Level (MLBX36) – $99.99
- 48” REDSTICK™ Box Level (MLBX48) – $129.00
- 59” REDSTICK™ Box Level (MLBX59) – $159.00
- 72” REDSTICK™ Box Level (MLBX72) – $189.00
- 78” REDSTICK™ Box Level (MLBX78) – $209.00
- 96” REDSTICK™ Box Level (MLBX96) – $249.00
- 24”/48” REDSTICK™ Box Level Set (MLBXS48) – $169.00
- 78”/32” REDSTICK™ Box Level Jamb Set (MLBXJB) – $249.00
All magnetic models include amplified rare-earth magnets which provide excellent holding power in common metal applications.
Magnetic
- 16” REDSTICK™ Magnetic Box Level (MLBXM16) – $69.99
- 24” REDSTICK™ Magnetic Box Level (MLBXM24) – $89.99
- 32” REDSTICK™ Magnetic Box Level (MLBXM32) – $109.99
- 36” REDSTICK™ Magnetic Box Level (MLBXM36) – $114.00
- 48” REDSTICK™ Magnetic Box Level (MLBXM48) – $139.00
- 59” REDSTICK™ Magnetic Box Level (MLBXM59) – $169.00
- 72” REDSTICK™ Magnetic Box Level (MLBXM72) – $229.00
- 78” REDSTICK™ Magnetic Box Level (MLBXM78) – $229.00
- 96” REDSTICK™ Magnetic Box Level (MLBXM96) – $279.00
- 24”/48” REDSTICK™ Box Level Set (MLBXSM48) – $179.00
- 78”/32” REDSTICK™ Box Level Jamb Set (MLBXJBM) – $279.00
REDSTICK™ Compact Levels are built on a compact box level frame, the levels are designed for tight access use or jobsite installation applications with smaller working surfaces.
Compact
- 24” REDSTICK™ Compact Box Level (MLCM24) – $49.99
- 24” REDSTICK™ Magnetic Compact Box Level (MLCMM24) – $64.99
- 48” REDSTICK™ Compact Box Level (MLCM48) – $69.99
- 48” REDSTICK™ Magnetic Compact Box Level (MLCMM48) – $89.99
- 72” REDSTICK™ Compact Box Level (MLCM72) – $99.99
- 72” REDSTICK™ Magnetic Compact Box Level (MLCMM72) – $119.00
- 24”/48” REDSTICK™ Compact Box Level Set (MLCMS48) – $129.00
- 24”/48” REDSTICK™ Magnetic Compact Box Level Set (MLCMSM48) – $139.00
Is Your Level Accurate?
While “stacking” two levels together to compare vial readings is a common old-school way to check a level, it is not the correct way to check a vial’s accuracy.
With a stated accuracy of .029 degrees (1/32″ in 72″), one level can be .029 degrees to the left and the other .029 degrees to the right, causing a slight difference in the compared bubble positions, while both bubbles still maintain their 1/32″ in 72″ accuracy. The “correct” way to check a vial’s accuracy can be done quickly by following the instructions below.
To check the “level” or “horizontal” vial’s accuracy, place the level on any flat surface.
- Make a mark on the flat surface at one end of the level.
- Read the bubble & remember where it is.
- Turn the level 180 degrees (end to end), placing the level right on the line drawn from the original end placement.
- Read the level.
- If the bubble returns to the same place, the level is accurate. If it does not, it is not accurate.
- Do it again, regardless of the reading.
- To check the “plumb” or “vertical” vials, place the level against any door frame or wall.
- Make a mark on the wall beside the top vial.
- Read the bubble & remember where it is.
- Flip the level side for side (not end for end!).
- Read the level.
- If the bubble returns to the same place, the vial is accurate. If it does not, it is not accurate.
- Do it again, regardless of the reading.
- To check the second “plumb” vial, turn the level end for end.
- Repeat all of the steps as done for the first “plumb” vial.
Soft Storage Bags
According to Milwaukee they will be offering soft bags in July 2017. The bags will be offered the following ways:
- Stand-alone accessory bag: the retail cost is going to range from $79.00 to $ 149.00
- Kitted: Milwaukee will offer combination offerings such as a Jamb kit, Contractor kit and Master kit ranging from $299.00 to $399.00
- Promotional Offerings: sales with different combination level and a free bag.
REDSTICK Guarantee
Milwaukee is hoping end users will compare their Lifetime Accuracy Guarantee to Stabila, and other level manufacturers warranties. They also have plans on offering a new level to compete with the Stabila R-Beam level, as well as, soft storage accessory bags.
Milwaukee or Stabilia? – “King of Levels”
There is no coincidence that the REDSTICK is priced the same as Stabilia. Milwaukee is making a concerted effort to position with, and fight for, the coveted title of “King of Levels!” It’s important to remember that this is Milwaukee’s first release against Stabilia. Milwaukee has proven that they are a brand that can compete and deliver innovation, and they’ve now their entering the level world.
While I am not 100% convinced that the REDSTICK is a better level than Stabilia, I am convinced that they’re close. In fact, this new, healthy, competition will undoubtedly cause Stabila to sharpen their pencil. Overall, the REDSTICK is impressive, but still feels like a work in progress, not uncommon for a first run product. Lots of companies have released products with the promise of “more to come,” and Milwaukee is no different. There’s more to come!
Many people are saying that Milwaukee is a power tool company and is offering a box level just to say that they have a box level. I can tell you that this is definitely not the case, while they haven’t reached the coveted “King of Level,” category [yet] they’ve definitely created a level worthy for the “aristocracy.” If I were Stabila, I’d be watching the REDSTICK release closely.
Milwaukee REDSTICK Level Video Review
NOTE:
Milwaukee sent over some clarification after watching the video [embedded below] that I wanted to share. I mentioned in the video that we tested frame strength on both the strong and weak axis, and the all-metal backbone seemed to help more on one axis than the other. Apparently this is by design. This core reinforcement to the frame protects against premature bent frame failure and provides advanced durability and protection especially in the weak axis-which is the most common bent frame failure on the jobsite.
-
- Right vial
-
- Right vial
-
- Magnet
-
- Center Vial


Related Posts
About the author
Rob Robillard
Robert Robillard is a remodeler, general contractor, and principal of a carpentry and renovation business located in Concord, Massachusetts, and serves as the Editor of Tool Box Buzz and founding editor of A Concord Carpenter . Rob is in charge of our Tool and Product Review - Tool and Product Review - Video Channel, , where we post all of our tool reviews and video tutorials. Rob enjoys using his knowledge and experience to help and educate building professionals as well as DIYers on best practices in the remodeling industry. The Concord Carpenter's motto: "Well done is better than well said!" : Read more about Rob
http://www.aconcordcarpenter.com/@https://twitter.com/robertrobillardRob Robillard
1 Comment
Leave a comment
Disclosure
Product reviews on this site contain our opinion of a product or service. We will always strive for objectivity and transparency in our reviews. Our goal is to provide readers with honest, objective information based on our own experiences. We never have and never will accept payment in exchange for a positive review. Many of the products that we review are provided to us for free by a manufacturer or retailer. In some cases, we also have advertising or affiliate relationships with manufacturers and retailers of products and services we review. For additional information please visit our additional disclosure policies.


Rob, Ive been a finish carpenter for more then 40yrs, here in Las Vegas,, we work in the high end custom homes,, been a Stabila user for most of this,, Well I’m going to be the first guinea pig to try your new box levels, bought the 96- 48″ & Jamb set, Hope there worth it.. I will follow up on this
Tks James B.