


How to Build Construction Trailer Shelving

How to Build Adjustable Modular Construction Trailer Shelving
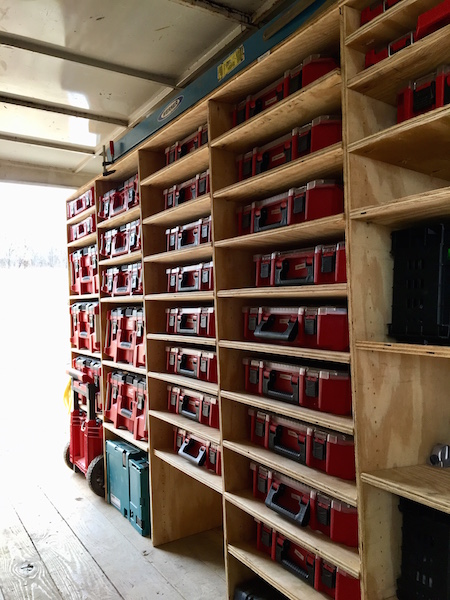
I recently made the decision to reorganize my construction tool trailer. I wrote earlier about some of my “must-haves” for this project, including adjustable modular shelves to accommodate my Milwaukee PACKOUT storage boxes.
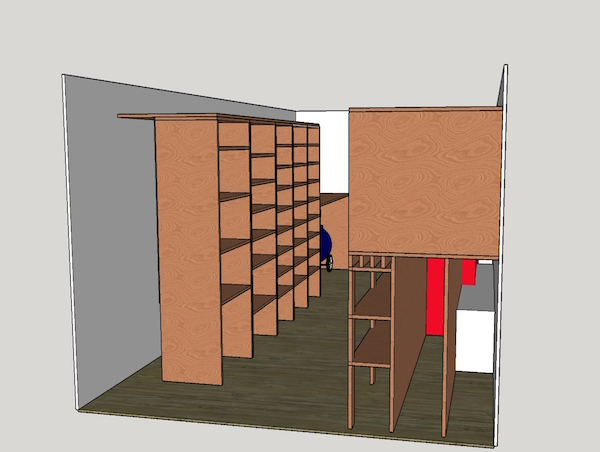
As with any project, it is always a good idea to start with a plan. While I am not a huge stickler for exacting plans on a project like this, I do like to have a “game plan” to start with. I like to use SketchUp for this as I can easily adjust and change certain parts to accommodate real-life situations. Although this is my preferred method, there are many other programs or just a hand drawn sketch will suffice.
Cutting The Shelf Parts
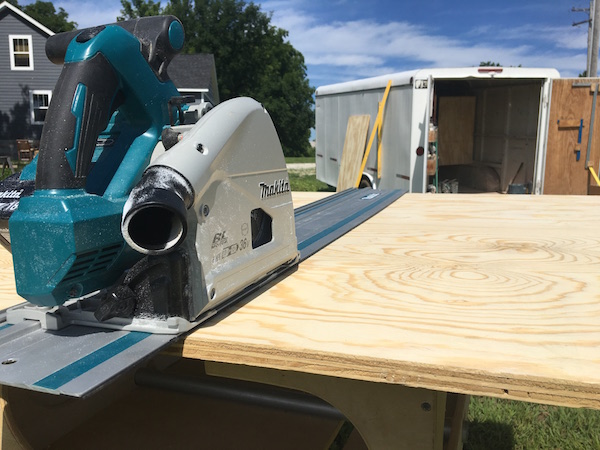
For this project, I decided to use AC plywood. For my needs, this was a good balance between quality materials while keeping the costs under control. It is just a work trailer after all.
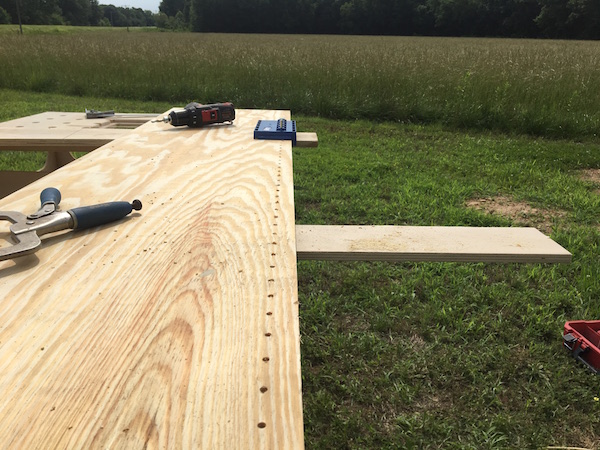
I decided to make each upright and each shelf the exact same dimension. This was done to speed up production time and allow for easy adjustability in the future.
I broke down my sheet goods with my plunge cut (track) saw. You can use a table saw or a circular saw with a straight edge to accomplish this as well. I began by cutting all of the uprights first as this allowed the drops to be used for the individual shelves.
I then cut all of the shelves. This went pretty fast since they are all the exact same size.
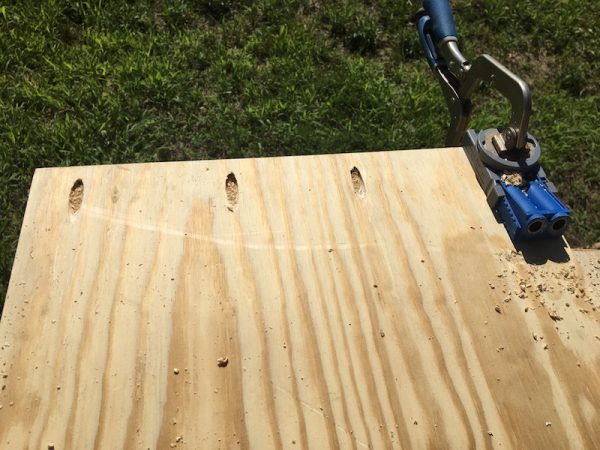
Shelf Pins
After I cut all of my parts, I began the tedious job of drilling all the shelf pin holes using the Kreg shelf pin jig. The reason for the shelf pin holes is just to index the individual shelves. I can arrange the shelves and mock up where I want the tools to be located.
Pocket Holes
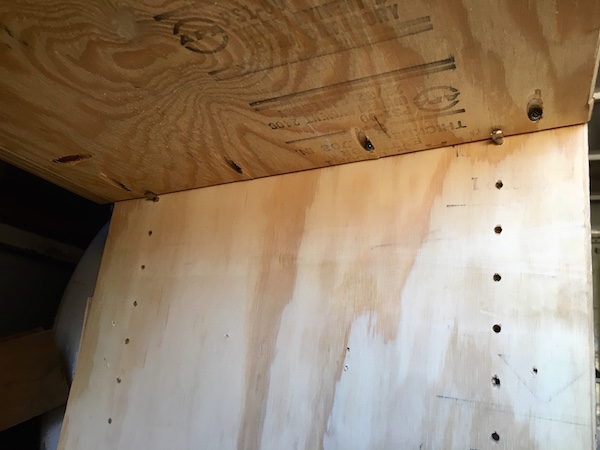
When I had everything where I wanted. I fastened the shelves to the uprights using pocket hole screws. This also ties each of the uprights together making one solid unit.
For the uprights, I drilled pocket holes in the bottom and the top to attach them to the floor and to attach the top piece. I drilled 8 pocket holes in each shelf to hold the weight of the tools. While this might have been a little overkill, I wanted to make sure it would be strong enough since I wouldn’t be using glue anywhere.
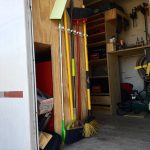
I also used some of the cut-offs to install on the back of the shelves to keep the tools from sliding off the back. Again, these were installed using pocket screws.
Chamfer
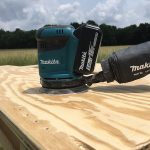
I also put a small chamfer on the edges with my compact router. This serves two purposes. First, it eases the sharp edges helping to prevent cuts and secondly it helps keep the edges of the plywood from being damaged when taking the boxes in and out.

Installation
Once all of my parts were finished, it was time to begin installation. I began by laying out where I wanted my first upright to go. I attached it to the floor using pocket screws. For the next upright, I used one of the shelves as a spacer and used pocket holes to hold it in place. I repeated this process for all of the uprights.
To hold the uprights in position, I temporarily installed a shelf between each upright by using the upper most shelf pin holes and using clamps to hold everything together. This was just to keep the spacing even.
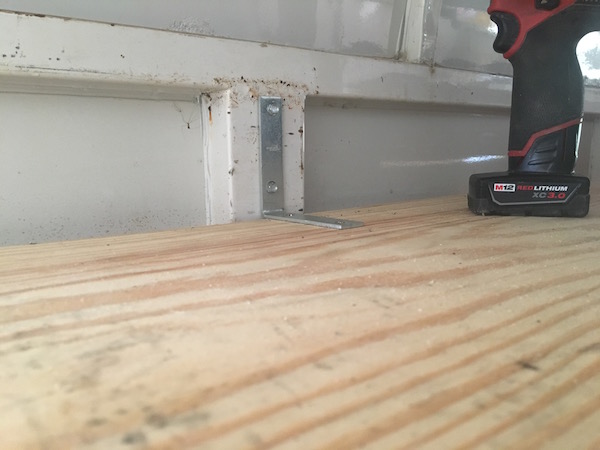
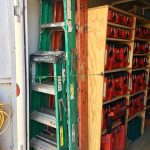
I then installed the top piece. For my design, this was the only piece that was a different size. I did this so I could put ladders on top and have some extra storage behind the shelves for longer tools. This also allowed for the shelves and uprights to all be the same without notching around the wheel wells.
For the top piece, I notched around some of the structure of the trailer using a jig saw. To attach the shelves to the structure of the trailer, I simply fastened some “L” brackets to the structure and to top of the shelving unit.
After all of the uprights were held in place, I could remove the shelves that were temporarily installed. This allowed enough room to install the remaining pocket screws into the top.
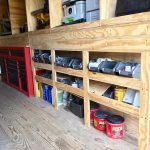
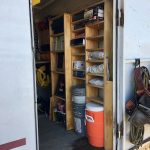
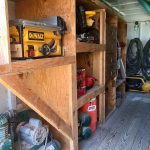
I used the shelf pin holes as guides and began arranging the shelves to accommodate my needs. I installed the shelves with the back being one pin hole lower so the shelf sat at a slight angle. This was to keep any of the boxes from sliding out during transport. When everything was where I wanted it, I attached everything to the uprights using pocket screws.
As with most organizational projects, the finished product is fairly fluid. I tweak and adjust different aspects as I notice areas of improvements. Having modular shelves allows these changes to be made on the fly to accommodate my needs.
Related Posts
About the author
Will Endicott
William Endicott is a licensed contractor in the State of Missouri and is the principal of a custom home building and renovation company. After attending the University of Kansas, he began working full time in the trades and soon after, started his own company. As a second generation carpenter, William grew up around job sites and discovered his love of tools. He now enjoys finding tools that help give his clients the best possible quality, while also helping to keep his company productive and profitable. In his spare time, he enjoys woodworking projects, fishing and spending time with his wife and three children.
1 Comment
Leave a comment
Disclosure
Product reviews on this site contain our opinion of a product or service. We will always strive for objectivity and transparency in our reviews. Our goal is to provide readers with honest, objective information based on our own experiences. We never have and never will accept payment in exchange for a positive review. Many of the products that we review are provided to us for free by a manufacturer or retailer. In some cases, we also have advertising or affiliate relationships with manufacturers and retailers of products and services we review. For additional information please visit our additional disclosure policies.


How do you prevent the packouts from falling off the shelving?